Guides are helpful in many ways. For example, making templates, measuring distance or position, and aligning, are the most basic function of guides.
As a graphic designer working with branding and logo design, I use grids and smart guides for all my artwork because they help me get accurate results which shows professionalism. When you design a professional logo, precision is everything, so using guides is important.
There are different types of guides as I briefly mentioned, such as grids and smart guides. I’ll explain what they are and how to add/use guides in Adobe Illustrator.
Let me be your guide.
Table of Contents
3 Types of Commonly Used Guides
Before adding guides, Adobe Illustrator needs your permission to show them. You can turn on the guides from the overhead menu View and there are three commonly used guides that I’m going to show you how to add today.
Note: the screenshots are taken from Adobe Illustrator CC Mac version. Windows or other versions can look different. Windows users change the Command key to Crtl.
1. Rulers
Rulers help you define safe areas for your design and align objects to accurate positions. It works best when you have a sample size measurement and you want other objects to follow.
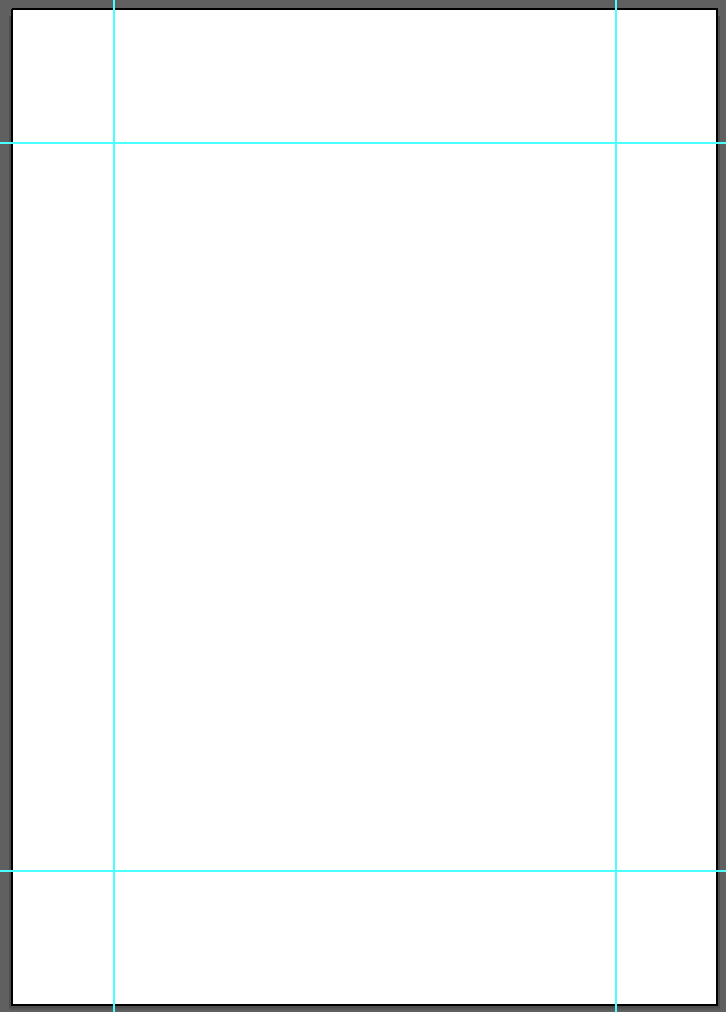
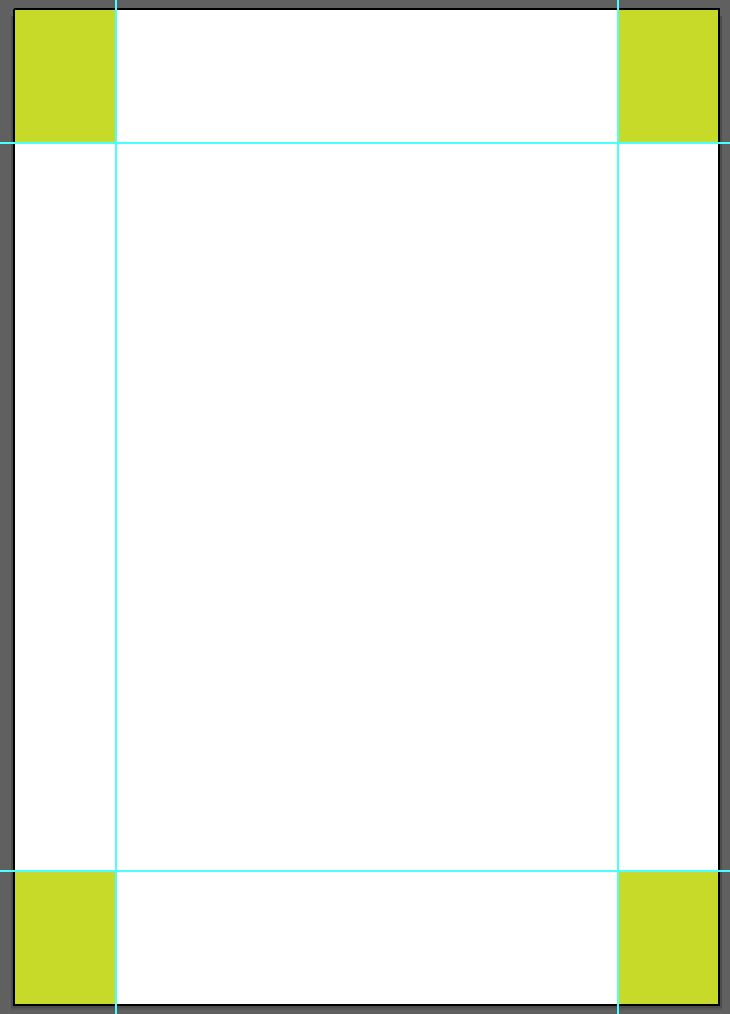
For example, I used the rulers to create this guide for my design safe area, because I want the main artwork to be in the center and don’t want any important artwork to go beyond the guide.
Tip: It’s important to keep your artwork in a safe area especially when you print to avoid cutting off part of your work. And our attention tends to focus on the center, so always put the important information in the center of your artboard.
It’s pretty easy to add guides using the rulers, basically just click and drag, but as I mentioned before, the first step is to give permission to show.
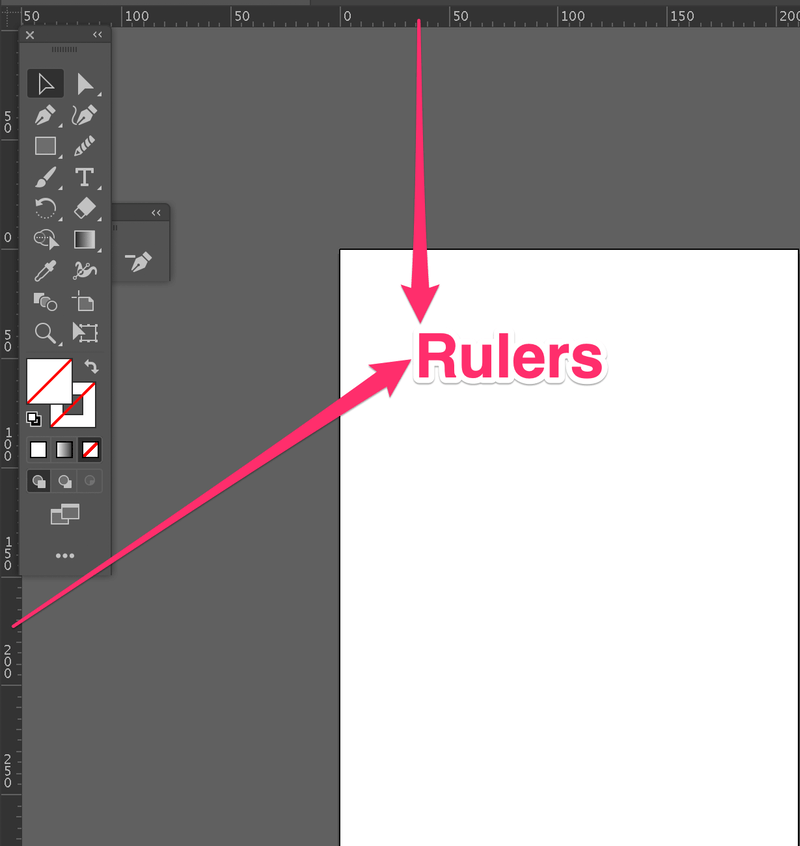
Step 1: Go to the overhead menu and select View > Rulers. An easier option is to use the keyboard shortcut Command + R (You can hide the rulers using the same shortcut). Rulers are shown on the top and left sides of the document.
Step 2: Select the Rectangle Tool to create a sample measurement of how far you want your main artwork to be from the artboard edges. Drag the rectangle to any of the four corners.

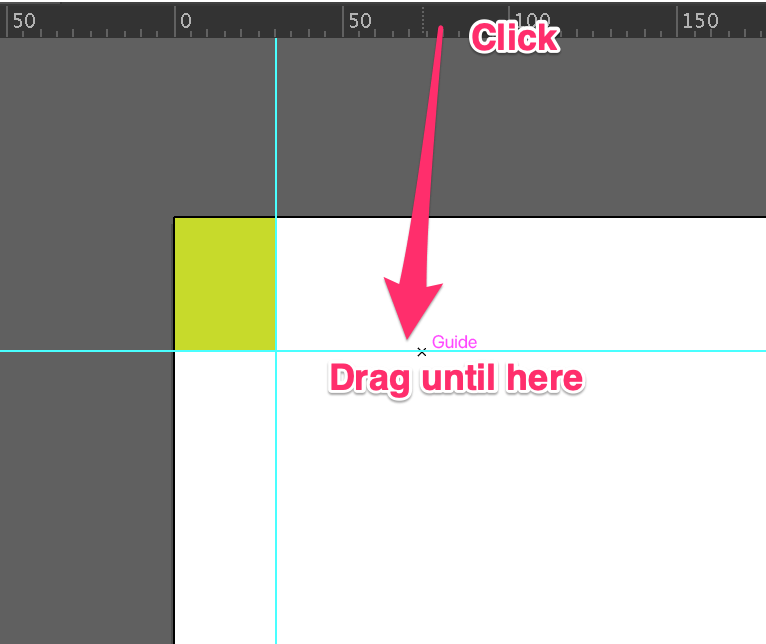
Step 3: Click on the ruler and drag the guideline to meet the side of the rectangle. It doesn’t matter which ruler you click and drag first.
Make copies of the rectangle sample and move them to all corners of the artboard. Drag the rulers to create guides for all sides of the artboard.
Once the guides are added, you can delete the rectangles. If you want to avoid moving the guides by accident, you can lock them by going to the overhead menu again and selecting View > Guides > Lock Guides.

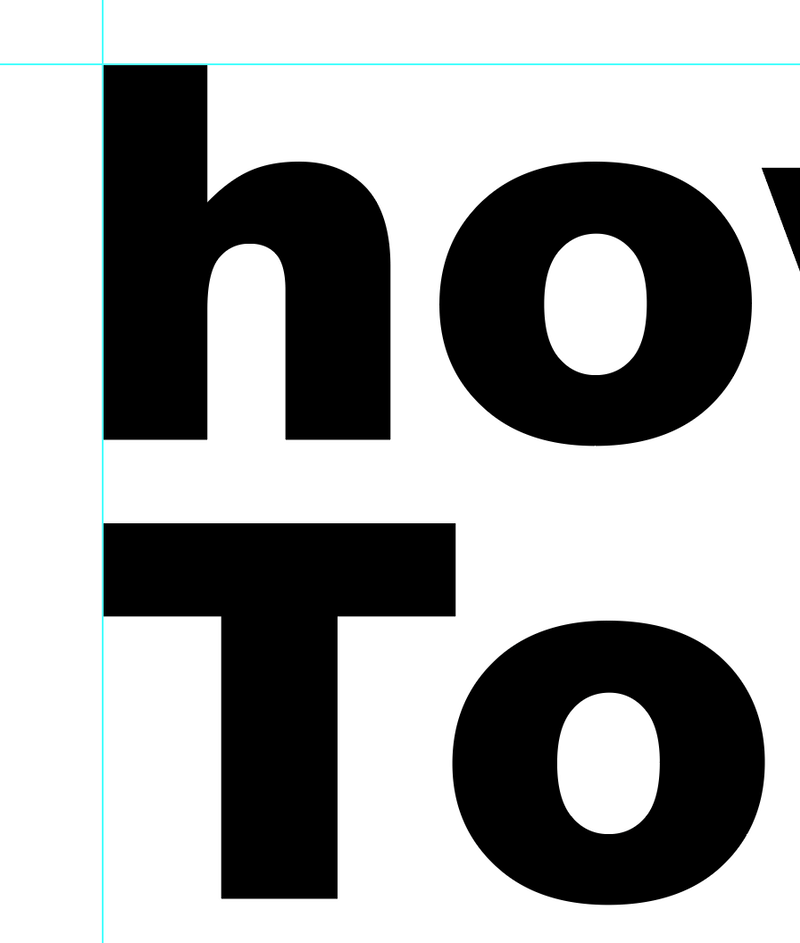
Other than making guides for artwork safe areas, you can also use the guides to align text or other objects.
When you are done with the final design, you can hide the guides by selecting View > Guides > Hide Guides.
2. Grid
Grids are the square boxes showing behind your artwork when you activate them. When you design a professional logo, you’ll need some help from the grids. It helps you get precise points and details for your design.
If you want to use grids as guides for creating your logo or simply get ideas of the distance between objects, you can go to the overhead menu and select View > Show Grid to see the grids.
The default gridlines showing on the artboard have a pretty light color, you can change the color, grid style, or size from the Preferences menu. As you can see, you can change the settings for the guides as well.
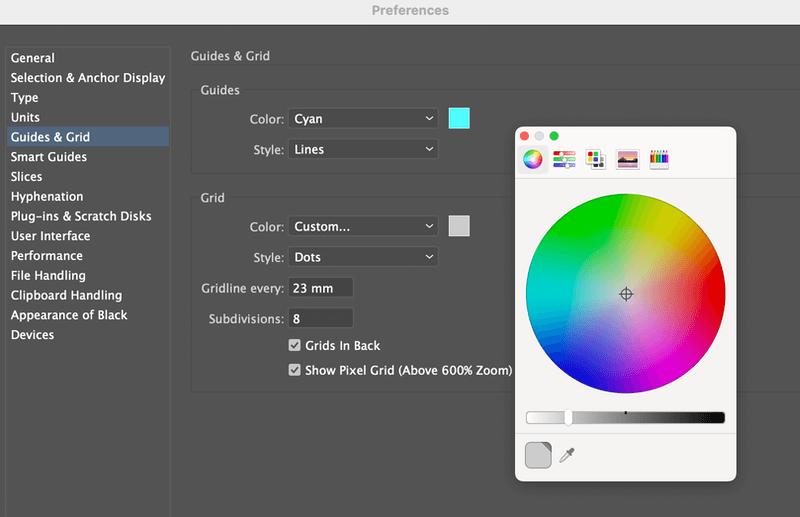
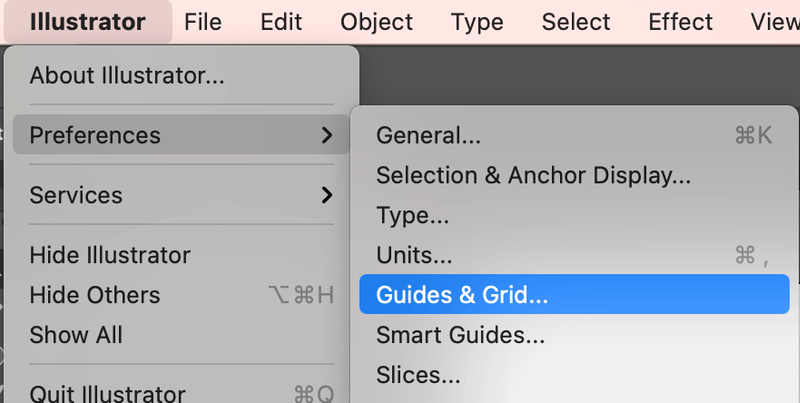
Go to the overhead menu and choose Illustrator > Preferences > Guides & Grid (Windows users choose Edit > Preferences > Guides & Grid from the overhead menu).
For example, I set the grid size a bit smaller and changed the gridline color to light green.

3. Smart Guides
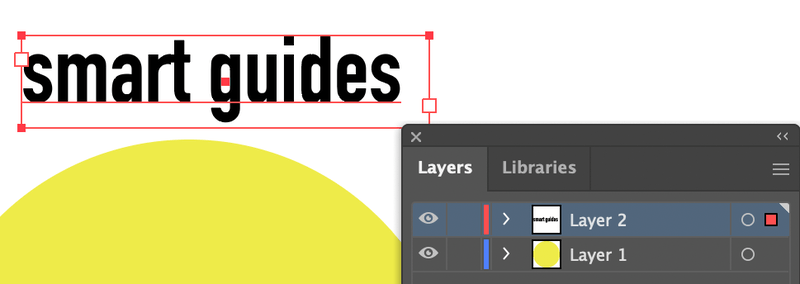
Smart Guides are everywhere. When you hover over or select an object, the outline box you see is a guide to tell you which layer you’re working on because the outline color is the same as the layer color.
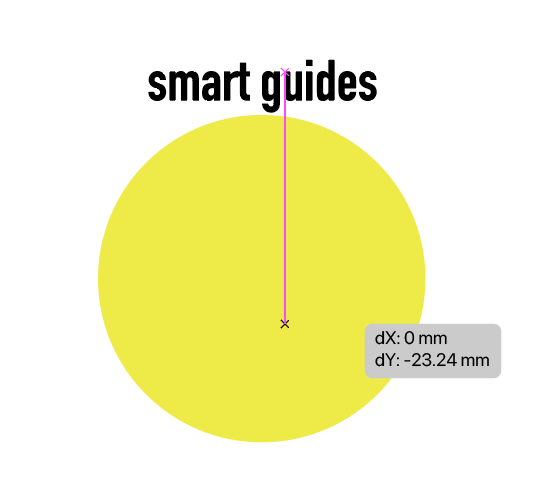
Smart Guides also help you align objects without using the align tools. When you move around an object, you’ll see the x and y values and intersecting points guided by a pink guideline.
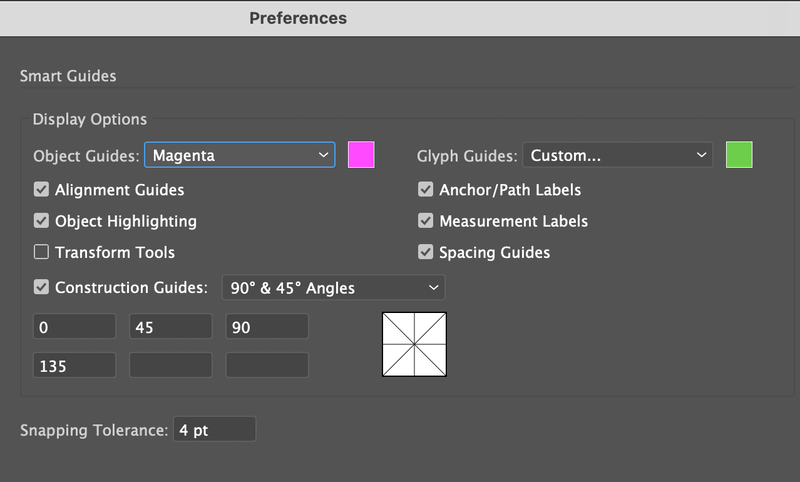
If you haven’t had it activated yet, you can go set it up quickly from the overhead menu View > Smart Guides or use the keyboard shortcut Command + U. Same as the other two guides, you can change some settings from the preferences menu.
Conclusion
Adding guides in Illustrator is basically allowing the document to show guides. You’ll find all guide options from the View menu and if you need to change the guide settings, go to the Preferences menu. That’s pretty much about adding/using guides in Adobe Illustrator.
About June Escalada