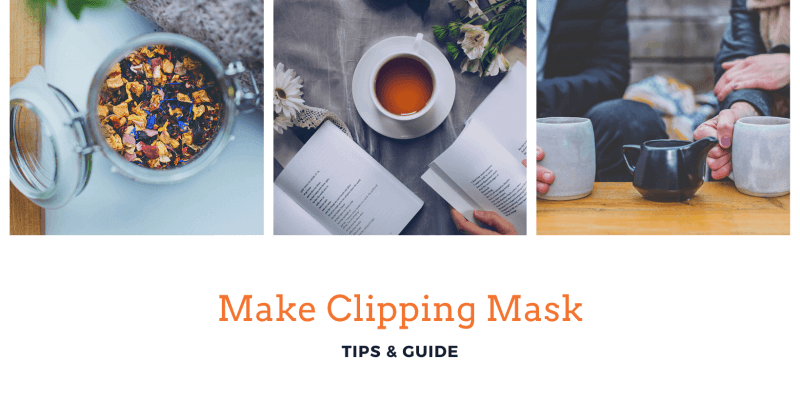
Clipping Mask is another designer’s must-know tool in Adobe Illustrator. Creating text with a background, and showing the image in shapes, all these cool and fun designs are created by making a clipping mask.
I have been working with Adobe Illustrator for more than eight years, and let me tell you, Make Clipping Mask is a tool that you will use quite often as a graphic designer. From simple things like clipping your portfolio photo to brilliant poster design.
In this tutorial, I will show you four ways to make a clipping mask along with some useful tips.
Let’s dive in!
Table of Contents
What is a Clipping Mask
Nothing complicated. You can understand a clipping mask as a shape called a clipping path that goes on top of objects like images and drawings. When you make a clipping mask, you can only see the underpart object within the clipping path area.
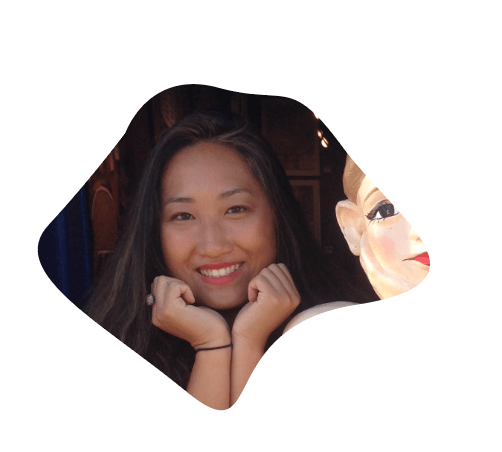
For example, if you have a full-body picture, but you only want to show your headshot, you can create a shape (clipping path) on top of the picture to clip only the head part of the picture.
Still confused? Visuals will help explain better. Keep reading to see visual examples.
4 Ways to Make a Clipping Mask in Illustrator
Note: Screenshots below are taken on Mac, the Windows version might look slightly different.
There are four different ways to make a clipping mask. Keep in mind that in all methods, the clipping path must be on top of the object you wish to clip.
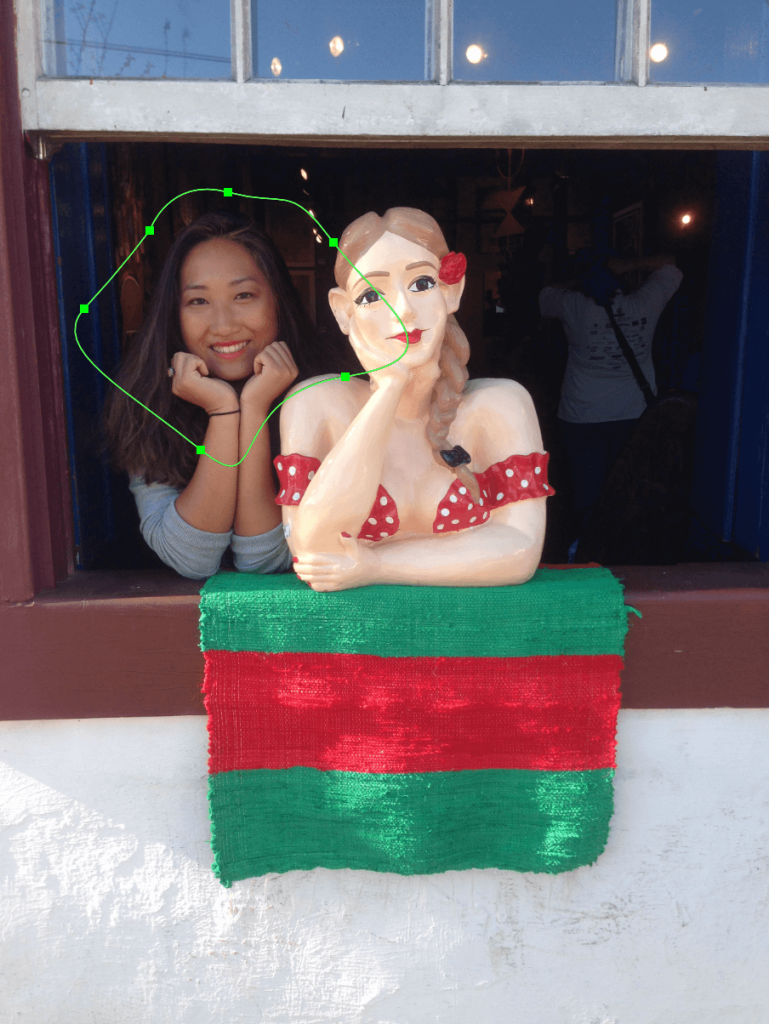
For example, I want to show only the headshot of this image.

Step 1: Create a clipping path. I used the Pen Tool to create this path.
Step 2: Place it on top of the object you wish to clip. You can also fill the path with color to see clearly where the path is. Because sometimes when you deselect the path, it’s hard to see the outline.
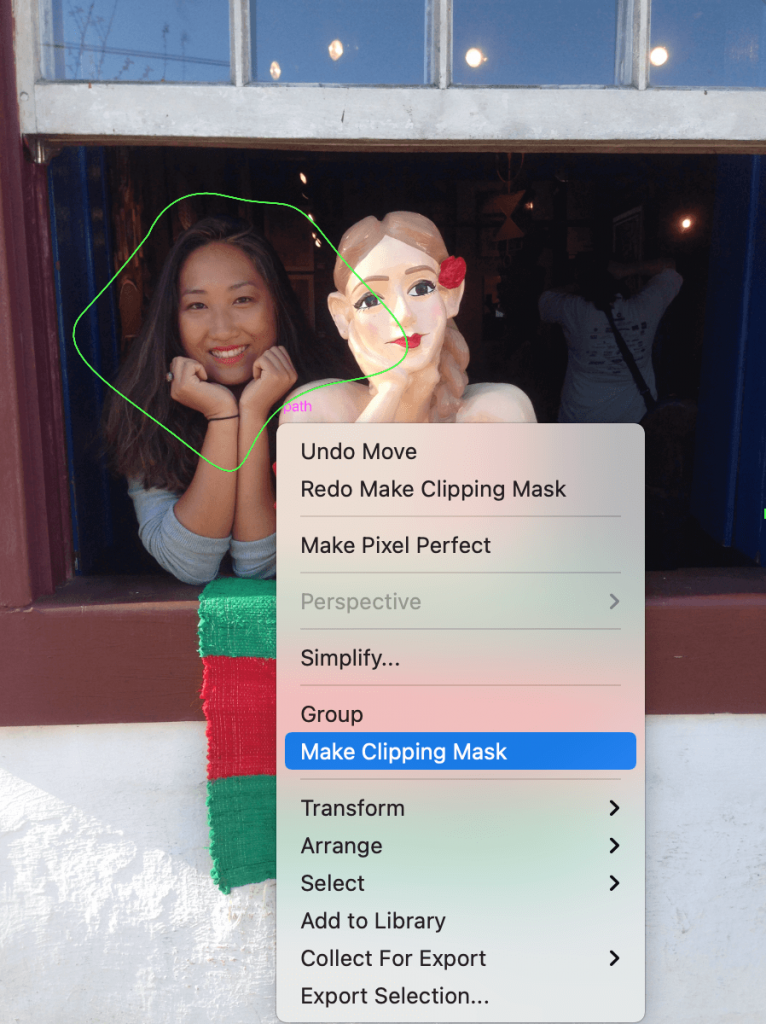
Step 3: Select both the clipping path and the object.
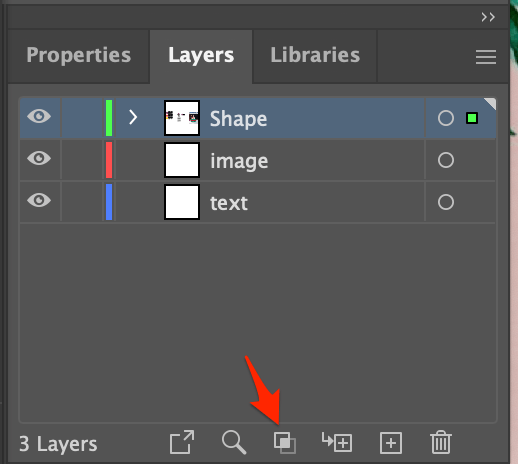
Step 4: You have four options. You can make a clipping mask using the keyboard shortcut, right-click, from the overhead menu or in the Layer panel.
1. Shortcut
Command + 7 (for Mac users) is the shortcut for making a clipping mask. If you’re on Windows, it’s Control + 7.

If you are not a shortcut person, you can also make Object > Clipping Mask > Make.

3. Right-click
Another way is to right-click on the mouse and then click Make Clipping Mask.
4. Layer Panel
You can also make a clipping mask at the bottom of the Layer panel. Remember, the clipped objects must be in the same layer or group.
There you go!
Besides cutting an image to fit in a custom shape, you can also use a clipping mask to add an image background to the text. If you’re interested to learn more, check out my tutorial on How to Fill Text with an Image in Illustrator.
FAQs
You might also want to know the answers to these questions that your designer friends have.
Why is the clipping mask in Illustrator not working?
Keep in mind that a clipping path must be a vector. For example, If you want to fill the text with an image background, you must outline the text first and then make a clipping mask.
How can I edit a clipping mask in Illustrator?
Not happy with the clipping area? You can go to Object > Clipping Mask > Edit Content and you will be able to move around the image below to show the area you like.
Can I undo the clipping mask in Adobe Illustrator?
You can release the clipping mask by selecting the object, right-clicking, and choosing Release Clipping Mask.
What is a compound clipping mask in Illustrator?
You can understand compound clipping paths as object outlines. And you can group objects into one compound path to make a clipping mask.
Wrapping Up
There are many cool things you can do with the clipping mask tool in Adobe Illustrator. Remember the tips I mention in the article and you will master this tool in no time.
Can’t wait to see what you are going to make!
About June Escalada
Phil B
Hello June,
I read your article and I have a question for you. I have an 2″x6″ object with three 2″x2″ images. The 6″ length is vertical, and there is white space between the three images with no content. I’m trying to move the center image vertically downward by 0.25″ and leave the other two images in the same location. Can I do this with a simple clipping mask or is there an extra step? When I make my clipping mask of the center 2″ square image the other images disappear. Do you have any advice? Thanks.
Phil
June Escalada
Hi Phil,
When you make a clipping mask, only the mask area will show and the original image will disappear. In your case, you can make 2 copies of the original image, clip the three images one by one, and then align them together.
James
I have major issues with Clipping Masks. When I succeed I am very happy but in spite of me following all the steps, sometimes nothing works and I don’t know why. Now I made a screenshot of a pic from Google, I type the text over it, create outlines and select both and press Clipping mask Make. The background and my text disappear off the screen.
June Escalada
Hi James,
Are you trying to fill the text with an image background?
MbrkSA
Hi,
Is there a way to clip the image the opposite way
Making outlined path disappeared leaving the other parts of the image?
June Escalada
Hi there,
Yes, you can choose the “Invert Mask” option from the Transparency panel.