
Changing the blending mode in Adobe Illustrator is a simple process, all you have to do is open the Transparency panel, select the object, image, or text, and choose a blending mode. The question is, which blending mode should you use?
Honestly, try them all. I like to use different blending modes for different artworks, for example, for blending images, I use Multiply quite a lot, and for blending text into images, I like to use Screen or Color Dodge.
In this article, you’ll learn what are the blending modes in Adobe Illustrator and how to use them.
Note: The screenshots from this tutorial are taken from Adobe Illustrator CC Mac version. Windows or other versions can look different.
Understanding Blending Modes in Adobe Illustrator
Blending modes in Adobe Illustrator allow you to blend the color of a selected object/group/layer with the color of the underlying object or image.
The color of the selected object (on the top) is called blend color, and the underlying color is called base color.
The default mode is Normal, which shows the original color. Then you have 15 blend effects that you can add to manipulate the colors. You’ll need at least two overlapping colors in order to see the blend effects.
For example, the circle and text are in default mode – without any blending effects.

Now I’m going to show you a quick overview of what each mode looks like. You’ll notice the blending effect in the overlapping area of the colors.
When you choose Darken, you’ll see that the overlapping area blends into the darker color.

Multiply also darkens the overlapping part as it blends or multiplies the base color by the blend color.

Similar to the two effects above, Color Burn darkens the base color to reflect the blend color.

As you can see, Darken, Multiply and Color Burn usually darken the overlapping color.
Lighten selects the lighter color of the two (base and blend color) and lightens the overlapping area that is darker than the blend color.

Screen will get you a lighter color as it increases the inverse of the blend and base colors.

Color Dodge brightens the base color based on the blend color.

All Lighten, Screen, and Color Dodge lighten the overlapping color.
Overlay is a bit complicated to understand, according to Adobe, it multiplies or screens the colors, depending on the base color and it preserves the highlights and shadows of the base color while mixing in the blend color to reflect the lightness or darkness of the original color.

Soft Light creates a soft diffused spotlight effect as it blends the overlapping colors. It creates a similar effect to when you reduce the opacity of the color.

Just the opposite, Hard Light creates a brighter and stronger spotlight effect based on the blend color.

Difference subtracts from the brighter color from either base or blend color. When you blend with white, it inverts the base color value, and when you blend with black, no changes apply.

Exclusion creates a very similar effect to Difference, except that the contrast from Exclusion is lower.

Hue gets you the overlapping color with luminance and saturation of the base color and the hue of the blend color.

Saturation does the opposite of Hue, it creates an overlapping color with the luminance and hue of the base color and the saturation of the blend color.

Color creates a similar effect as Hue, but it preserves the gray levels in the artwork. This blending mode is useful for monochrome artworks and tinting works.

Luminosity creates a color with the hue and saturation of the base color and the luminance of the blend color.

Now that you know what each blending effect looks like, follow the steps below to choose a blending mode for your artwork.
3 Steps to Change Blending Mode in Adobe Illustrator
Besides blending objects, you can also blend two images together in Adobe Illustrator (that’s right! Without Photoshop!) by changing the blending mode.
Since you’ve already seen quite a few examples of colors above, I’m going to show you an example of changing the blending mode for images in Adobe Illustrator.
Step 1: Place two images together, one on top of the other. If you want to blend objects, place the objects together.
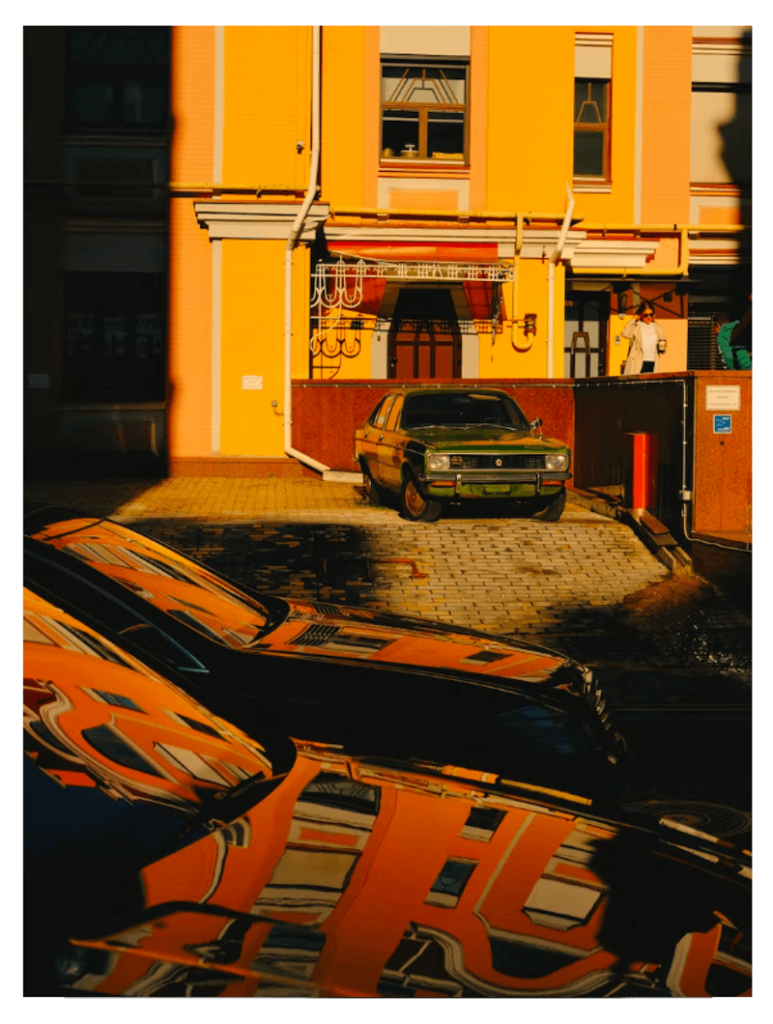
For example, I want to blend these two images together.
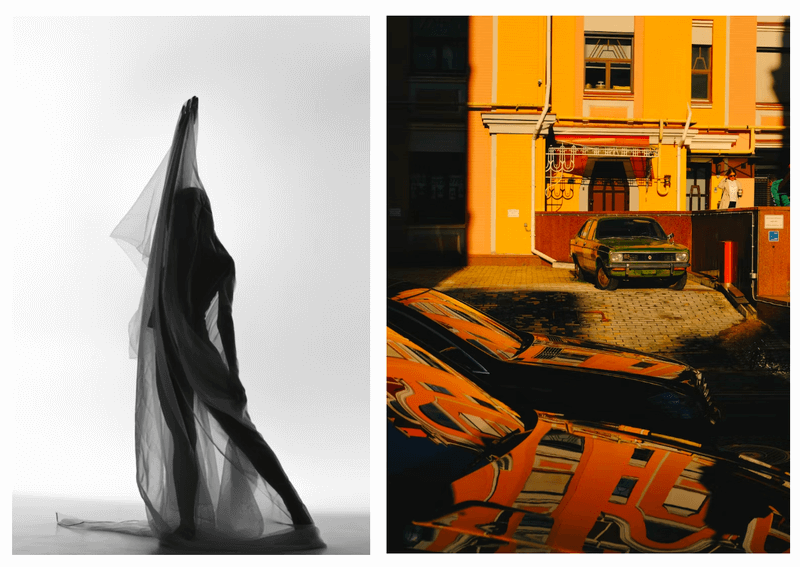
Now I’m going to place the image on the right on top of the image on the left (you won’t see the underlying image).
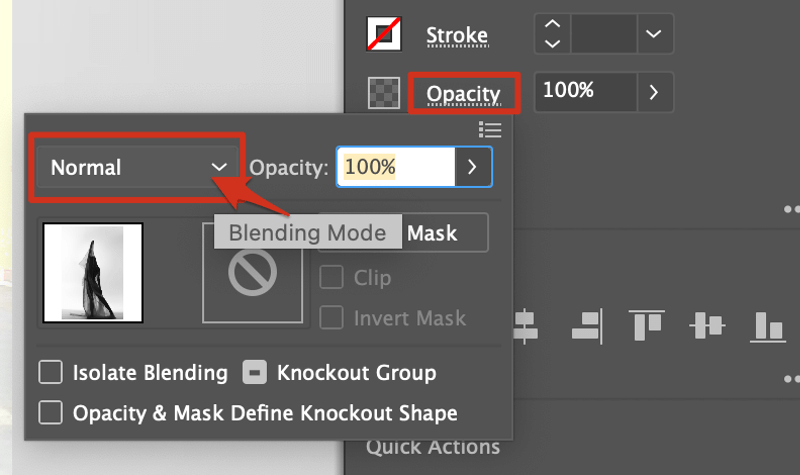
Step 2: Open the Transparency panel from the overhead menu Window > Transparency. if you have an object selected, you can also find the blending mode options by clicking Opacity on the Properties > Appearance panel.
Step 3: Choose a blending mode. For example, I chose Screen, and this is the blend effect I got.
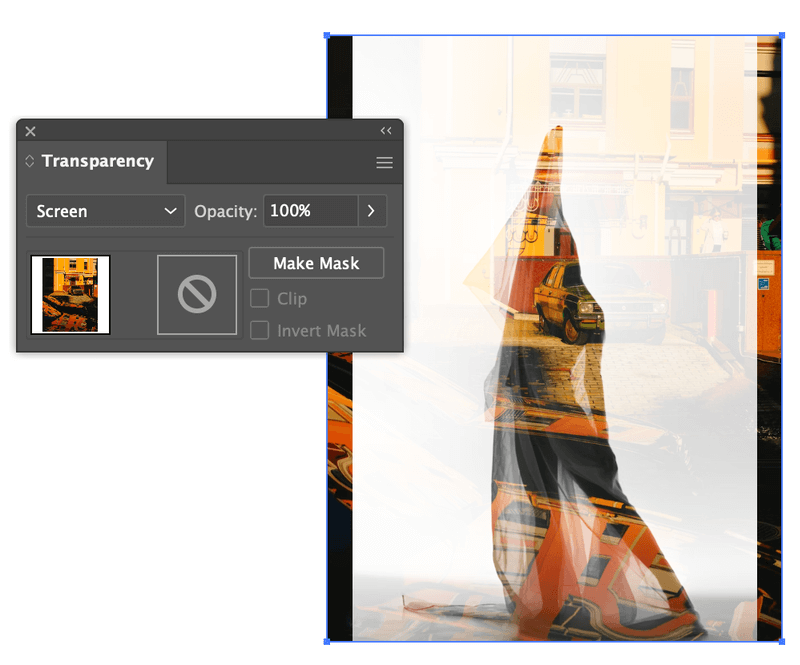
As simple as that!
Wrapping Up
Changing the blending mode in Adobe Illustrator is an easy process but you should understand what each blending mode does. Hopefully, after reading this article you already have a better understanding of how blending modes work in Adobe Illustrator.
Mukiibi
June,
Thanks a million. I am passionate about Fireworks & Illustrator too. I directed my boy to this page and the results are amazing!
June Escalada
Hey there!
That’s great! I’m happy to know that my tutorial is helping out.