
If you plan to send your Illustrator file to print or maybe share it with your teammate to work on it together, it’s always a good idea to embed your images.
I’m saying this because it already happened to me quite a few times in college when I had to present my work to the class and the images on my Illustrator file didn’t show. Well, we learn best from our experience, right?
Oh, don’t assume that when you place an image in Illustrator it’s already embedded. No, no, no! The image is linked, yes, but to embed it, there are a few extra steps. I mean, very simple trouble-saving extra steps.
Check them out!
What’s an Embedded Image
When you embed an image in Adobe Illustrator, it means that the image is saved in the AI document file.
You are free to transfer the Illustrator file to other devices without worrying about missing images. Even if you delete the image on your hard drive, you will still be able to view it in Illustrator.
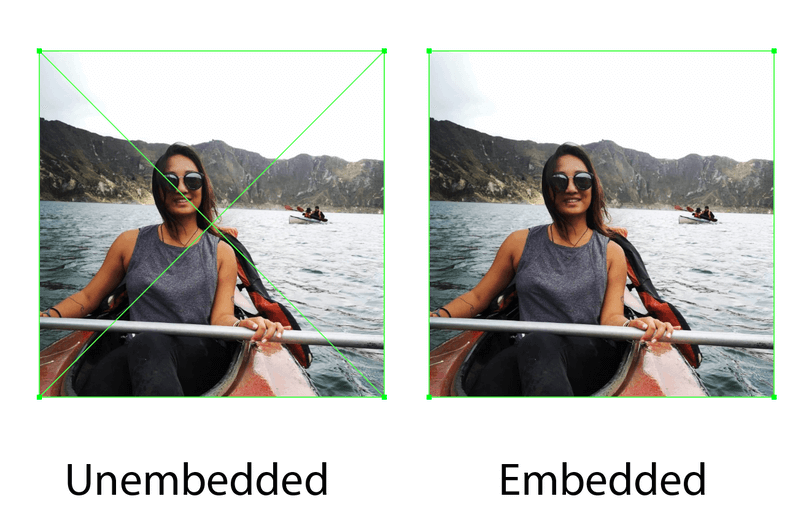
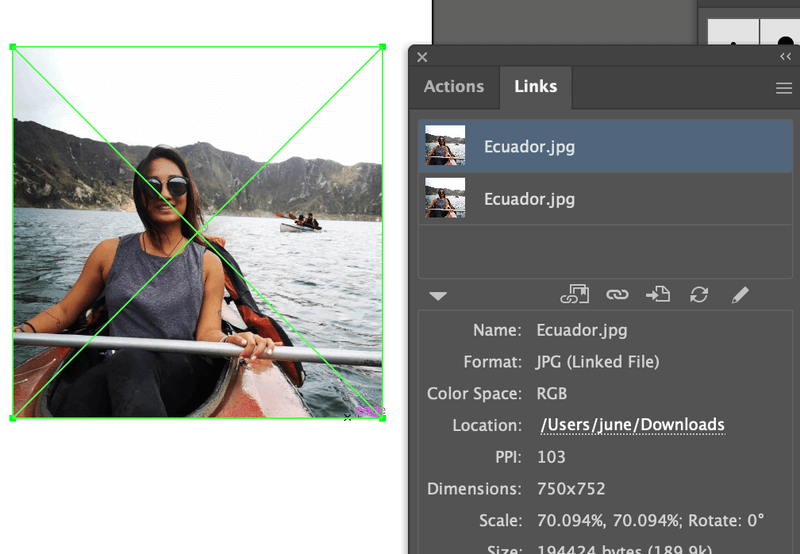
When you place an image in Illustrator, it shows as a link, and there will be two cross lines on the image. But once you embed it, the cross lines will disappear and you’ll only see a bounding box. See an example of an embedded image.
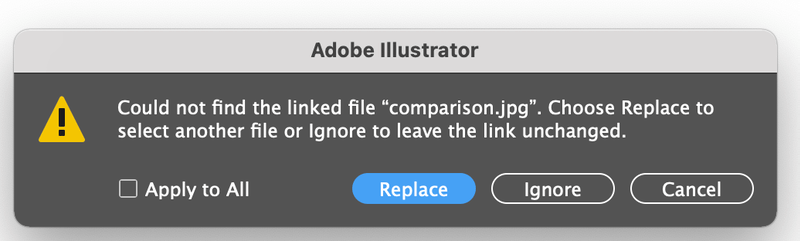
When you see this message, uh oh! Bad luck! Your linked images are not embedded. You have to either replace them or download the original images again.
Why Should You Embed Images
When your images are embedded in Adobe Illustrator, you can open the AI file on different devices and still be able to view the images.
It’s a good idea to embed the images on your AI file when you work on the project together with multiple people. Missing images are no fun, and you’ll spend unnecessary extra time downloading or replacing them.
So yeah, embed your images!
2 Ways to Embed Images in Adobe Illustrator
Note: Screenshots are taken on the Illustrator CC Mac version. The Windows version might look slightly different.
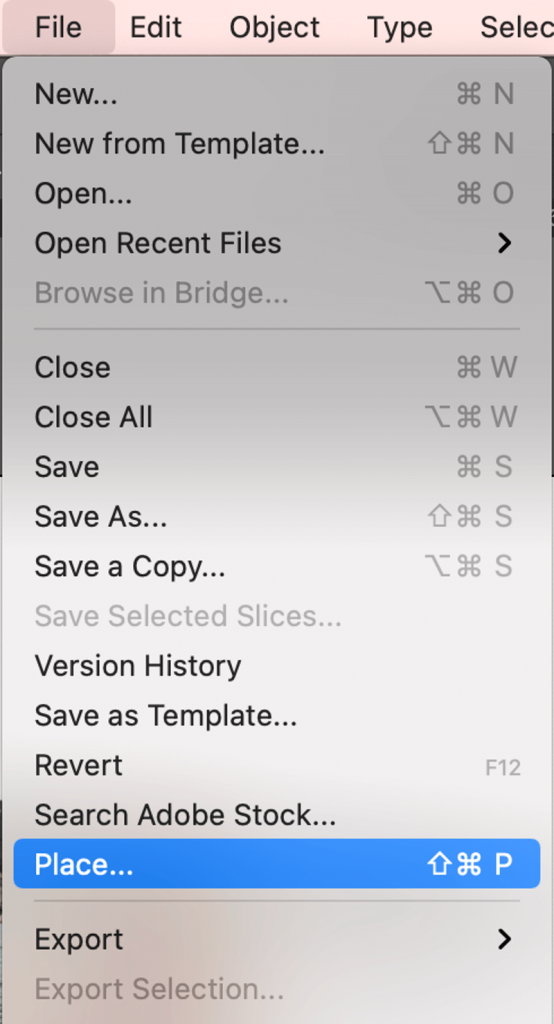
Before embedding images, you need to place the images in your Illustrator file. You can place the images by simply dragging them in the Illustrator document, or you can go to the overhead menu File > Place (keyboard shortcuts Shift + Command + P).
Then you have two options to embed your images: from the Properties panel or you can do it from the Links panel.
Quick Actions
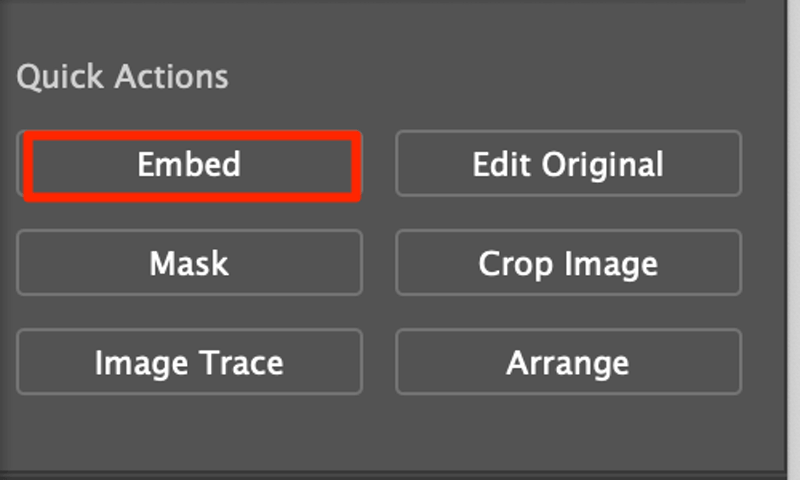
Illustrator has made things so easy for us today, you can embed your image quickly from Quick Actions under the Properties panel.
Step 1: Place your image in Illustrator.
Step 2: Select the image you want to embed on the artboard.
Step 3: Click Embed on the Quick Actions tool section.
Links panel
Let me give you a brief introduction to the links in Illustrator. A linked image is referred to where the image is located on your computer.
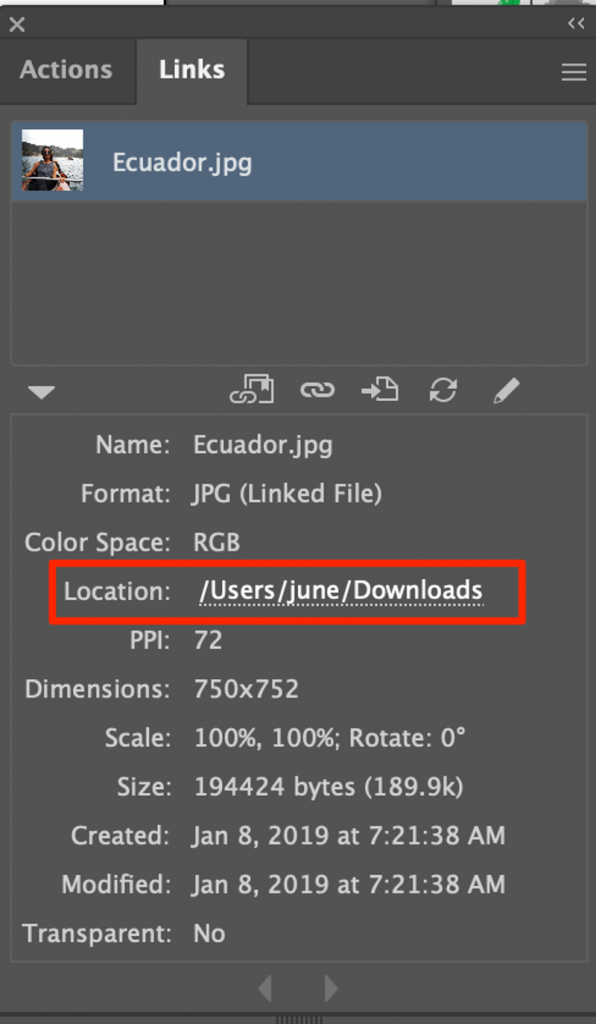
So whenever you change the location of the image on your hard drive, you need to update links in Illustrator to make sure your image is not missing. And if you delete the image on your computer, it’ll be deleted in Al as well.
Step 1: Place images in Adobe Illustrator.
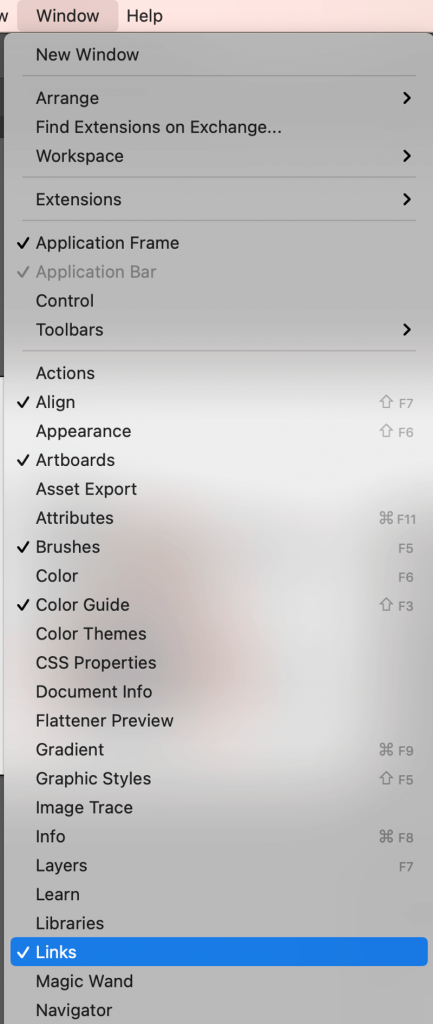
Step 2: Open the Links panel: Window > Links.
Step 3: Select the images you want to embed. You’ll see two cross lines on the image.
Step 4: Click on the hidden menu in the left-right corner.
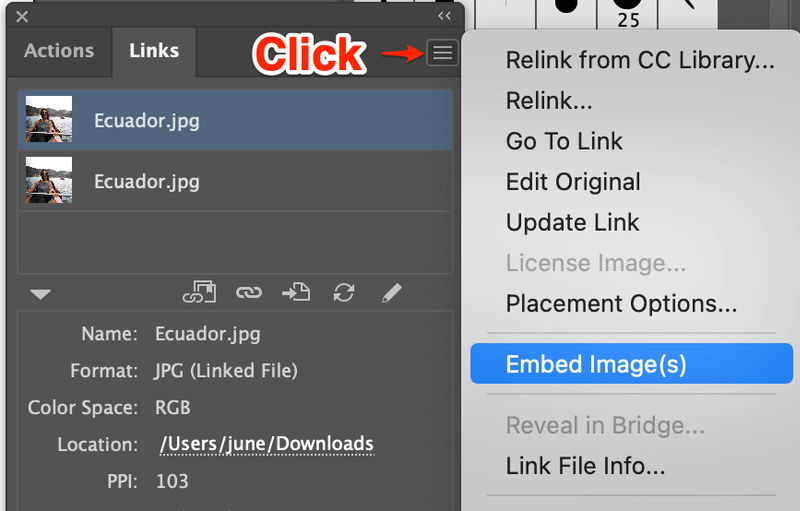
Step 5: Select Embed Image(s).

That’s it.
Other Questions?
I have listed a couple of common questions that other designers asked. See if you already know the answer.
What’s the difference between linking and embedding?
You can see images as links in Adobe Illustrator. Your images are linked to a specific location on your computer. When you change where you put your file on your computer, you must update the link on AI as well, if not, your links (images) will be missing in the AI document.
Embedded images will not show missing because they are already part of the Illustrator document. Even if you delete the original images (links) on your computer, your embedded images will stay in your AI file.
Can I edit an embedded image in Illustrator?
You can change the linked images from the Links panel. Click on the Relink option if you want to change the image.
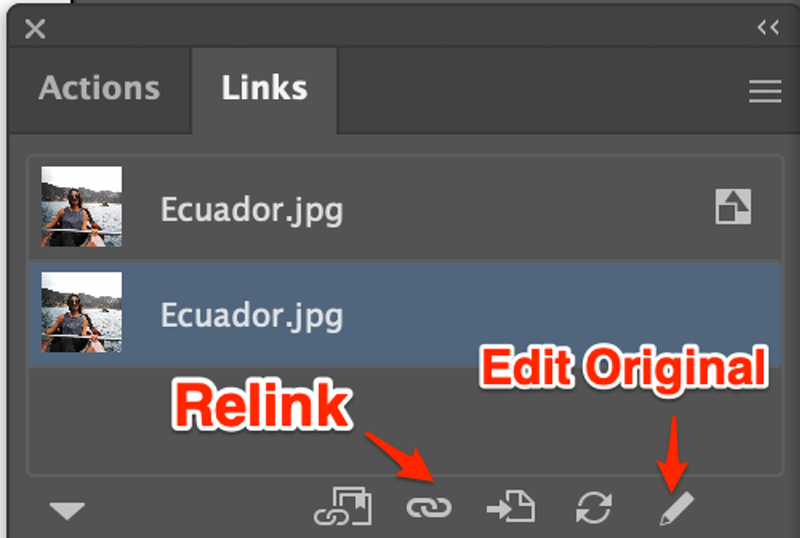
You can only edit the original image before you embed them. Before embedding the image, click Edit Original on the Links panel to edit your image.
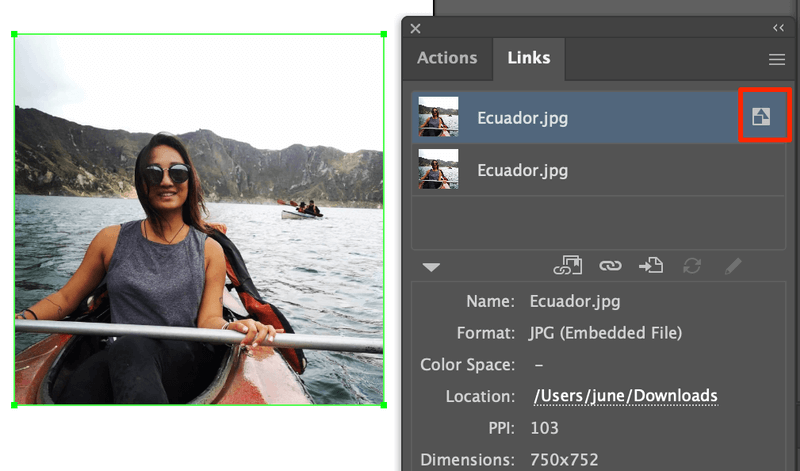
How do I know if an image is embedded in Illustrator?
There are two ways you can see if your image is embedded in Illustrator. When you don’t see the cross lines on the image, that means the image is embedded. Another way is to see it from the link panel. You’ll see a small embed icon next to the image name.
Final Thoughts
Embedding images is a must when you transfer Illustrator files that contain images to other devices. Keep in mind that when an image is linked doesn’t mean it’s embedded. So, always do the extra steps to link your image(s).
No broken links! Good luck!
Fletcher W.
Thanks for sharing this information!
June Escalada
You’re welcome, Fletcher!
K
The thing is illustrator is embedding different copies of any given source as an independent asset and it takes a lot of space. The better way to give your files to someone else is packaging them
Cathryn
Brilliant, thank you June! Really clear instructions! 🙂
June Escalada
Hi Cathryn,
You’re welcome!
Emmanuel
Thank you for preventing me from getting worked up. I had clip-masked a number of images that were refusing to embed. Was able to finally embed them using the links panel. Thank you, June!
June Escalada
Great! You’re welcome, Emmanuel!
Joel
Where do you find the Quick Links?