Designing a font sounds like a difficult and complicated project, especially when you have no clue where to start. I’m saying this because I was totally in your shoes when I first started graphic design ten years ago.
After years of experience, I found some easy tricks that help quickly create fonts and icons by modifying existing sources and making rounded corners is one of the most useful tricks for making vectors.
You can edit a simple shape or a standard font to make it something different and unique by changing the corners.
How does that work?
In this tutorial, you will find two super easy ways to make rounded corners for shapes and text in Adobe Illustrator.
Let’s dive in!
2 Quick Ways to Make Rounded Corners in Adobe Illustrator
You can use method 1 to create a rounded rectangle or modify it to create any rectangle-based shapes. The Direct Selection tool from method 2 is good for editing any objects with anchor points.
Note: the screenshots are taken from Adobe Illustrator CC Mac version. Windows or other versions can look different.
Method 1: Rounded Rectangle Tool
If you want to make a rounded rectangle, there’s a tool for it. If you haven’t noticed yet, it’s under the submenu of the Rectangle Tool together with a few other shape tools. Follow the steps below to create a rectangle with rounded corners.
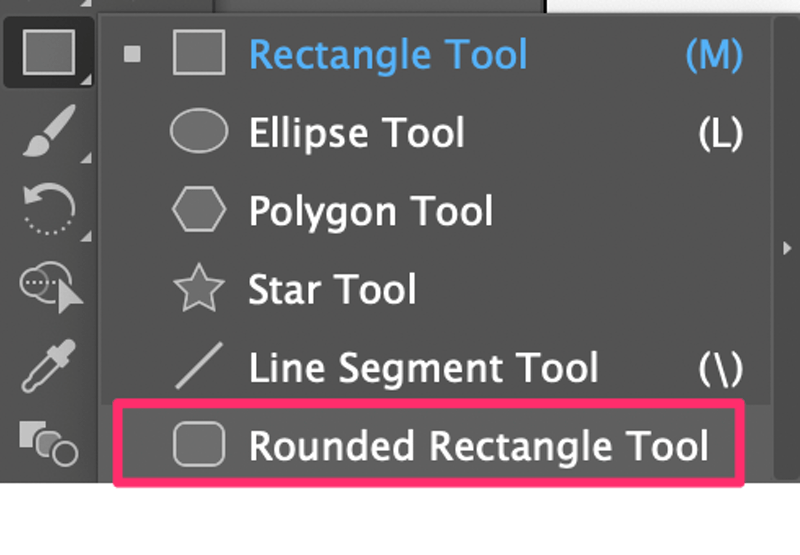
Step 1: Select the Rounded Rectangle Tool from the toolbar.
Step 2: Click and drag on the Artboard to create a rounded rectangle.
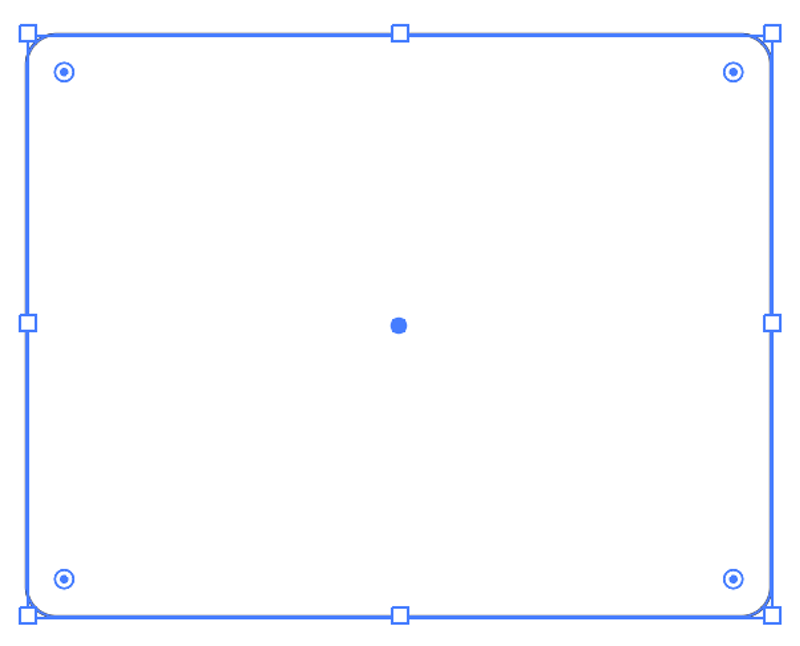
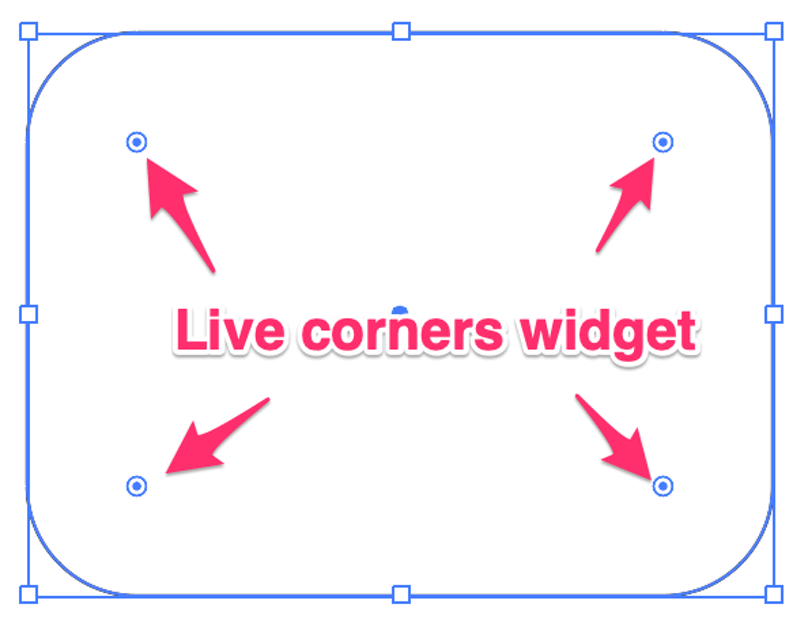
You can change the corner radius by dragging the Live Corners Widget (the circles that you see near the corners). Drag toward the center to make rounder corners and drag out to the corners to decrease the radius. If you drag all the way out, it’ll become a straight corner regular rectangle.
If you have a specific radius value, you can also input it on the Properties panel. Click the More Options button on Properties > Rectangle if you don’t see the corners options.
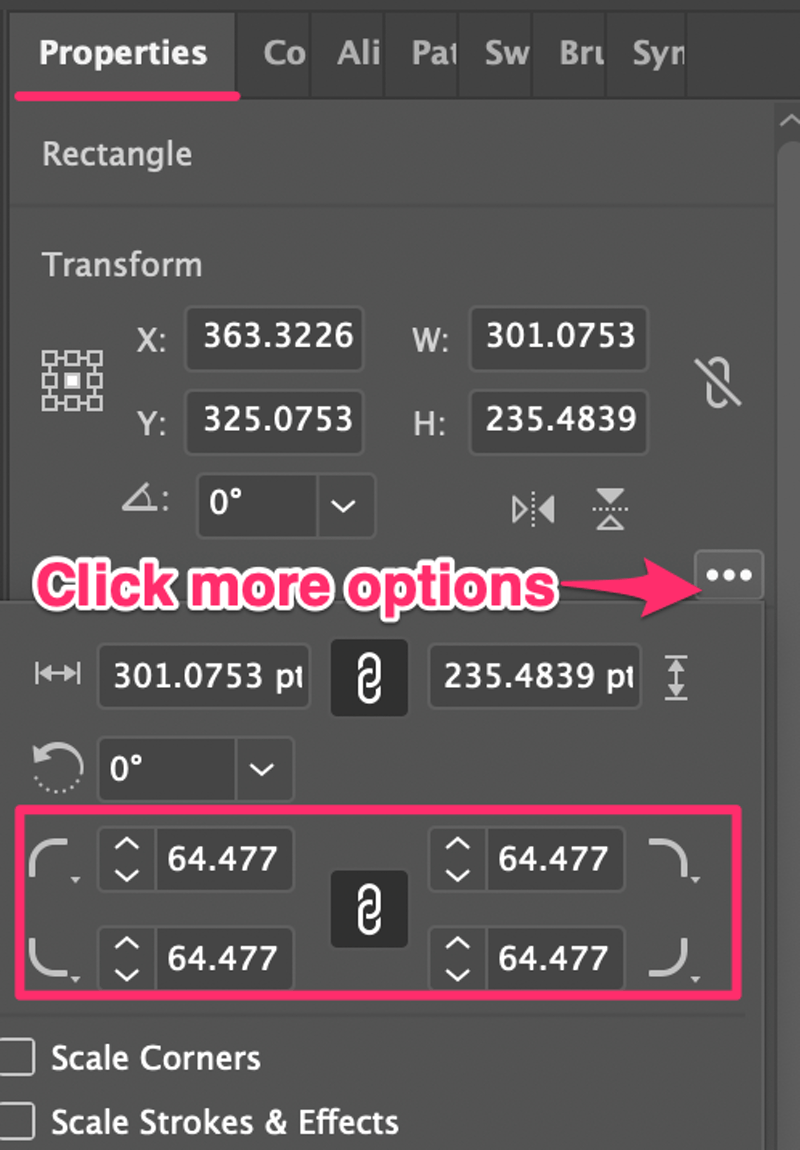
When you drag the widget, you’ll see that all four corners are changing together. If you wish to only change the radius of one corner, click on that corner again, you’ll see the corner highlighted, and drag.
If you want to select multiple corners, hold the Shift key to select.
How about other shapes? What if you want to make rounded corners for a font?
Good question, that’s exactly what I’m going through in Method 2.
Method 2: Direct Selection Tool
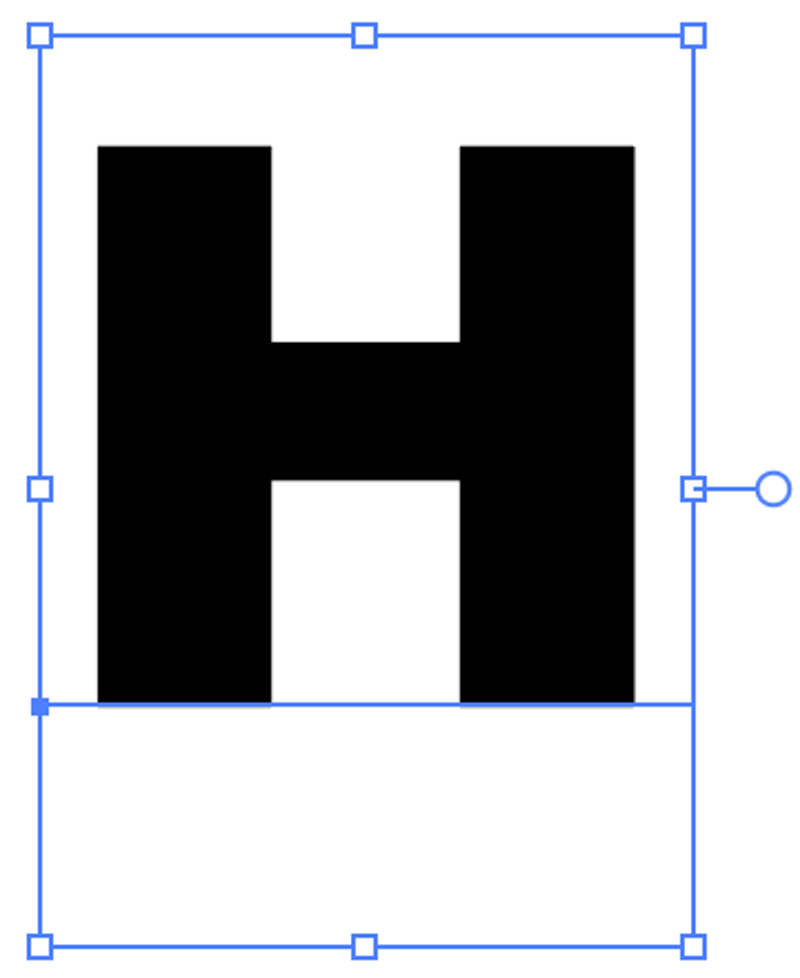
You can use the Direct Selection Tool to adjust the corner radius of any shapes you create in Illustrator with anchor points, including text. I’m going to show you how to do it with an example of making rounded corners for a font.

Imagine I use the standard font, Arial Black, for the letter H but I want to round the straight corners a bit to create a smoother look.
There’s a very essential step to do before you start with the Direct Selection Tool.
Step 1: Create a text/font outline. You’ll notice that when you hover over the text you wouldn’t see any Live Corners Widget even with the Direct Selection Tool selected, because there are no anchor points on live text. That’s why you’ll need to outline the text first.
Step 2: Select the Direct Selection Tool. Now you’ll see the Live Corners widget on the font.
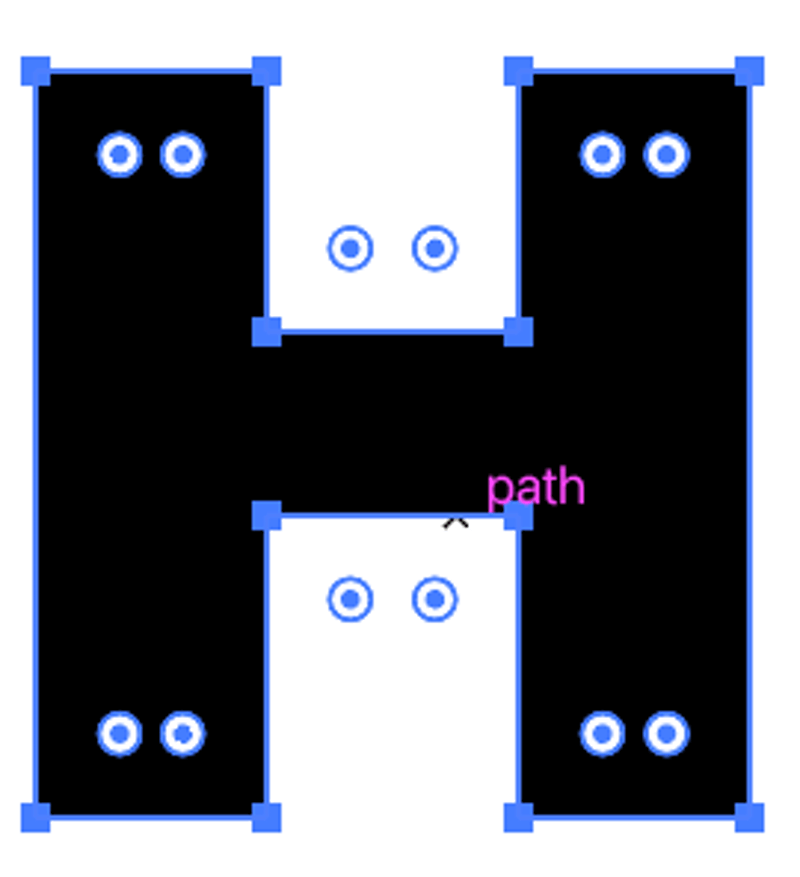
Step 3: Same as in method 1, click on any widget to make rounded corners. If you want to round multiple corners, hold the Shift key to select the corners that you want to round, and drag.
See, you’ve just made the standard Arial Black to a new font. See, making a new font is not that hard.

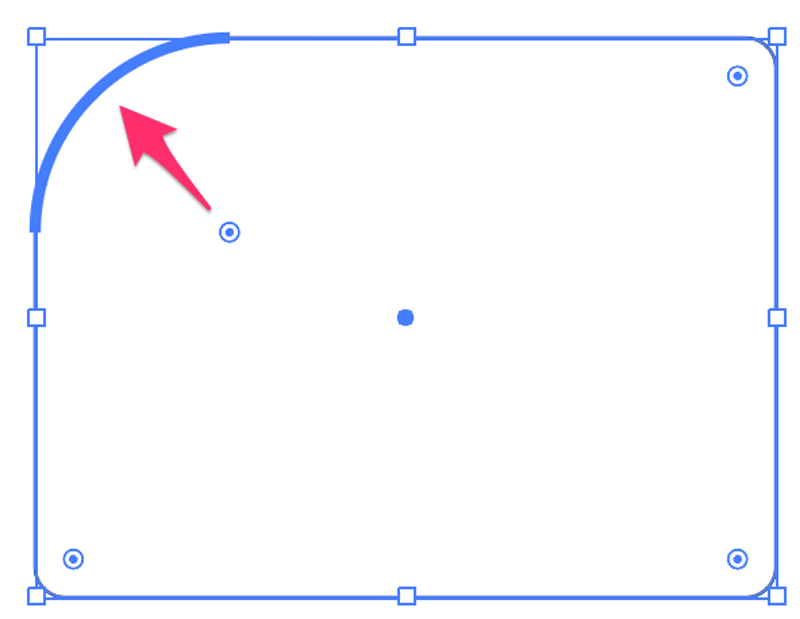
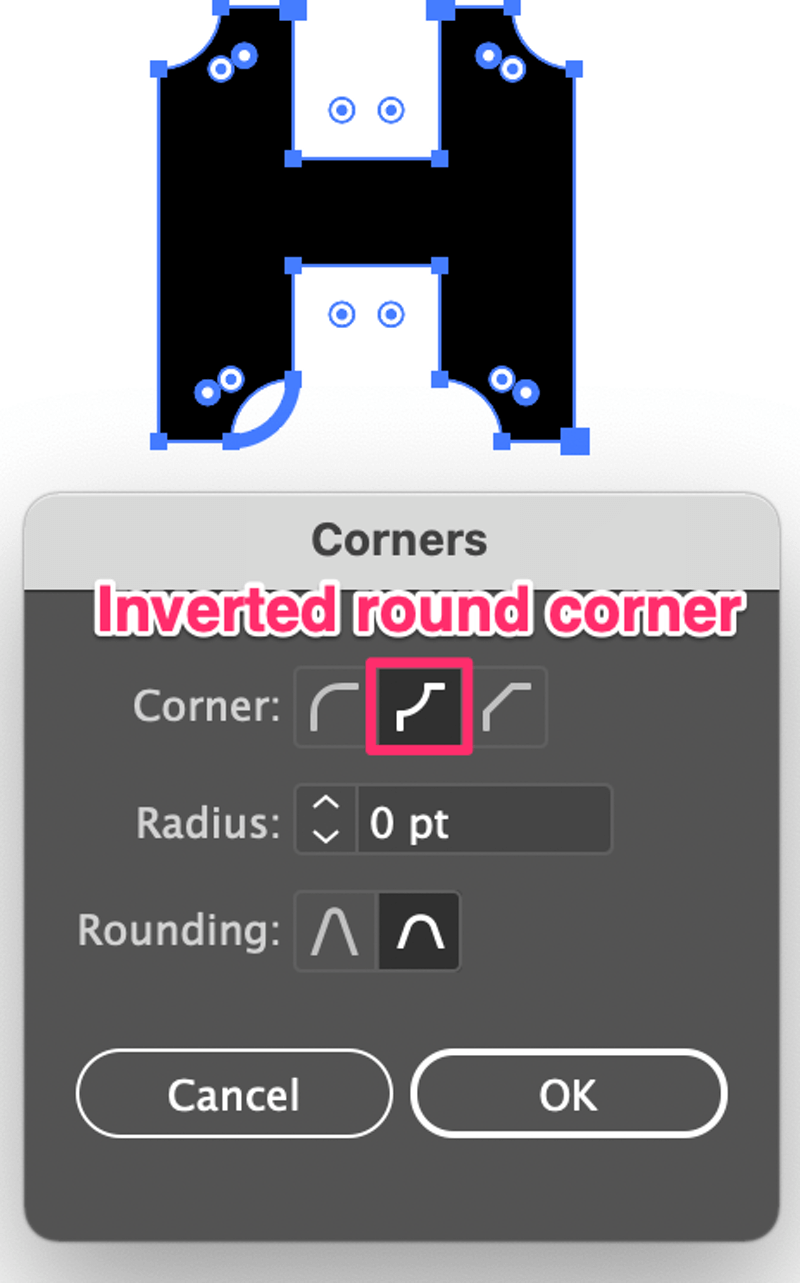
Another magic trick that the preset Rounded Rectangle Tool cannot do is that when you double-click on the widget using the Direct Selection Tool, it brings up the Corners window.
You can choose what type of corners you want to make and change the radius. For example, this is what the Inverted round corner looks like.
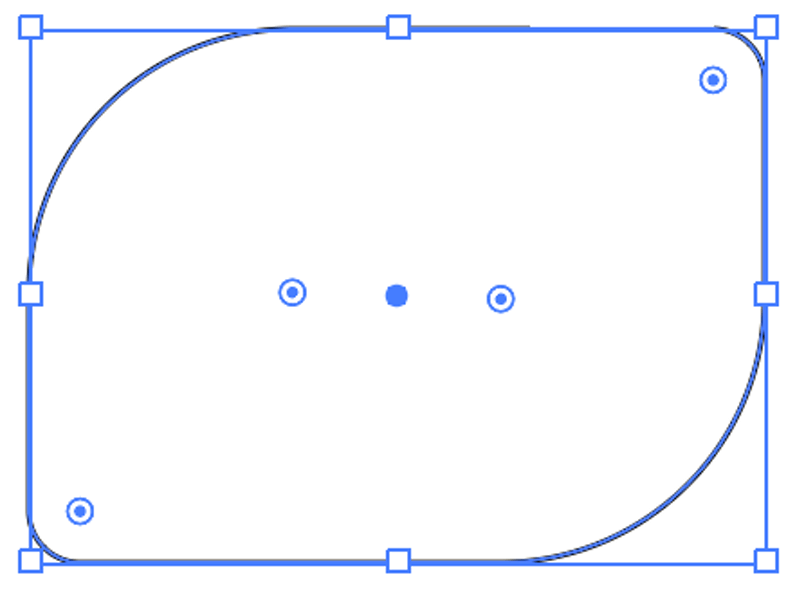
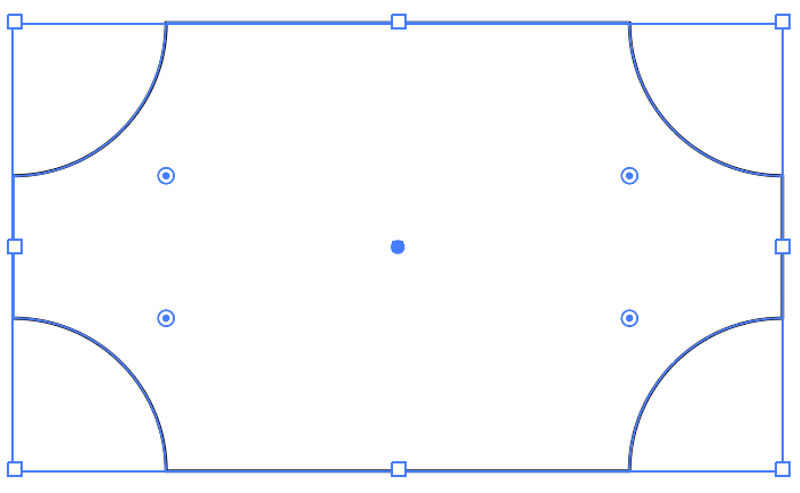
You can use this method to change the rounded rectangle corner style as well. After creating the rounded rectangle, select the Direct Selection Tool, double-click the Live Corners widget, and invert the round corner.
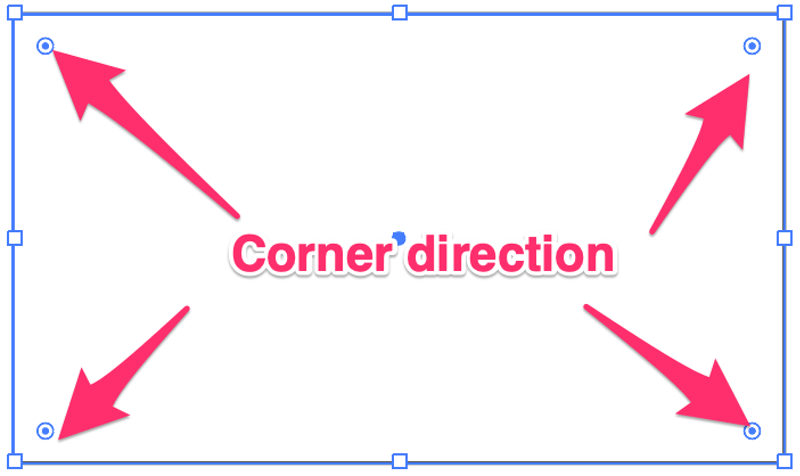
Tip: If you want to straighten the corners, simply select the widget and drag it out in the corner direction.
Conclusion
The Direct Selection Tool is awesome for editing anchor points to create new shapes and making rounded corners is one of the easiest edits you can do. I often use this tool to create new fonts and design icons.
If you’re looking for a simple rounded rectangle shape, the Rounded Rectangle Tool is right there for you, quick and convenient.
Sam
Thank you. God bless you!
June Escalada
You’re welcome, Sam!
Carol
Thank you, June! It’s been awhile since I’ve seen your best friend, so I needed your help. (I’m very grateful!)
June Escalada
Hi Carol, you’re welcome 🙂
JOEY
Thanks for being a word of wisdom. Appreciate your help!
June Escalada
You’re welcome, Joey!
Glenn
The Rounded Rectangle Tool does not exist in Version 25.4.1
Glenn
I just figured out that the Rounded Rectangle Tool can be added into my tool bar simply by dragging it in from the missing tools list found by clicking on the 3 dots at the bottom of the toolbar.