
Text, being one of the most important elements in graphic design, can be transformed in many ways to create different effects on your artwork. For example, bold text can be used to catch attention, and italics are usually used for emphasis or contrast.
Many font styles already have italicized variations, but if not, you can use the Shear option. Don’t know where it is?
No worries! In this tutorial, I’ll show you how to italicize text from the Characters panel, and how to title text that doesn’t have the italicized option.
2 Ways to Italicize/Tilt Text in Adobe Illustrator
If the font you choose already has italic variations, great, you can italicize text with a few clicks. Otherwise, you can apply a “shear” effect to the font that doesn’t have the italic option. I’m going to show the difference using two examples.
Note: the screenshots are taken from the Adobe Illustrator CC Mac version. Windows or other versions can look different.
Method 1: Transform > Shear
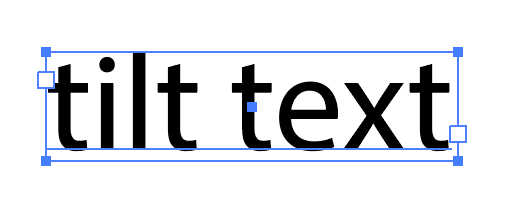
Step 1: Use the type tool to add text to the artboard.
The default font should be Myriad Pro, which doesn’t have an italic variation. You can see the font variations by clicking on the font style options bar.
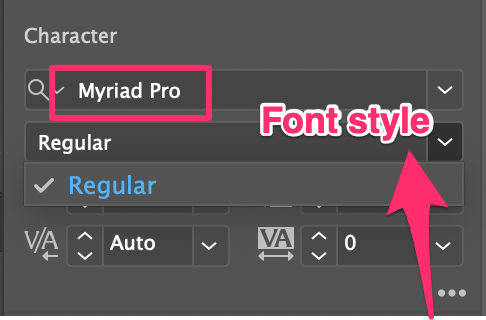
As you can see, only Regular is available. So we’ll have to transform the text by adding a shear angle.
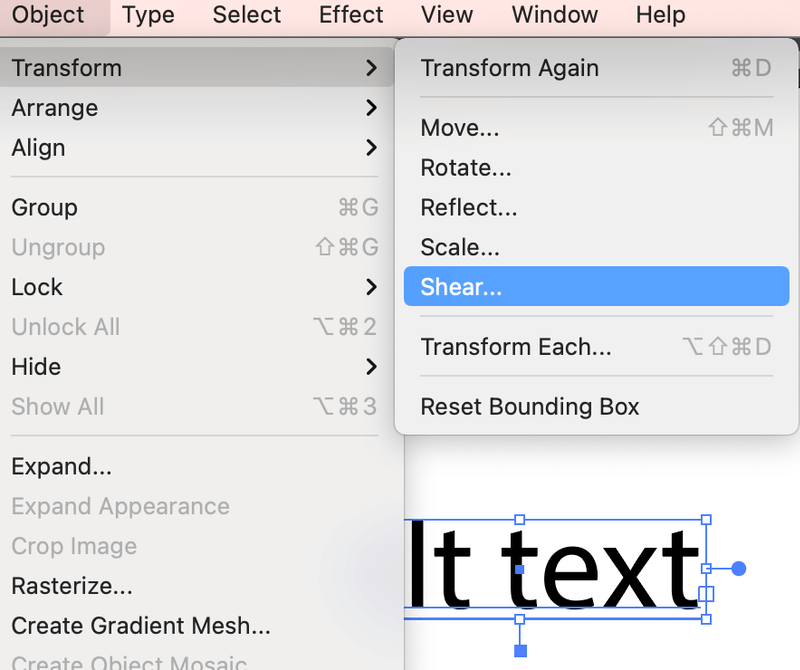
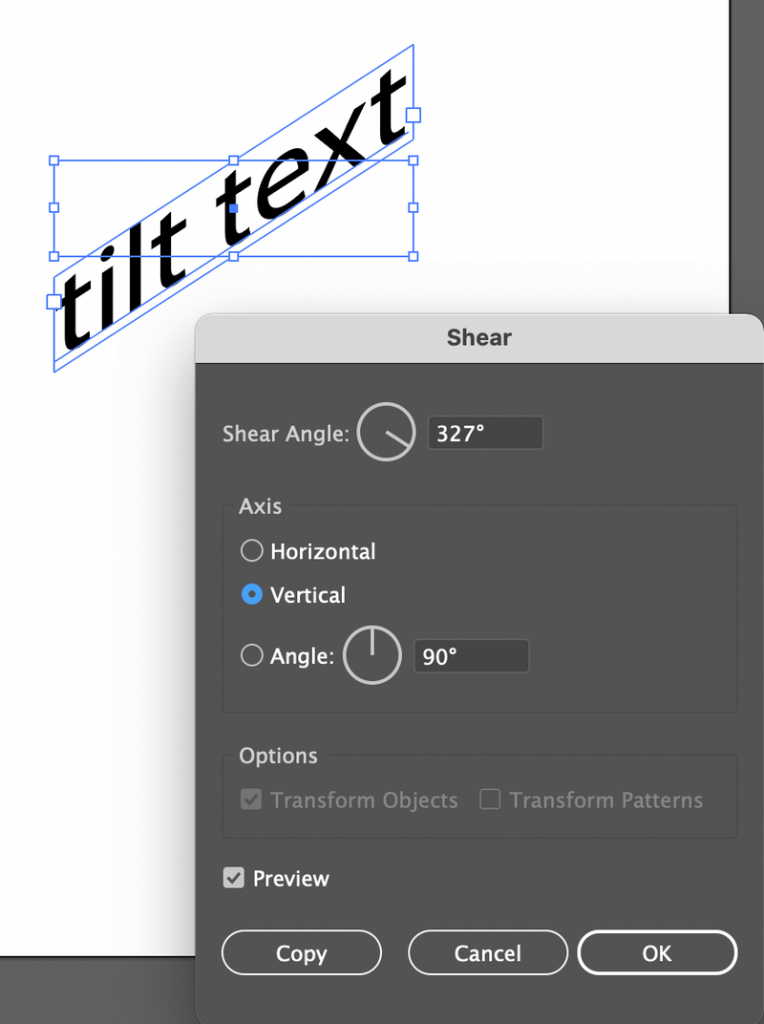
Step 2: Select the text, go to the top menu, and select Object > Transform > Shear.
A setting window will pop up and you can title the text by adjusting the settings. If you want to italicize text similar to the normal italic font style, you can select Horizontal, and set the Shear Angle around 10. I set it to 25 to show a more obvious tilt.
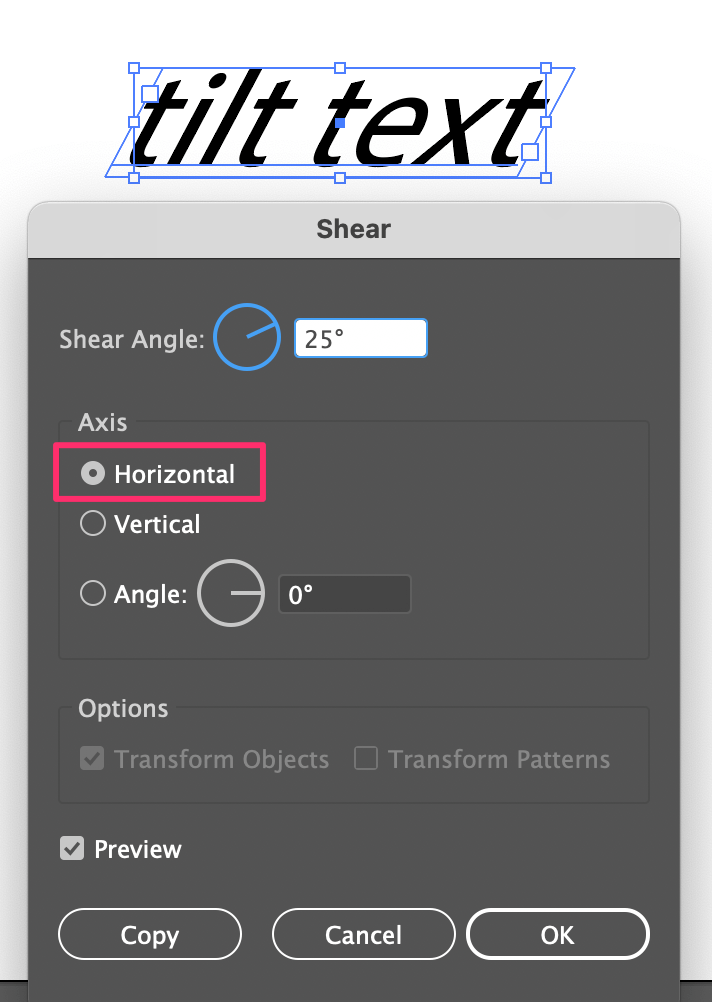
You can also tilt the text in other directions by changing the Axis and Shear Angle.
That’s how you tilt text using the Shear tool when the font doesn’t have an italic variation by default. If you decide to change the font and it has italics, follow the method below.
Method 2: Change Character Style
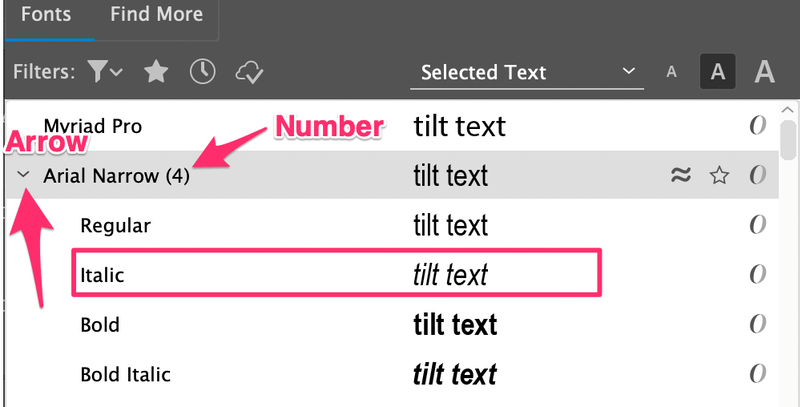
Step 1: Select the text and find a font that has a small arrow next to it and a number next to the font name. The arrow means that there’s a submenu (more font variations) and the numbers show how many variations the font has, most likely you’ll find Italic.
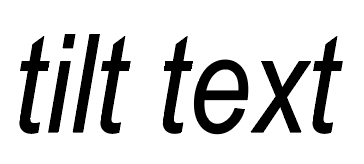
Step 2: Click on Italic and that’s it. This is how to make standard tilt text.
Wrapping Up
It’s pretty easy to italicize or tilt text in Adobe Illustrator using either of the methods above. The font style is the quicker and easier option if the font you choose has italic variation. The Shear option is more flexible for titling text from different angles and can create a more dramatic effect.