Bold text gets people’s attention, that’s why you often use it to highlight some important info that you don’t want people to miss. In the design world, sometimes you’d be using bold font or text as a graphic element.
I’ve been working as a graphic designer for more than ten years, and I have to say that I love using bold text as a visual effect to catch attention, sometimes I even use large and bold font as my artwork background.

Actually, a lot of fonts already have the bold character style by default, but sometimes the thickness is just not ideal.
Want to make your text bolder? In this article, you will learn three different ways to bold text in Adobe Illustrator along with some useful tips.
Attention!
There are multiple ways to bold text in Illustrator, but knowing these three will be more than enough to handle your daily work.

Note: Screenshots are taken from the Illustrator CC Mac version, the Windows version might be slightly different.
Method 1: Stroke Effect
The most flexible way to change the thickness of your text or font is by adding a stroke effect.
Step 1: Find the Appearance panel and add a border stroke to your text.
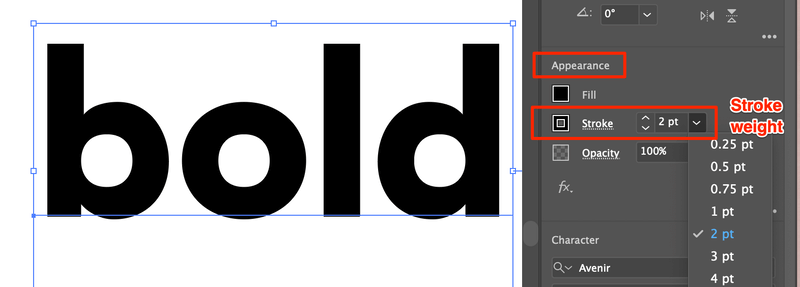
Step 2: Adjust the stroke weight. That’s it!
You can manipulate the weight precisely using this method and the best part is, you can still change the font if you’re not happy with it. You don’t have to create a text outline to change the stroke thickness.
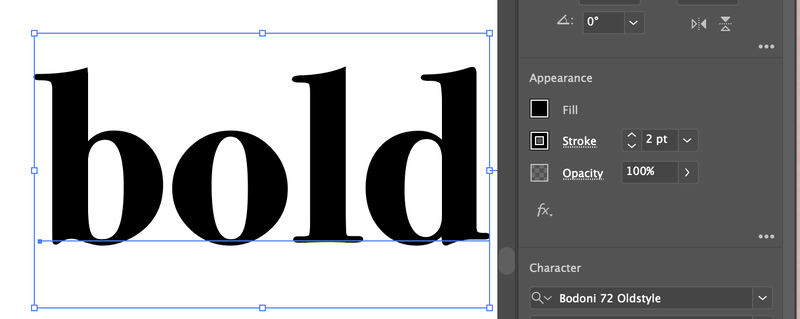
Method 2: Font Style
Changing character style is for sure the easiest way to bold text. All you have to do is choose the Bold or Black/Heavy option.
Have your font selected, go to the Character panel and click Bold. Done.

For some fonts, it’s referred to as Black or Heavy (Heavy is thicker than Black). Anyways, same theory.
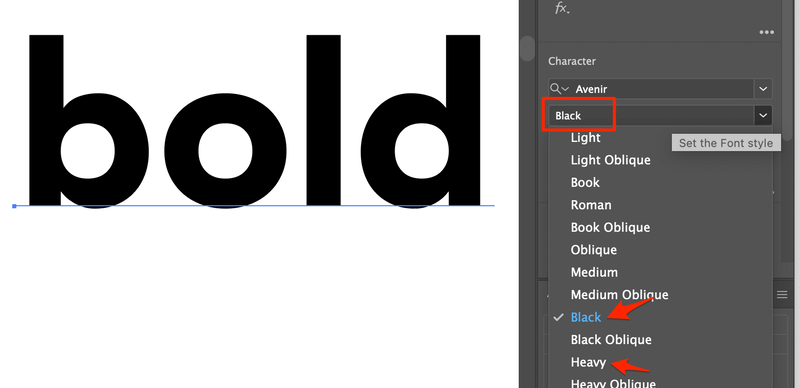
Sure, it’s so simple and useful sometimes, but can’t really do much with it, because the boldness is by default.
Method 3: Offset Path
This is, let’s say the ideal way that everyone recommends to bold text in Adobe Illustrator. In this method, you’d have to create an outline of the text, and then add an offset path to the outlined text. Make sure you’re 100% satisfied with the font because once you create an outline, you can’t change the font anymore.
Step 1: Select the text you want to bold and create an outline using the keyboard shortcuts Shift + Command + O.

Step 2: From the overhead menu click Effect > Path > Offset Path.
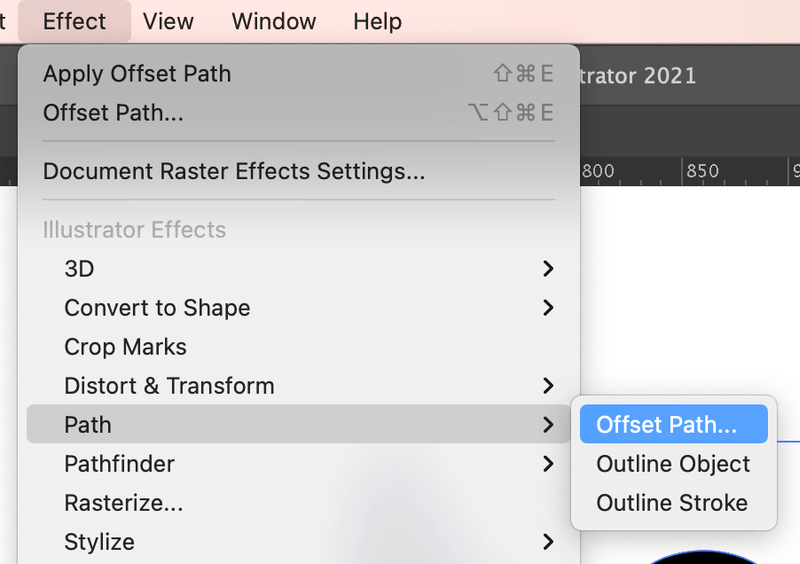
Step 3: Input the Offset value. The higher the number, the thicker the bolder the text will be.
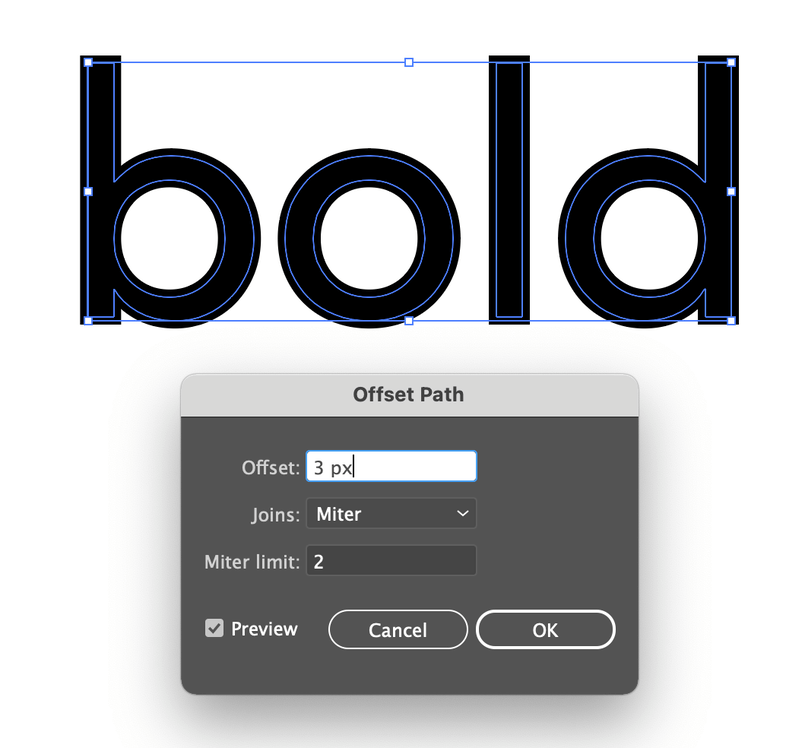
You can preview the effect before hitting OK.
Anything Else?
You might also be interested to know the answers to the following questions related to creating bold text in Adobe Illustrator.
What’s the keyboard shortcut for bold text in Adobe Illustrator?
Technically, you can use keyboard shortcuts to bold text but it doesn’t always work out the way you expected. If you want to avoid any troubles or complications, I’d strongly suggest you use the method above to create bold text in Illustrator.
How to change fonts when the text is bold?
As I mentioned before, you can change the font if you use the stroke effect method to bold text. Simply go to the Character panel and change the font.
How to make a font thinner in Illustrator?
You can make a font thinner using the same method as bold text. Create Outline > Effect > Offset Path.
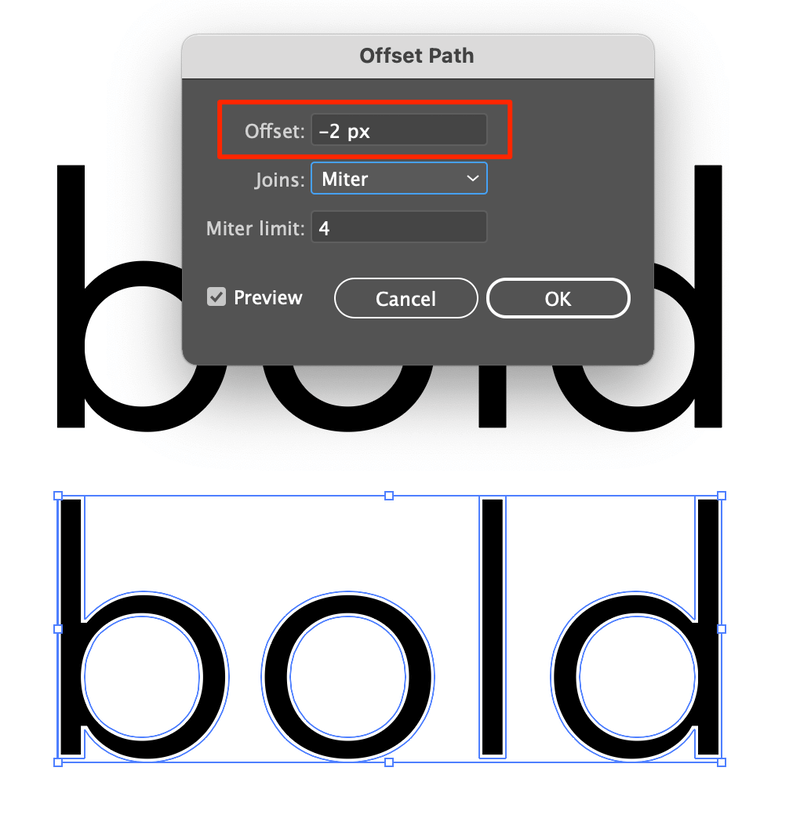
Change the number to negative, and your font will be thinner.

Final Thoughts
Bold is beautiful and powerful. You can either use it to catch attention or as graphic background and design element. Knowing the three simple ways to bold text in Illustrator is essential for your graphic design career.
You want people’s attention. Especially today there are so many talented artists that create amazing designs. An eye-catching design with bold text can catch attention at the first sight and lead to reading the details. Can’t wait to see what you’ll do with bold text.
Have fun creating!

deViL's eYe
Well done.. helpful
Keep going and the best wishes
June Escalada
Happy to hear! Thanks!
Masi
Thanks it was very helpful.
June Escalada
You’re welcome, Masi.
Al
A whole article yet ‘Shift + Command/Control + B’ not even mentioned?