The Measure Tool measures the distance between two points and it also measures angles. It’s quite handy for fashion, product, and packaging design because it works great for measuring lines.
If you’re doing digital graphic work, many of you might not be familiar with this tool because you don’t need to use it often and you can actually find out the sizes of objects without the actual measure tool.
In this tutorial, you’ll learn how to measure lines and objects in Adobe Illustrator with and without the measure tool.
Before getting started, I’m going to show you where to find the Measure Tool in Adobe Illustrator.
Note: all screenshots from this tutorial are taken from Adobe Illustrator CC Mac version. Windows or other versions can look different. Keyboard shortcuts are also from Mac. Windows users can change the Command key to Ctrl.
Table of Contents
Where is the Measure Tool in Adobe Illustrator
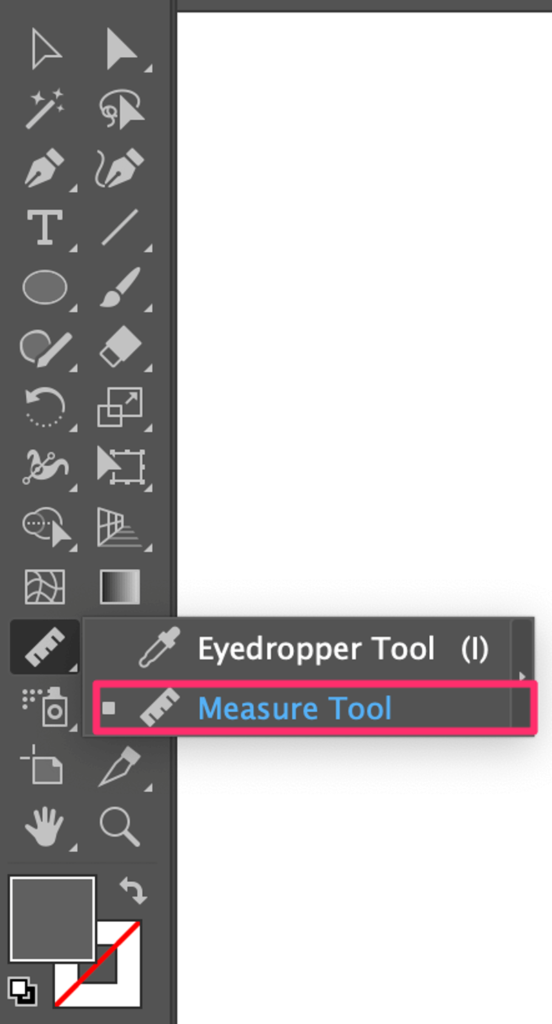
You probably won’t find the Measure Tool from the toolbar at a glance because it’s hidden in the submenu. Depending on which version of the toolbar you’re using (advanced or basic), you’ll find the measure tool in different locations.
You can see and change the toolbar version from the Window > Toolbars.

If you’re using the advanced toolbar like mine, you should find the measure tool in the same menu as the eyedropper tool. At least that’s my default setting.
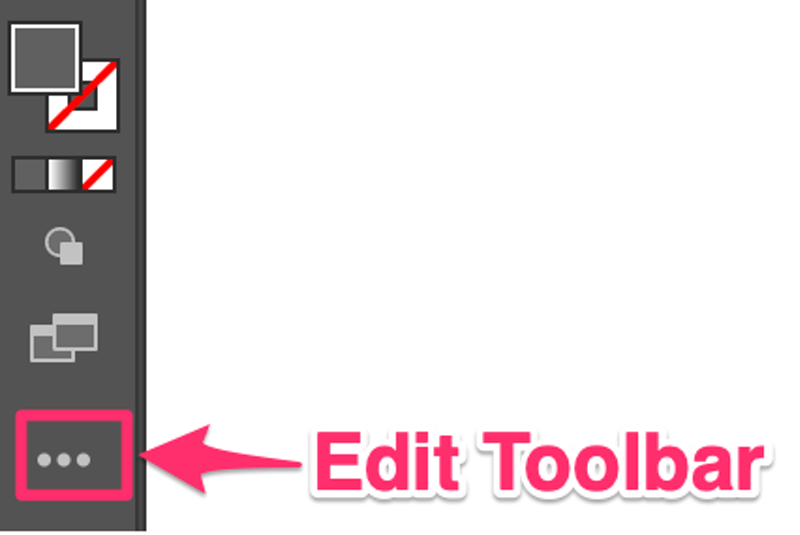
If you’re using a basic toolbar, you’ll find the Measure Tool from the Edit Toolbar menu.
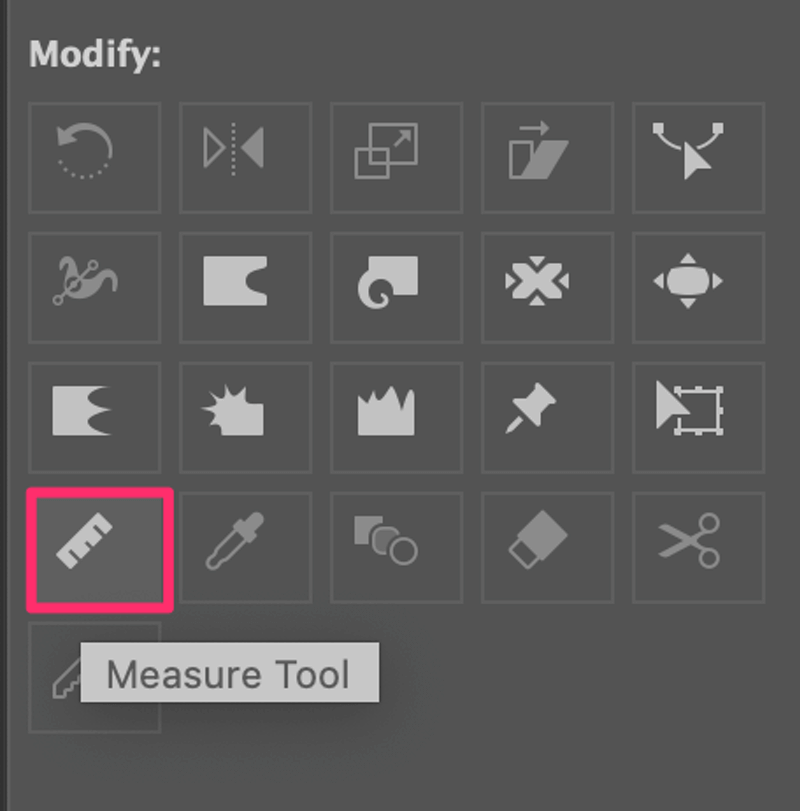
Now that you’ve found the tool, let’s find out how to use it.
How to Use the Measure Tool in Illustrator (2 Quick Steps)
I’m going to show you an example of how to use the Measure Tool to measure lines in Adobe Illustrator.
Step 1: Select the Measure Tool from the toolbar.
There isn’t a keyboard shortcut for the Measure Tool itself but you can use the shortcut Command + F8 to open the Info panel, which shows the measurement information that we’ll use in Step 2.
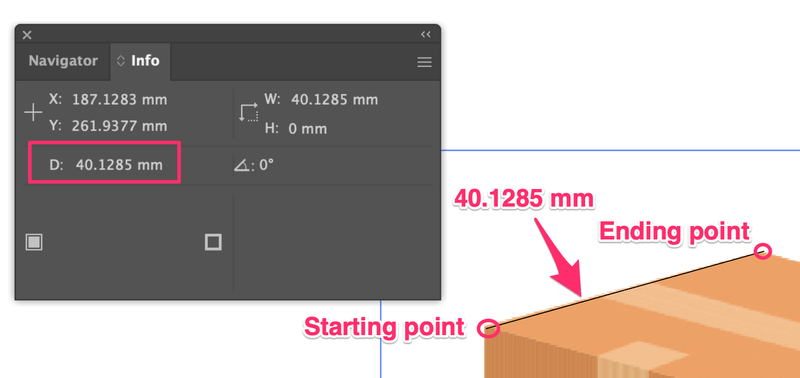
Step 2: Click on the starting point of the line that you want to measure and drag it all the way through the ending point of the line. When you click on the artboard, the Info panel pops up automatically and you’ll be able to see the size or dimension information there.
For example, if you want to measure the dimensions of this box. Starting with one side (line). Click and drag and you’ll see the length shown as D is 40.1285 mm, which is the length of the side (line) that I measured.
You can do the same to measure the rest of the sides.
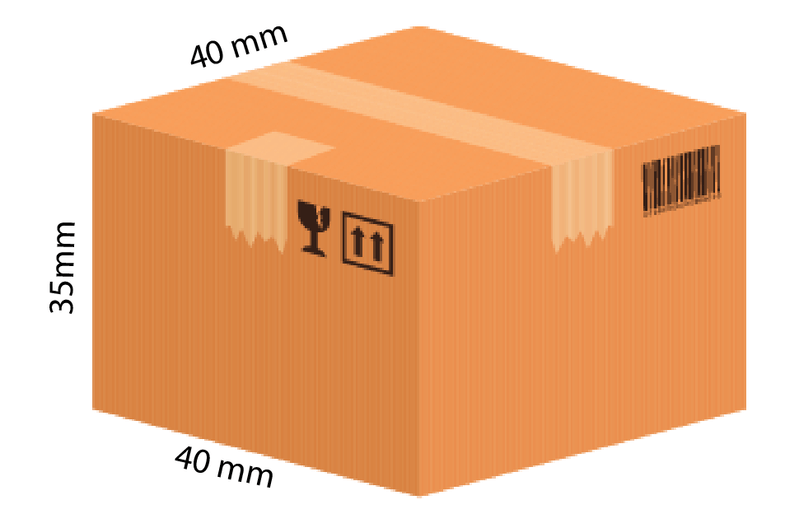
By the way, the dimension might not make sense for an actual packaging box, it’s just for showing you how to use the tool.
How to Measure Objects without the Measure Tool
Do you have to use the Measure Tool to measure objects in Illustrator? Not necessarily. You can also open the Info panel from Window > Info and see the measurement information directly.
With the Info panel open, when you select an object, the dimension information will show on the Info panel. However, this method only works if the object is a vector.
Try it out. Simply create a rectangle, and click on it. See the size info?
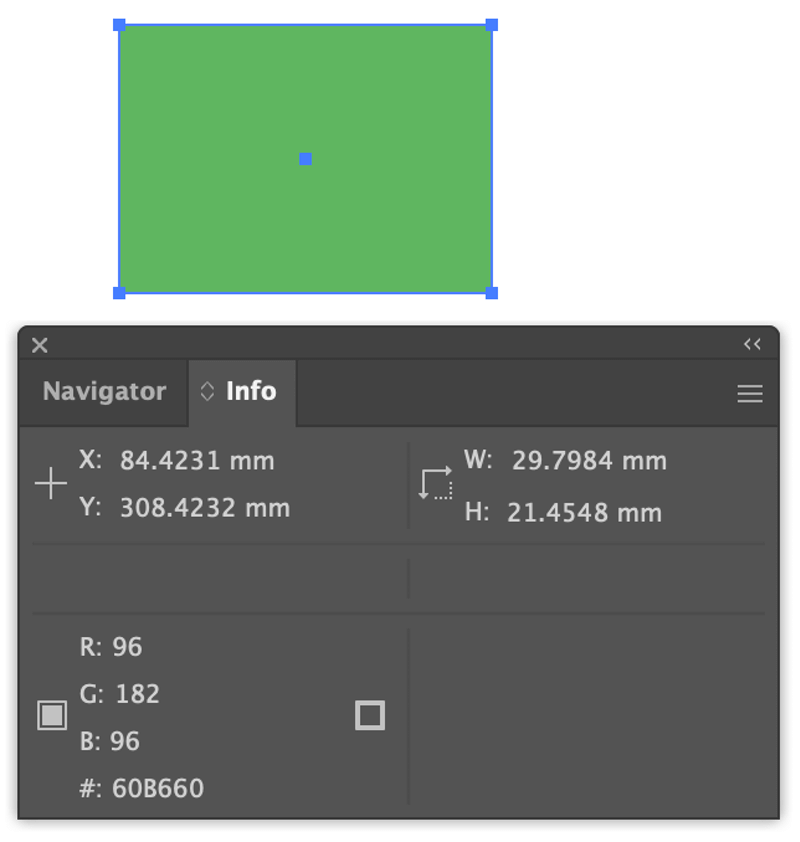
Another section where you can see the dimension info is the Properties > Transform panel.
Same rule as the Info panel. It only measures vector objects. If you select a raster image, it’ll only show you the size of the image instead of the objects on that image.
If you want to measure specific objects on a raster image, you’ll need to use the measure tool.
Final Thoughts
The Measure Tool is useful for measuring lines. Of course, you can use it to measure shapes as well, but you don’t have to. If you only want to get the width and height info, simply select the shape and you can see the size on the Properties panel.
About June Escalada
Opio
Thanks
June Escalada
You’re welcome 🙂