
Depending on what type of array you’re making, there are different ways to array an object in Adobe Illustrator. There’s one keyboard shortcut that simplifies the process that you can use – Command + D (macOS) or Control + D (Windows), which is the keyboard shortcut for Transform Again.
However, it’s essential to know how to use this shortcut along with other tools to make an array in Adobe Illustrator
In this tutorial, you’ll learn two ways to array an object and an additional method to make a circular array in Adobe Illustrator.
Note: All screenshots from this tutorial are taken from Adobe Illustrator CC Mac version. Windows or other versions can look different. If you’re using keyboard shortcuts on Windows OS, change the Command key to Ctrl, and the Option key to Alt.
2 Ways to Array an Object in Adobe Illustrator
The easiest way to create an array in Adobe Illustrator would be using the keyboard shortcut. Depending on whether you are making a linear or radial array, you’ll use the shortcut along with other tools.
The Transform effect is convenient when you already have specific values to input, such as the number of copies, the distance between objects, angles, etc.
Either way, let me show you how both methods work.
Method 1: Keyboard shortcut
You can use the keyboard shortcut Command + D (shortcut for Transform Again) to array objects in Adobe Illustrator. It’s the same idea as doing step and repeat.
Here’s a quick example. Let’s create a row of objects using the array keyboard shortcut.
Step 1: Select the object, hold the Option key, and drag it to the right (or any direction that you want the line/row to follow). If you want the objects to align on the row, hold the Shift key as you drag.

Step 2: Hit Command + D and you’ll see it automatically creates a copy of the object and it’s transformed based on the last action you made.

You can keep using the shortcut to add more copies of the object.

Now if you want to add more “rules” to how the object arrays, it can be a good idea to set it up manually from the Transform tool.
Method 2: Transform effect
Let’s say you want to array along a path, scale, or rotate the array in Adobe Illustrator, then using the transform effect is ideal.
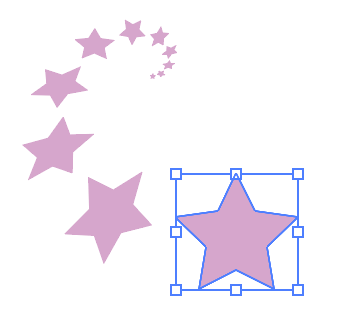
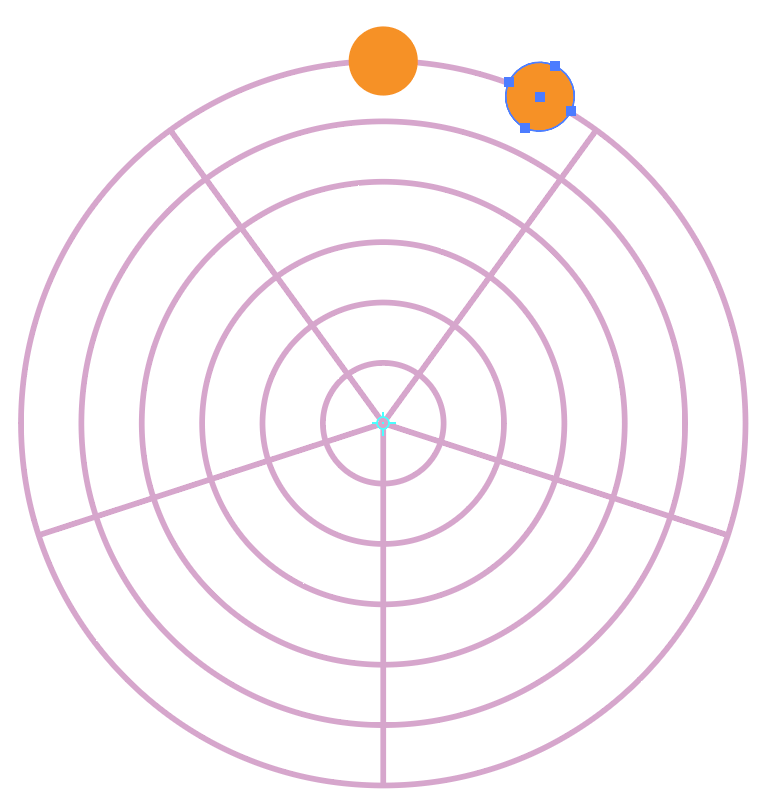
For example, let’s array the stars along a path with fading effects.
Step 1: Select the object, in my case, the star, and go to the overhead menu Effect > Distort & Transform > Transform.
Step 2: Change the settings on the Transform Effect window. Make sure to input the copies of the object you want to create. Adjust the settings accordingly, and you can check the Preview box to see how it transforms as you change the settings.
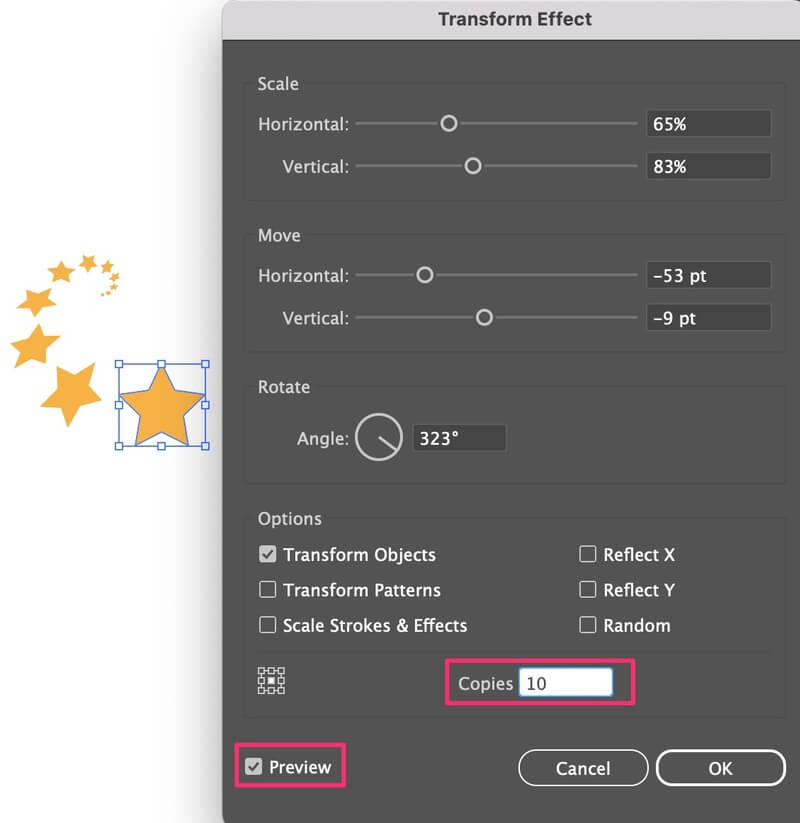
Click OK and you’ve made an array with fading effects. If you made any edits to the object, the array effect follows. For example, I changed the color of the first star, and all the stars follow the same color.
This is one way to make an array along a path, but if you want to make a radial array or circular array, there’s another easier way to do it. Keep reading.
How to Make a Circular Array in Adobe Illustrator
You can use the Polar Grid Tool to assist you to make a circular array. The idea is to make objects array around the polar grid.
If you don’t know where the Polar Grid Tool is, you can find it in the same menu as the Line Segment Tool from the Advanced toolbar.
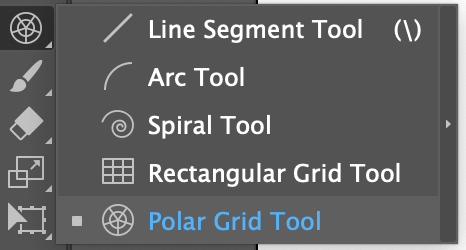
Found it? Let’s jump into the steps.
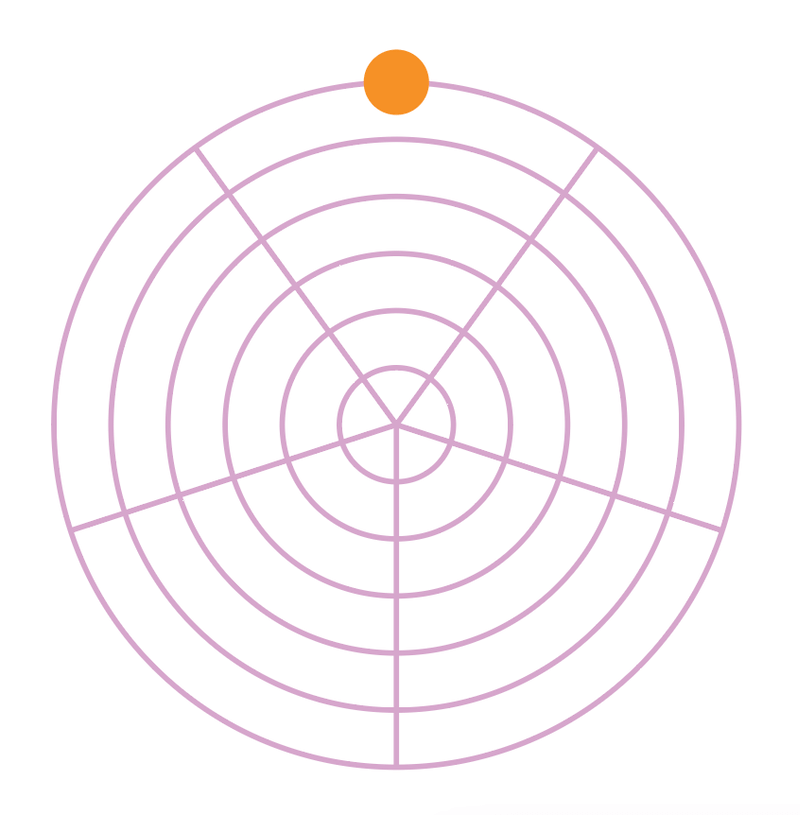
Step 1: Choose the Polar Grid Tool, hold the Shift key, click and drag on the artboard to draw a polar grid.
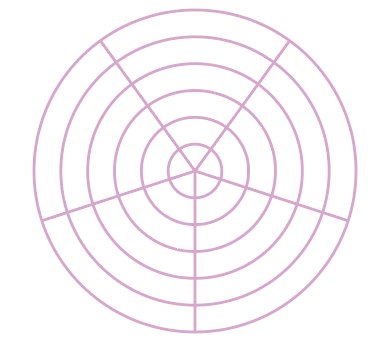
You don’t have to worry about the grid lines, because basically, we’re only using it as a guide.
Step 2: Move your object on the grid. For example, I want to make a circular array of a circle.
Step 3: Select the object and choose the Rotate Tool (keyboard shortcut R).
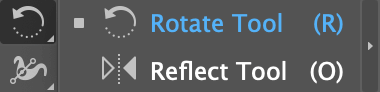
You’ll see a light blue point on the object, and that’s the rotation center point.
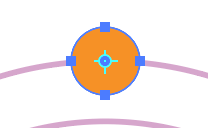
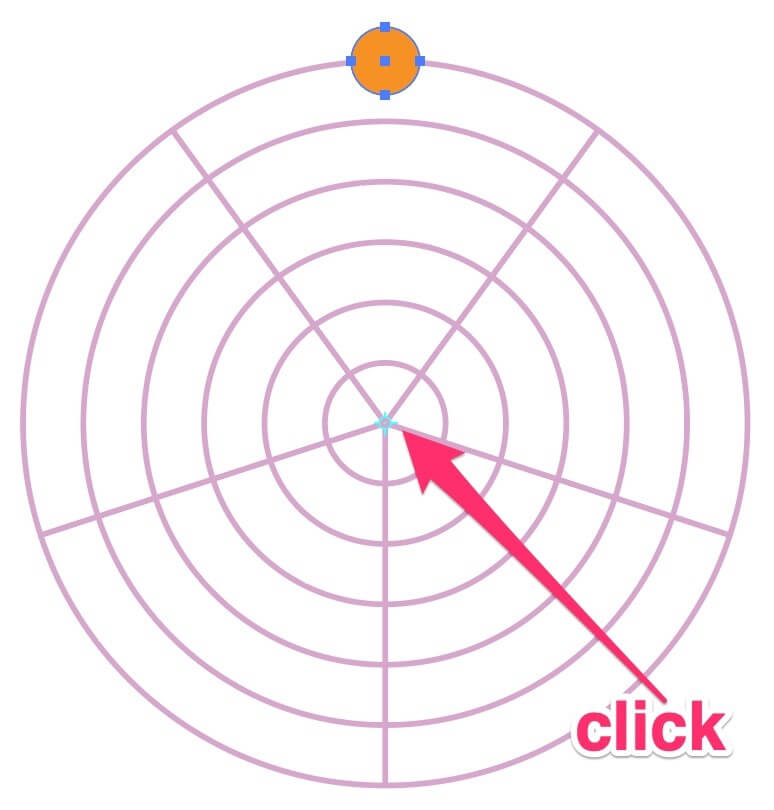
Click on the center of the polar grid to change the rotating point to the polar grid center instead of the object.
Step 4: Hold hold the Option key, click on the object and move it left or right, it’ll duplicate and rotate the object.
Step 5: Hit Command + D until you complete the circle.
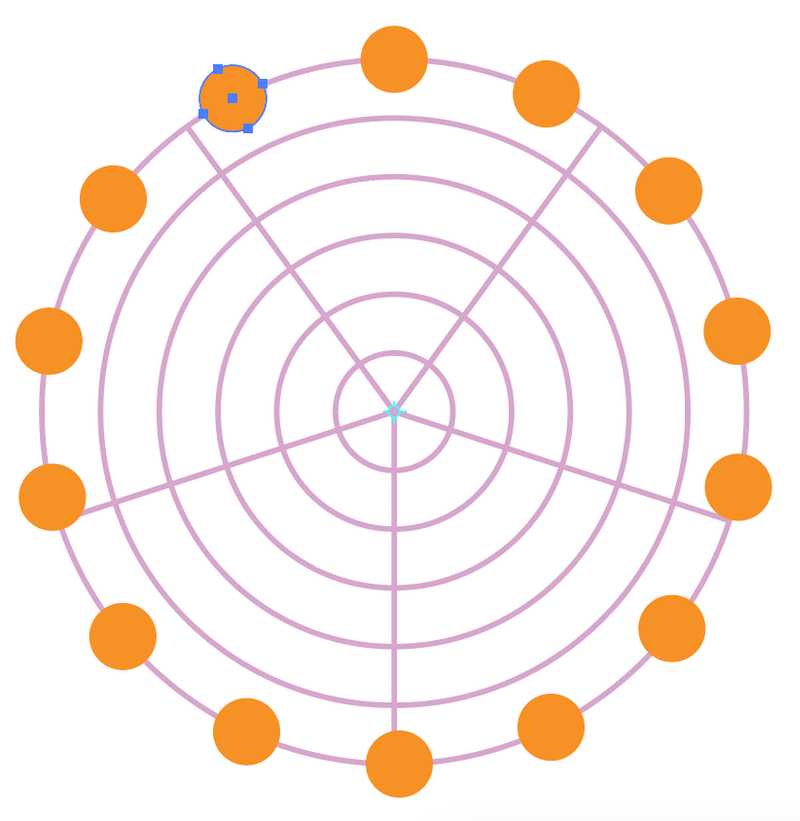
You can delete the polar grid to see how it looks.

Or add another layer or array using the polar grid.

Final Thoughts
I would say the Transform effect is best for making an array effect and the keyboard shortcut itself it’s good for duplicating and it works along with other tools.
Remember this keyboard shortcut: Command + D. Save it to your cheatsheet. It’s useful for making an array around a circle, step and repeat, and so much more.
titor
Great post! Thanks June 🙂
June Escalada
You’re welcome!
Olga
Amazing post! Super helpful and I love when there’s no need to go through 5 minutes video (back and forth…)