Before sending your artwork to print or publishing it online, it’s not a bad idea to preview it. You know, sometimes expectations and reality don’t match. But you can preview the problem and try your best to make things work.
Working as a graphic designer for over ten years with different means of design including digital, print, and multimedia, previewing my work before submitting has become a habit. A good one.
Take colors as an example, because they can be quite tricky. Once I printed my 3000 copies of brochures for a vape expo without previewing ahead. The colors and shadows on the artwork came out quite different from viewing it on the screen. What a disaster.
So yes, it’s important to preview your artwork. In this tutorial, you will learn four different types of viewing modes in Adobe Illustrator and some useful tips for each one of them.
Let’s dive in!
Different Types of Previews in Adobe Illustrator
Note: Screenshots are taken from the Illustrator CC Mac Version. the Windows version might look slightly different.
You can view your artboard in four different ways. For example, choose outline mode when you work with lines, pixel mode when you create a web banner, and overprint mode when you design printing materials.
Outline
Use the Outline mode when you are working on details! It allows you to see whether the lines or objects are intersecting. The Outline mode is especially useful when you’re creating shapes, or combining objects.
The outline mood looks like this. No colors, no images.
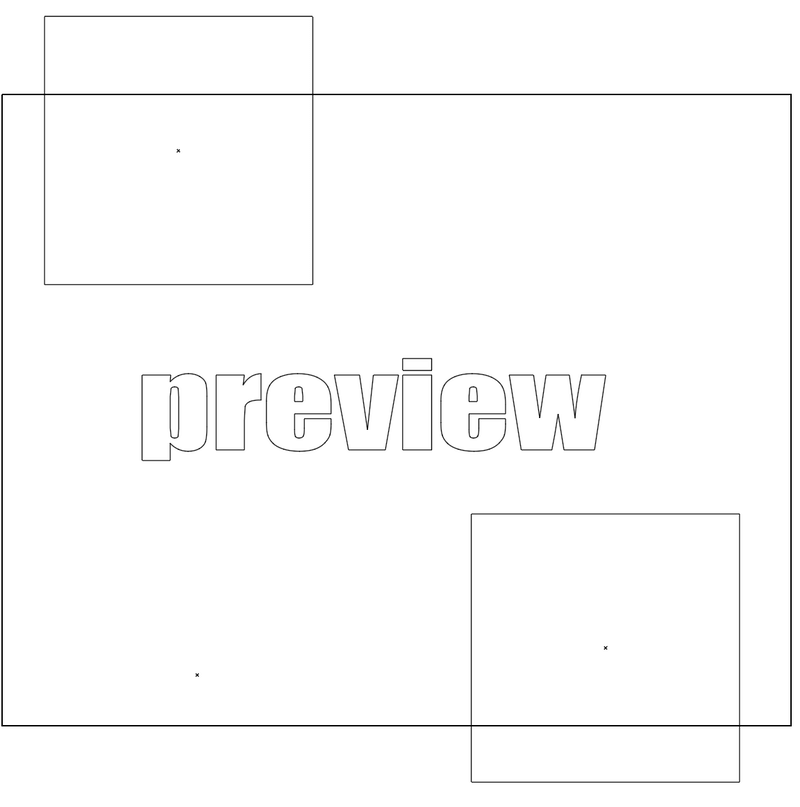
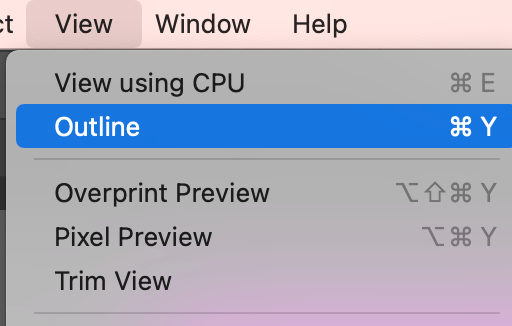
You can turn on the preview mode to see your artwork’s vector paths easily. Just go to View > Outline from the overhead menu.
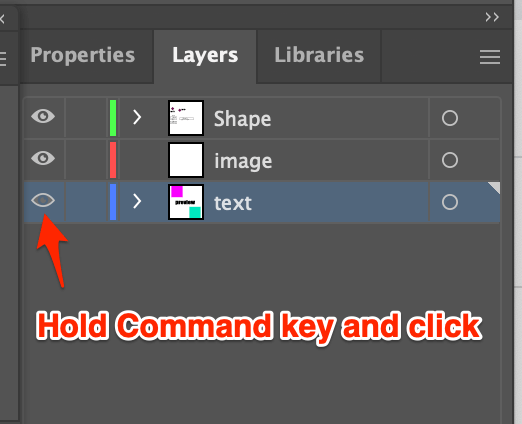
Another way to preview the artwork outline is by clicking on the eyeball icon on the Layers panel. This method allows you to preview specific layers. Hold down the Command key when clicking on the icon next to the layer(s) that you want to preview.
Overprint Preview
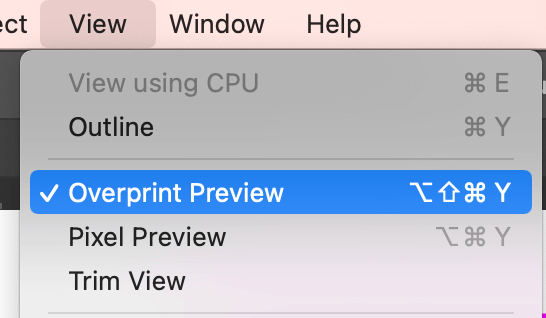
Before sending your artwork to print, you can preview how the colors, shadows, or other effects will look by choosing View > Overprint Preview.
Printed design can look different than the digital one, especially the colors. By previewing it ahead, you can adjust the settings closer to your ideal design.
Pixel Preview
Choose Pixel Preview when you want to see how your design will look on a web browser. It allows you to preview how objects will look when it’s rasterized.
Follow the same steps as other preview modes. Two clicks will get you there. Choose View > Pixel Preview.
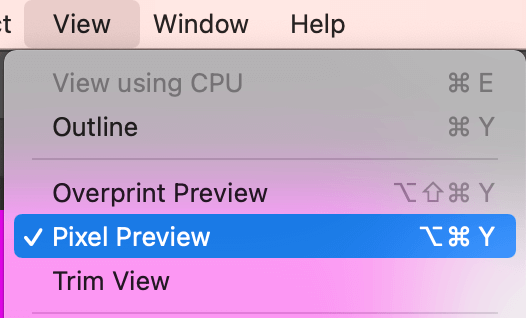
You can zoom in to see the individual pixel.
Trim View
The Trim View is the answer to viewing only the artwork within the artboard in Illustrator. You can choose Trim View with one of the preview modes above at the same time and of course, you can view the outline as well.
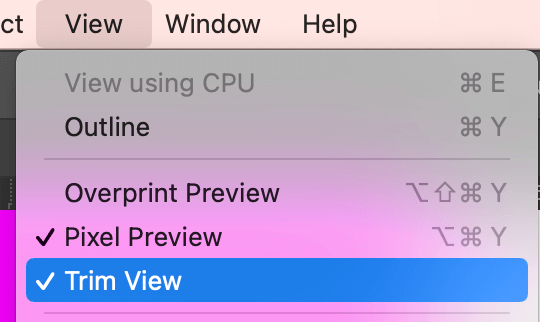
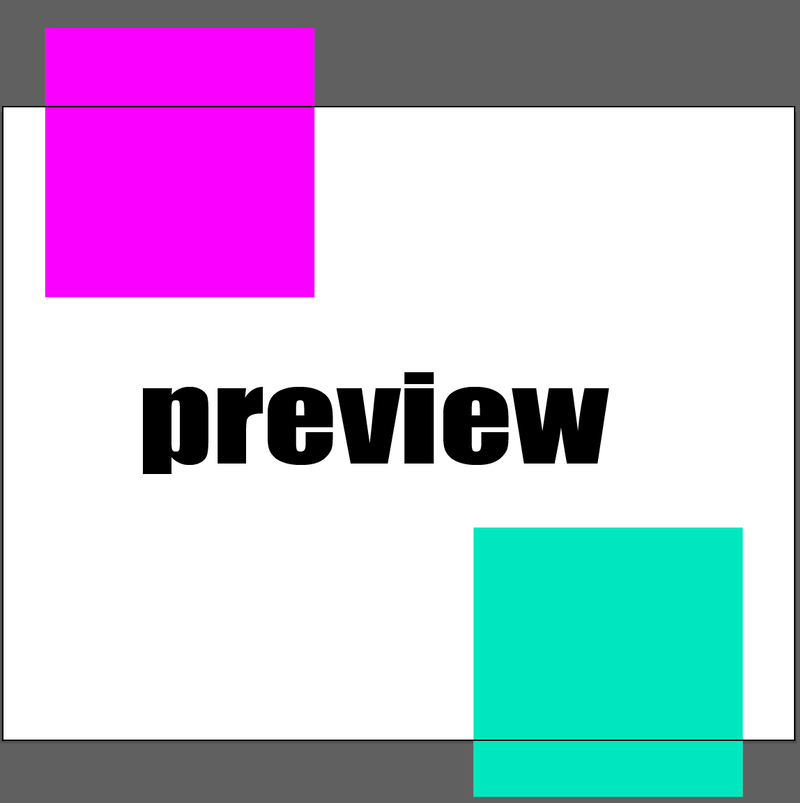
When we create graphic backgrounds, it is normal to have excess images outside the artboard. If you want to see how the design will look whether when it’s printed or published online, choose Trim View from the View dropdown menu.
For example, the two rectangle shapes are larger than my artboard.
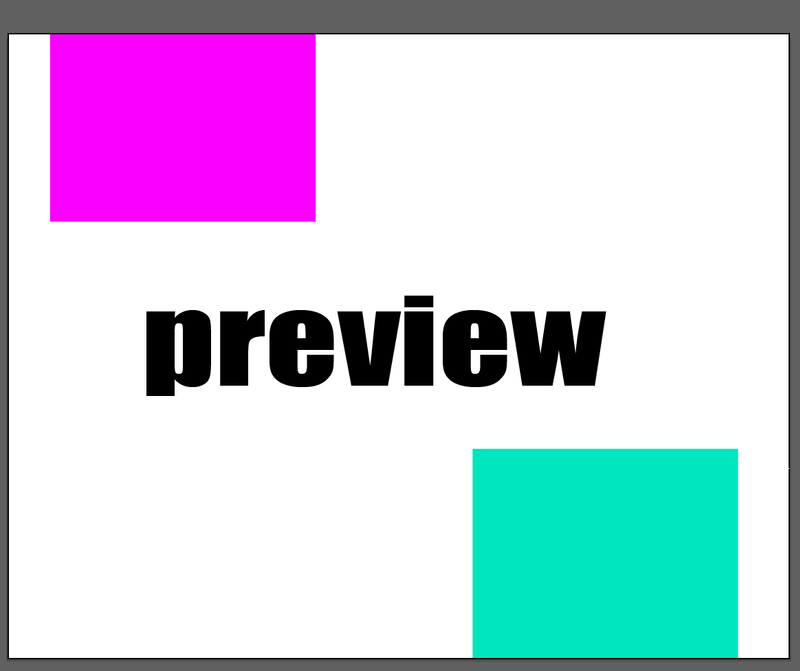
By choosing the Trim View, I can only see the part that’s inside the artboard.
Anything Else?
You may be interested in these questions about the preview mode in Adobe Illustrator as well. Check them out!
Adobe Illustrator Preview mode shortcut?
The most commonly used Outline Preview mode keyboard shortcut is Command + Y (Ctrl + Y on Windows). You can turn on and off the outline mode using the same keyboard shortcut.
What is GPU Preview in Adobe Illustrator?
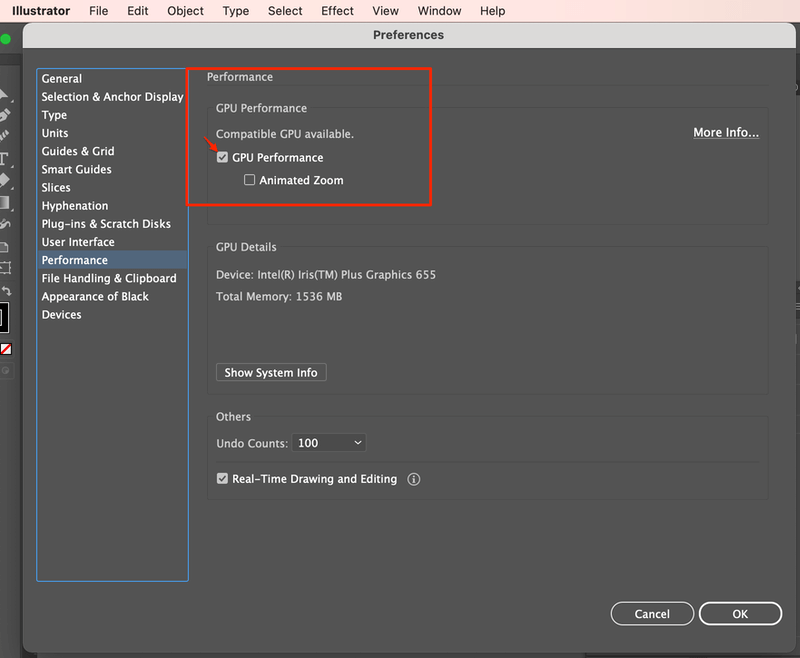
GPU is short for Graphics processing unit. It was originally designed to speed up the graphics rendering process. You can turn on GPU preview from the overhead menu View > View using GPU.
You can enable or disable GPU Performance from the Illustrator Application menu > Preferences > Performance > GPU Performance, check the box to enable, or uncheck the box to disable.
How do I turn off Preview mode in Illustrator?
Got stuck in the preview mode? It’s true that many designers ran into this problem, including myself.
99% of the time the keyboard shortcut (Command + Y) works, but when you happen to be in the 1%, try clicking the eyeball icon on the Layers panel while holding the Command key. You should be able to turn off the preview mode.
Wrapping Up
Before saving, printing, or publishing your final design, it’s important to preview it if you want to avoid anything unexpected such as color differences, positions of the background images, etc.
The Preview mode allows you to see and fix the problems that your design might have. I strongly recommend you do this extra step before turning in your creative work to show its maximum value.
JustACreativeLondoner
This was a great help! Seriously! almost started pulling my hair out. thanks for this well put together guide. Adobe in particular, it’s like tripping up and falling upward towards salvation sometimes.
June Escalada
You’re welcome 🙂