
We all start with a black-and-white version when we create a design. When it’s time to color, some might get stressed because of a lack of basic tool knowledge or a sense of color combinations.
I was the former case when I was a student. I always had the colors in mind but when it comes to execution, I had no idea what tool to use and how to make it happen.
After a few struggles, I put real effort into figuring out different tools and options, so I noted down some of the useful tips that I’d love to share with you to help you work with coloring in Adobe Illustrator.
In this tutorial, I’ll show you five ways to fill color in Adobe Illustrator with a couple of examples. Whether you’re coloring shapes, text, or drawings, you’ll find a solution.
Let’s dive in!
5 Ways to Fill Color in Adobe Illustrator
You can use different ways to fill color in Adobe Illustrator, if you have a specific color in mind, the quickest way is to input the color hex code. Not sure about the colors? Then try the Color guide or eyedropper to find sample colors. The paintbrush tool is good for illustrations.
Anyways, you’ll find a way to fill color for any design you create. Choose a method and follow the steps.
Tip: If you’re not sure where to find the tools, read this article I wrote earlier.
Note: the screenshots from this tutorial are taken from Adobe Illustrator CC Mac version. Windows and other versions can look different.
Method 1: Fill & Stroke
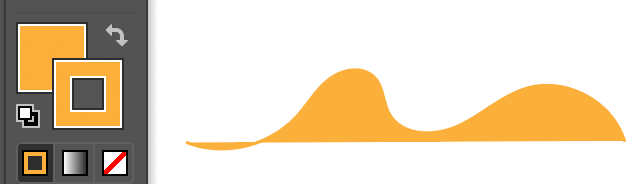
You can see the Fill and Stroke options at the bottom of the toolbar. As you can see now the Fill is white and the Stroke is black.
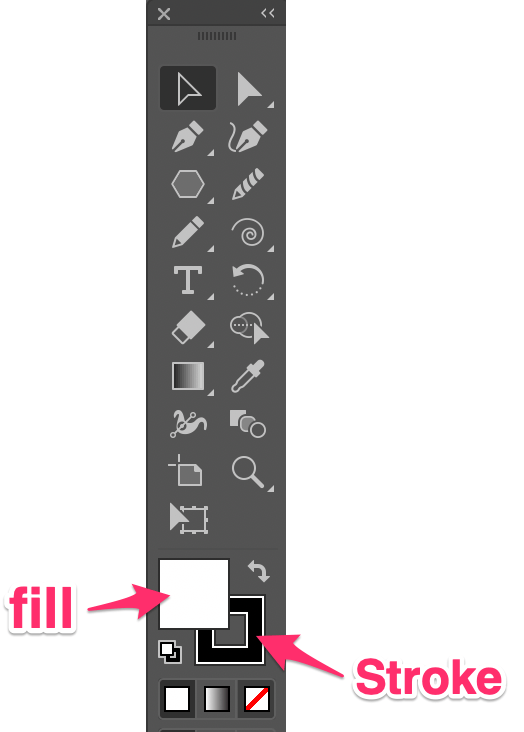
The colors change depending on the tools you use. When you create a shape, the fill and stroke colors remain the same. For example, if you use the Type Tool to add text, the Stroke color will automatically change to None, and the Fill will change to black.
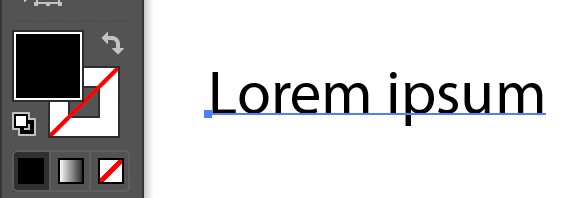
Want to fill it with another color? You can do it in two steps.
Step 1: Select the text and double-click on the Fill box.
Step 2: Choose a color from the Color Picker. Move the slider on the color bar to find a base color and you can click on the Select color area to choose a color.
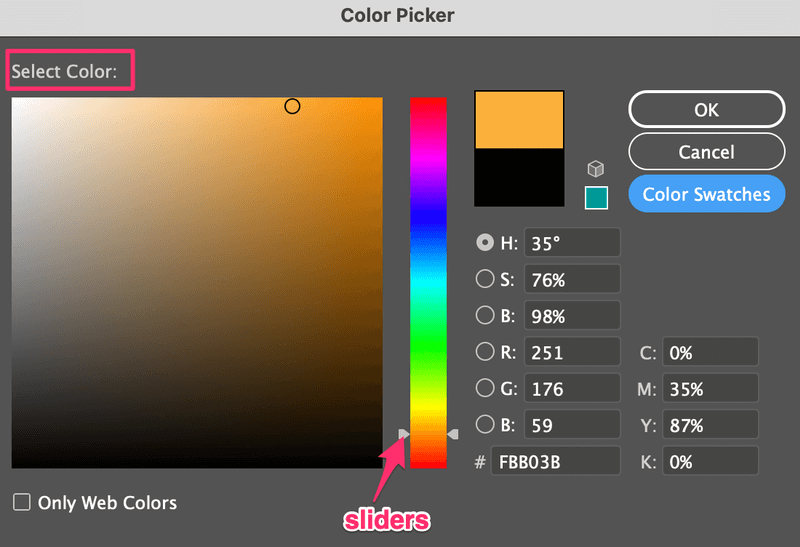
If you already have a specific color in mind and have the color hex code, input it directly where you see a box with a # sign in front.

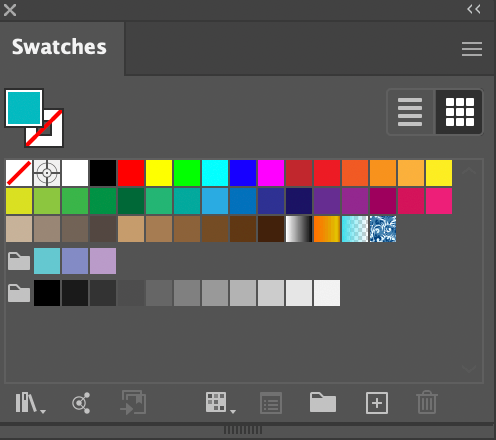
You can also click on Color Swatches and choose a color from there.
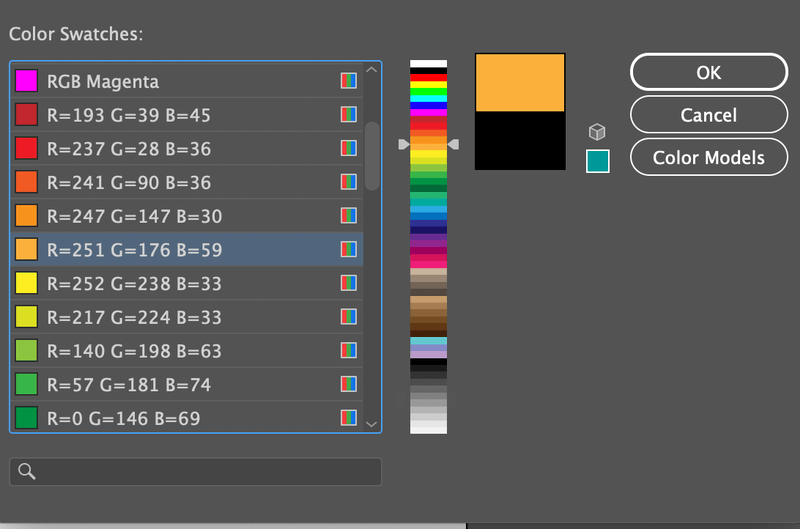
Click OK and your text will be filled with the color you just picked.

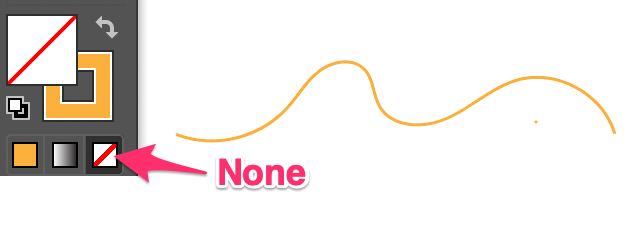
Now if you use the Pencil Tool or Paintbrush Tool to draw, it will automatically add a stroke color to the path you draw.
If you only want the stroke and don’t want the fill, click on the Fill box and click None (it means Fill color: None). Now you should see the stroke color only.
Method 2: Eyedropper Tool
If you want to use some colors from an image, you can sample the colors using the eyedropper tool.
Step 1: Place the sample image in Adobe Illustrator. For example, let’s sample the colors of this cupcake image and fill the shapes with some of its colors.

Step 2: Select the object you want to fill. Let’s start with the circle.
Step 3: Select the Eyedropper Tool (keyboard shortcut I) from the toolbar and click on a color you like on the image.
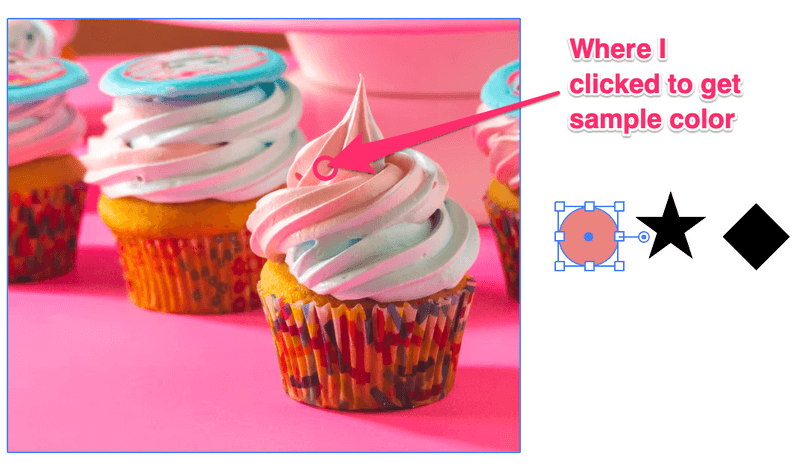
Repeat the same steps to fill in other colors.

Method 3: Color Panel/Swatches
The Color panel is similar to the Fill & Stroke option. You’ll be choosing a color from a color palette or inputting the CMYK or RGB values. Open the Color panel from the overhead menu Window > Color.
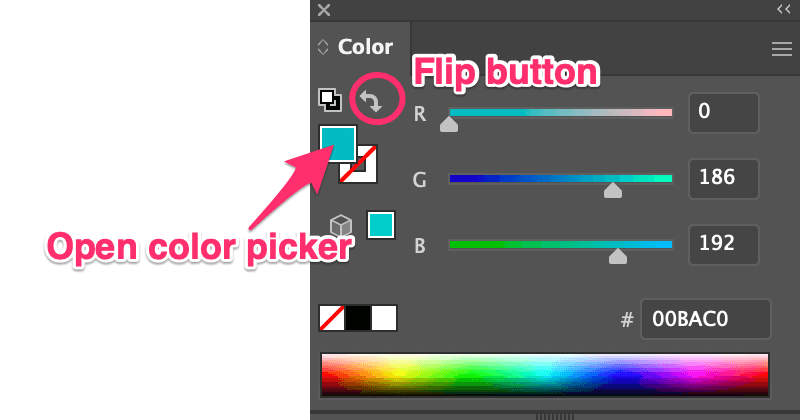
Simply select the object and move the sliders or input the color hex code to choose a fill color. You can also open the Color Picker by double-clicking the color box. If you want to add stroke color, click the flip button.
Want to fill a preset color? You can open the Swatches panel from Window > Swatches, select your object and choose a color from there.
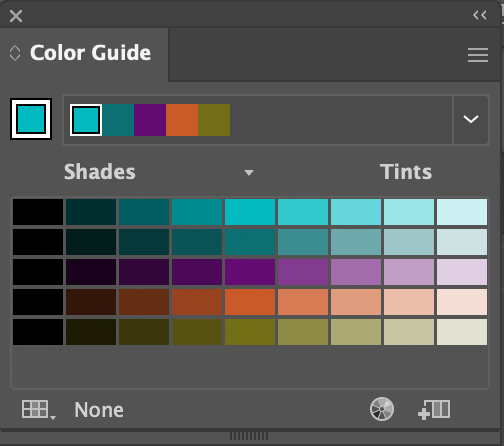
Tip: Not sure what’s the best color combination, you can try the Color Guide. Open the Color Guide panel from Window > Color Guide and it shows color tones and possible combinations.

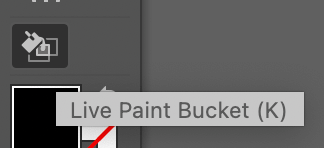
Method 4: Live Paint Bucket
This tool might not show on the basic toolbar but you can quickly open it from the Edit Toolbar menu or hit the K key to activate it.
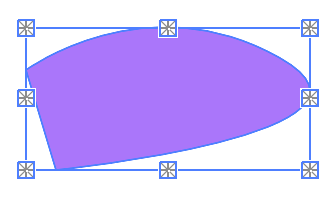
Step 1: Select the object you want to fill with color.
Step 2: Press the K key to activate the Live Paint Bucket. When you hover the pointer on the selected object, you’ll see “Click to make a Live Paint group”.
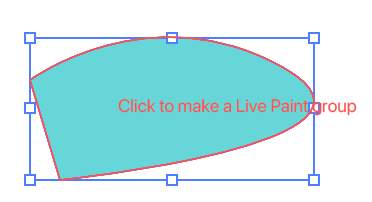
Step 3: Choose a fill color from the Color Picker and click on the object you selected. For example, I selected a purple color so I fill the shape purple.
Method 5: Paintbrush Tool
Still remember in one of your first drawing classes when you learned to use color pencils to fill color within the outlines? Same idea. In Adobe Illustrator, you’ll be filling colors with the paintbrush tool. This method works best when you are coloring open paths.
Let’s look at an example of a freehand drawing.

As you can see there are many open paths, so when you fill color, it wouldn’t fill the entire shape. It fills the path (stroke) instead.

I’m not saying that it looks bad, I actually like this random style as well, but if you want to color it following the outline, the paintbrush tool can do a better job. Because you can precisely draw on the area you want to color.
Simply select the Paintbrush Tool (keyboard shortcut B) from the toolbar, choose a stroke color and brush style, and start coloring. See, another advantage is that you can choose the brush style. For example, I chose an artistic drawing brush from the Brush Library.

You can get creative blend colors in the same shape as well. I love using this method to color illustrations.
You Got This!
We would normally use the Fill & Stroke from the toolbar to fill colors, but if you’re not sure about the color combinations, using sample colors and the color guide can be helpful for getting started. The paintbrush tool is good for filling the colors of a drawing.
But there are no set rules, and you can also combine all methods to make something awesome!
Danielle
Thanks for all your tips on using Adobe Illustrator! I’ve read a few of your articles today and they’ve been very helpful, it stopped me from banging my head against a wall!!!
June Escalada
You’re welcome, Danielle.
Hehe, don’t give up! You’ll get there 😉
sdasdasdasddasd
how to fill with an image (if its not possible say you cant) in ai 2020?