I’ve been using Adobe Illustrator for more than ten years now and I created so many icons and logos using shape tools, especially the rectangle, and ellipse tools.
A heart has a curve, you’re probably thinking about using the ellipse tool to make it, right? You surely can but today I’m going to show you how to make a heart using the rectangle tool. Trust me, it’s easier and quicker.
In this tutorial, you will learn three quick and easy ways to create different heart shapes in Adobe Illustrator and how to save them for future use.
You’re probably wondering how can you use a rectangle to make a heart shape or heart icon, yeah, it does sound weird. But, you’ll see!
3 Ways to Make a Heart in Adobe Illustrator (Different Styles)
Whether you want to make a perfect heart icon or add some love to your illustration-style poster, you’ll find solutions for both. There are multiple ways to create a heart shape in Adobe Illustrator but knowing these three should be more than enough.
Note: Screenshots are taken from Adobe Illustrator CC Mac version. Windows or other versions might look slightly different.
Method 1: Rounded Rectangle Tool + Pathfinder Tool + Shape Builder Tool
You can create a perfect heart shape using this method! The steps might seem a bit long and complicated but trust me, it’s super easy to follow.
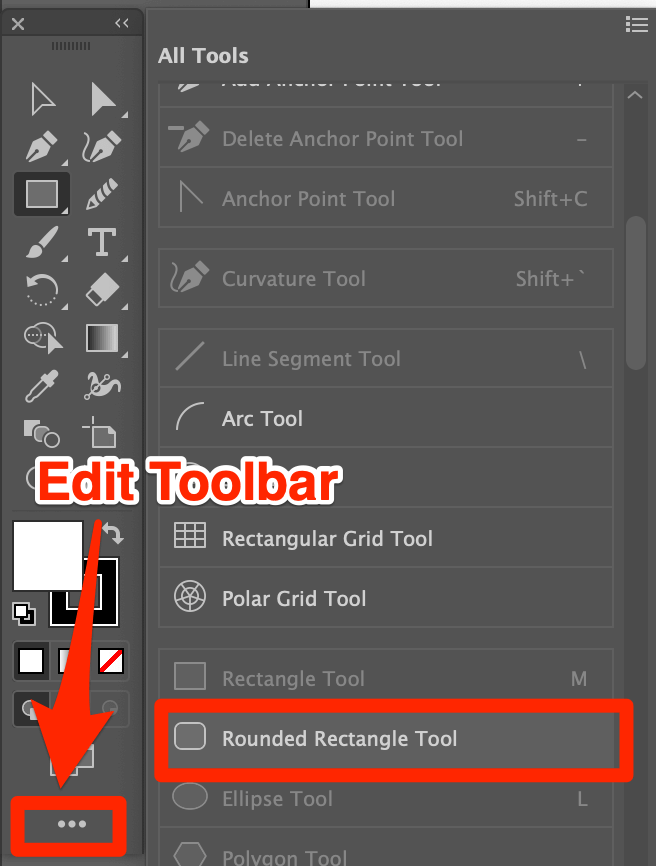
Step 1: Select the Rounded Rectangle Tool. If it’s not on your toolbar, you can find it from the Edit Toolbar menu, click and drag it to the toolbar. I would suggest putting it together with other shape tools.
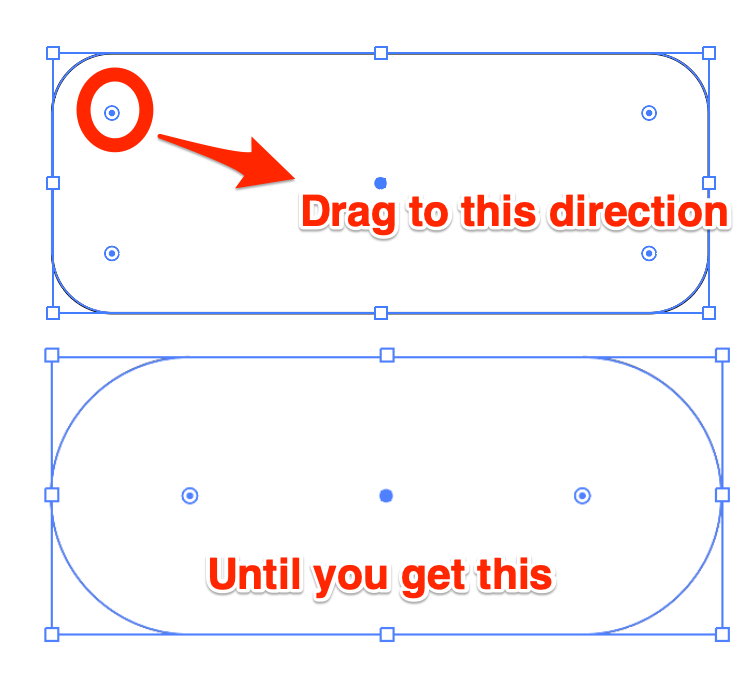
Step 2: Click on your artboard and drag to draw a rounded rectangle. Click on one of the small circles near the corner edges and drag it toward the center to make it as round as possible.
Step 3: Rotate it at a 45-degree angle and duplicate the rounded rectangle.
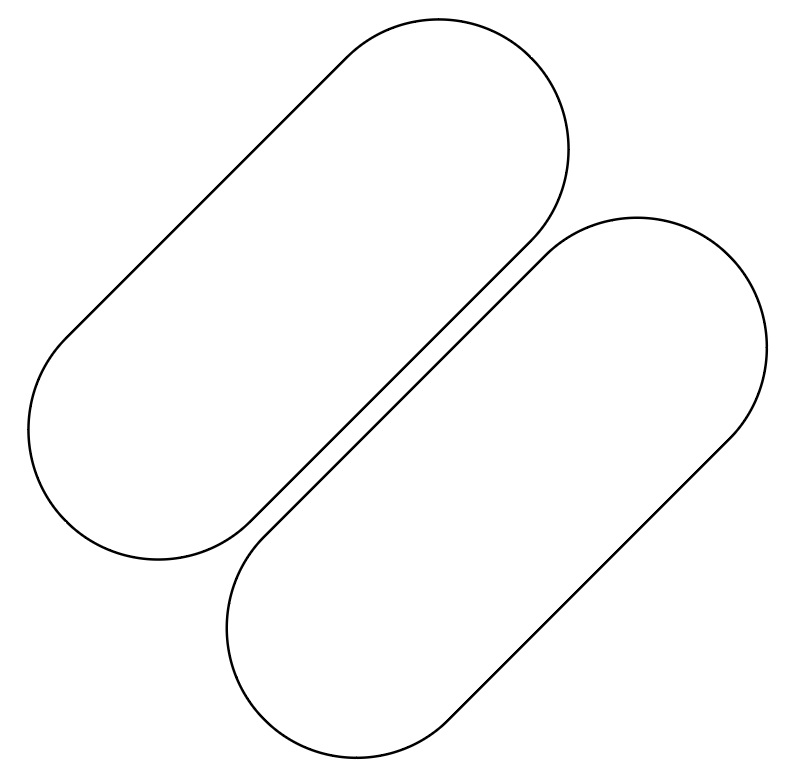
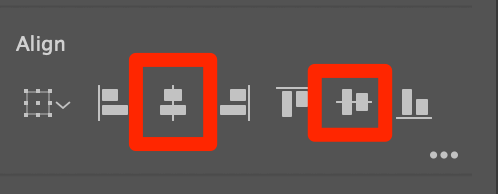
Step 4: Select both shapes. Align the two rounded rectangles horizontally and vertically to the center.
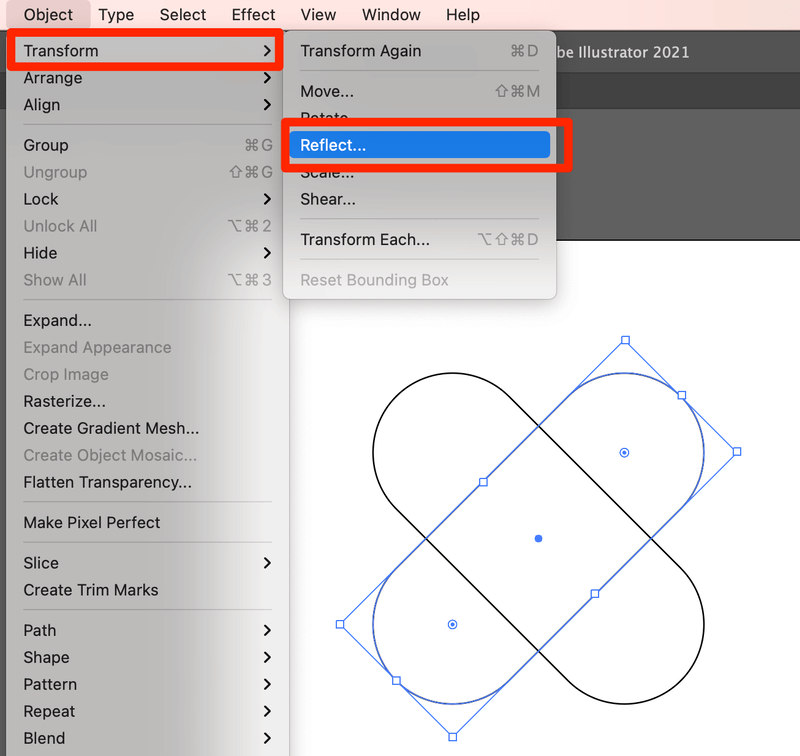
Step 5: Select one of the shapes and go to Object > Transform > Reflect.
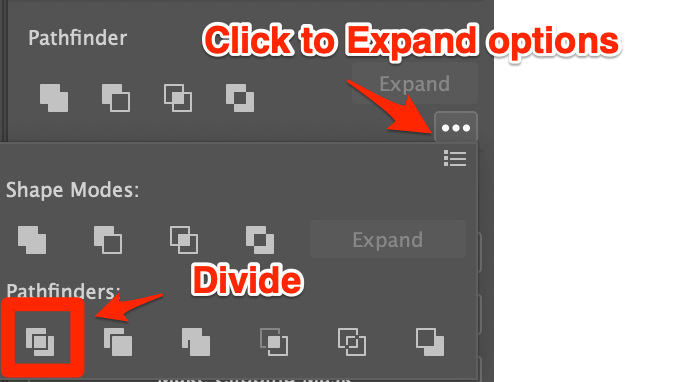
Step 6: Select both shapes and you will see the pathfinders on the Pathfinder panel. Click the expanded menu to see more options and select Divide.
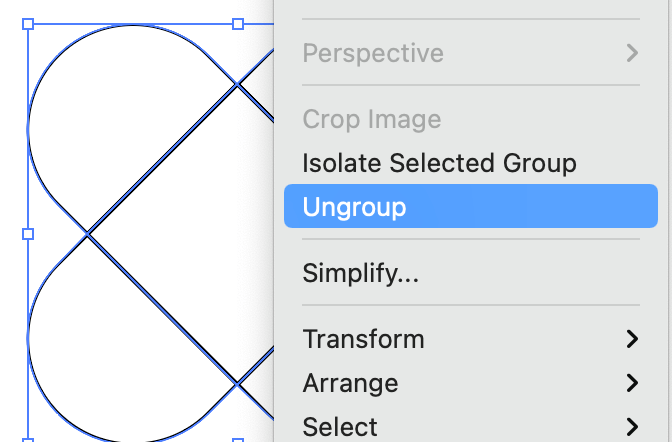
Step 7: Right-click on the shape and select Ungroup.
Step 8: Select the two half-circle shapes at the bottom and delete them.
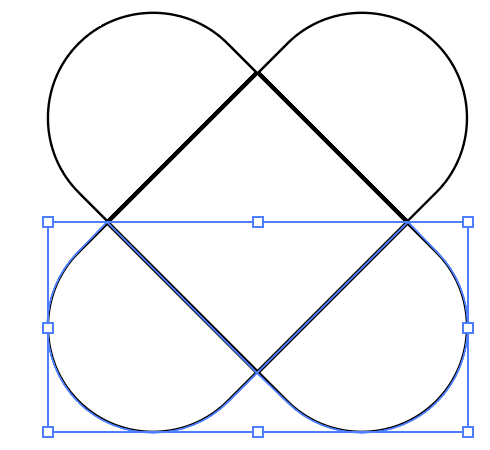
Now you can see a heart shape.

Step 9: Select the Shape Builder Tool to combine shapes.
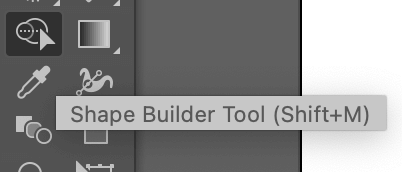
Step 10: Click and drag through the shape. The shadow areas are the shape you’re combining.
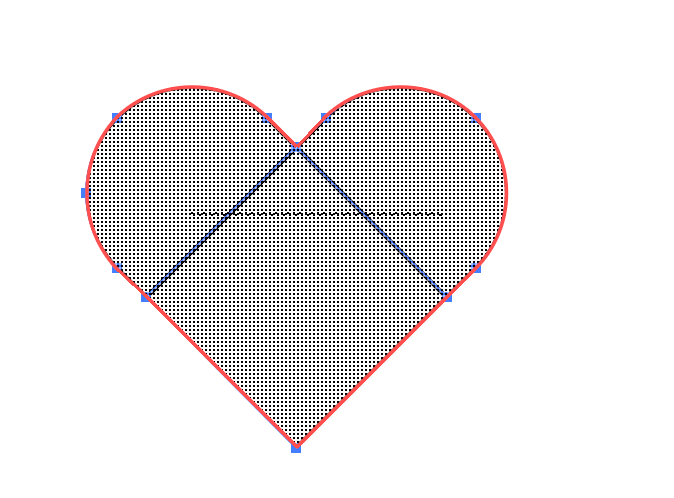
There you go!
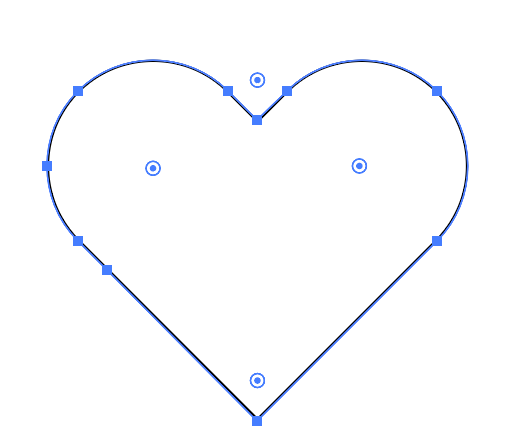
Now you can fill it with any color you like!
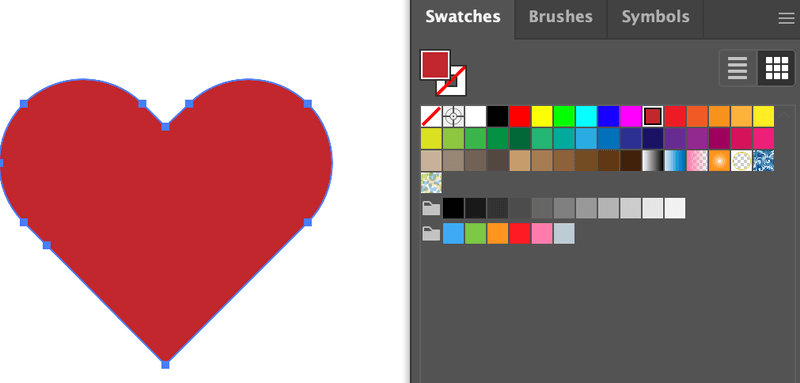
Method 2: Rectangle Tool + Anchor Point Tool
This is the quickest way to make a heart shape. All you have to do is create a square, and use the Anchor Point Tool to make some curves!
Step 1: Select the Rectangle Tool.
Step 2: Hold down the Shift key, click on your artboard and drag to make a square shape.
Step 3: Rotate the square 45 degrees.

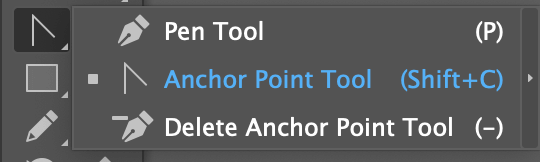
Step 4: Select the Anchor Point Tool that’s hidden under the Pen Tool.
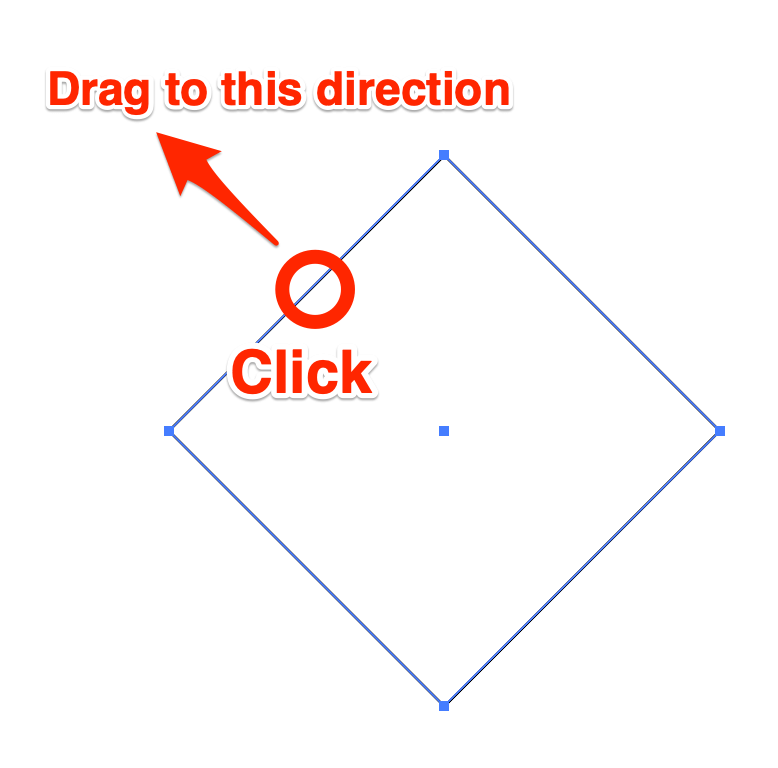
Step 5: Hold the Shift key, click on the top left side of the tilted square, and drag to the top-left direction.
Repeat the same for the right side, but drag to the top right direction and you’ll get a heart shape 🙂
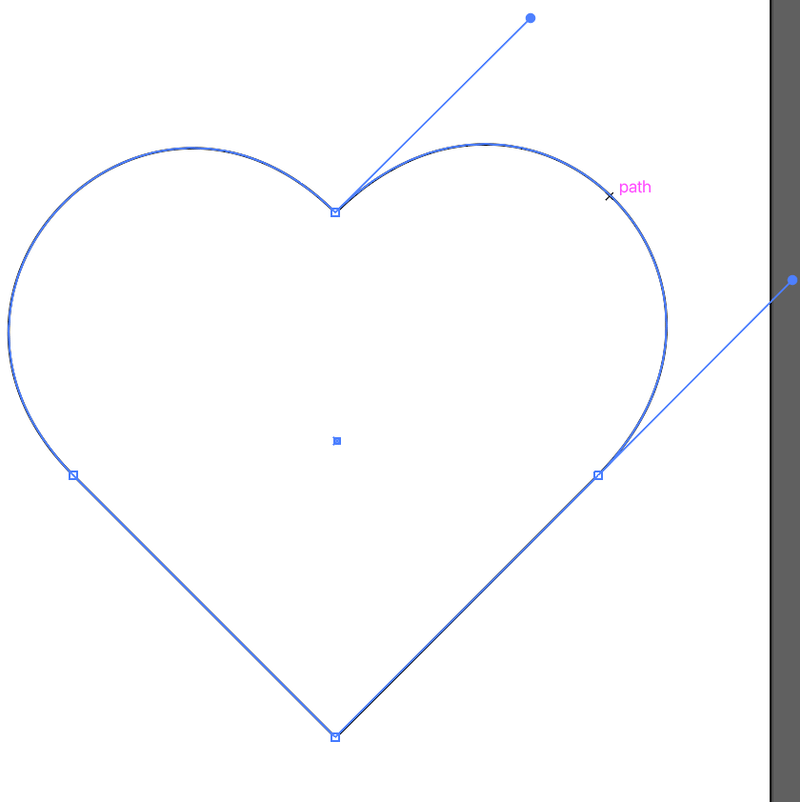
Tips: Turn the smart guides on so that you can see if both curves are on the same level.
Method 3: Pencil Tool
You can quickly create a freehand drawing heart shape using this method that it’s awesome for illustration-style design.
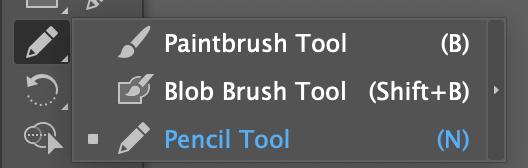
Step 1: Select the Pencil Tool (Keyboard shortcut N), if you don’t see it on the toolbar, usually it’s hidden under the Paintbrush Tool.
Step 2: Click on the artboard and draw a heart shape. Remember to close the path.
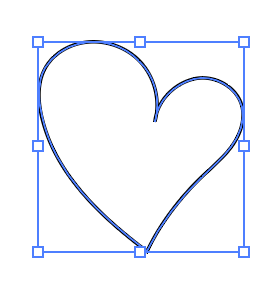
Tips: If you’re not happy with the curves, you can edit curves using the Direct Selection Tool, Anchor Point Tool, or Curve Tool.
You can also add color to the heart shape.

Anything Else?
Below are some common questions that designers have about creating a heart shape in Adobe Illustrator. Do you know the answers?
How can I save a heart shape in Illustrator?
You can save the heart as a symbol in Illustrator. Go to the overhead menu Window > Symbol, and the symbols panel will show and you can drag the heart onto the panel.
Another way is to save it as an SVG file on your computer and you can easily open it in Illustrator to edit or use it.
See Also: Free Heart SVG Collection
Can I edit the heart shape in Illustrator?
If it’s a vector file, yes, you can change the color of the heart, add a stroke, or edit the anchor points of the vector heart shape. But if it’s a raster image of a heart, then you cannot directly edit the heart shape.
How to save a heart shape in SVG format?
The default Save As format in Adobe Illustrator is always .ai. If you want to save it as SVG, when you save your file, click on the Format option and change it to .svg.
That’s Pretty Much It
You can make any style of heart SVG in Adobe Illustrator. The quickest way to get a heart icon is using the rectangle tool method, and if you’re creating a hand-drawing style design, using the pencil tool method should get you a better result.
Have fun creating!
Mansfield Nielan
It’s very helpful to me but can you please try and do a few PDF file? So we can grab our copy
Geri Kabala
You wrote a great tutorial, thank you! I’m three weeks into my graphic design program, and your first example worked like a charm.
June Escalada
Hey Geri! Welcome to the graphic design world! If yoy’re interested to learn more, I have an Illustrator beginner’s course coming out very soon 🙂