
Can’t seem to draw your ideal wavy line using either the pen tool or pencil? I feel you. Don’t worry, you won’t need them and you’ll have a guaranteed perfect wavy line. All you have to do is draw a straight line and apply an effect.
In this tutorial, you will learn how to make three different types of wavy lines in Adobe Illustrator, including how to make a wavy line from a straight line. If you want to make some cool wavy line effects, stick with me to the end.
Let’s get on the waves!
3 Ways to Make a Wavy Line in Adobe Illustrator
The easiest way to create a classic wavy line is to use the Zig Zag effect which you can find under the Distort & Transform option. If you want to get creative and make different types of wavy lines, you can use the Curvature Tool or Envelope Distort to make something fun.
Note: the screenshots from this tutorial are taken from Adobe Illustrator CC Mac version. Windows or other versions can be different. Windows users change the Command key to Ctrl.
Method 1: Distort & Transform
Step 1: Use the Line Segment Tool (\) to draw a straight line.


Step 2: Go to the overhead menu and select Effect > Distort & Transform > Zig Zag.
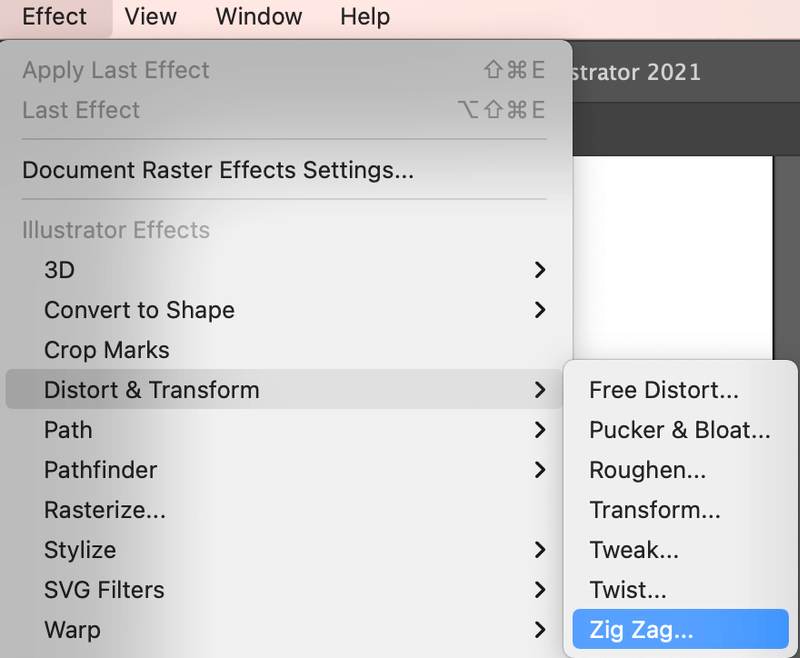
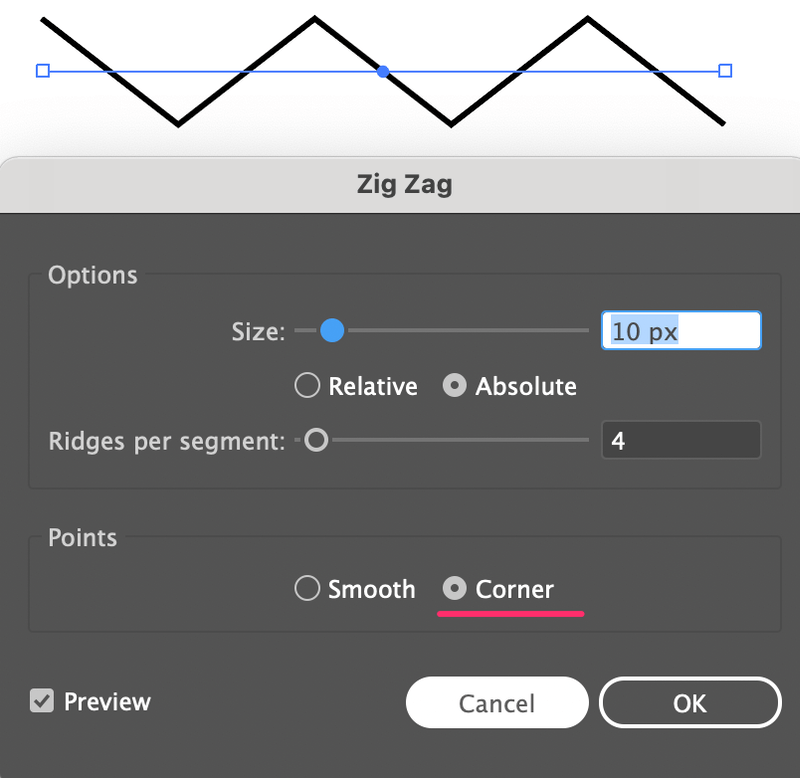
You’ll see this box and the default zig-zag effect (the Points option) is Corner.
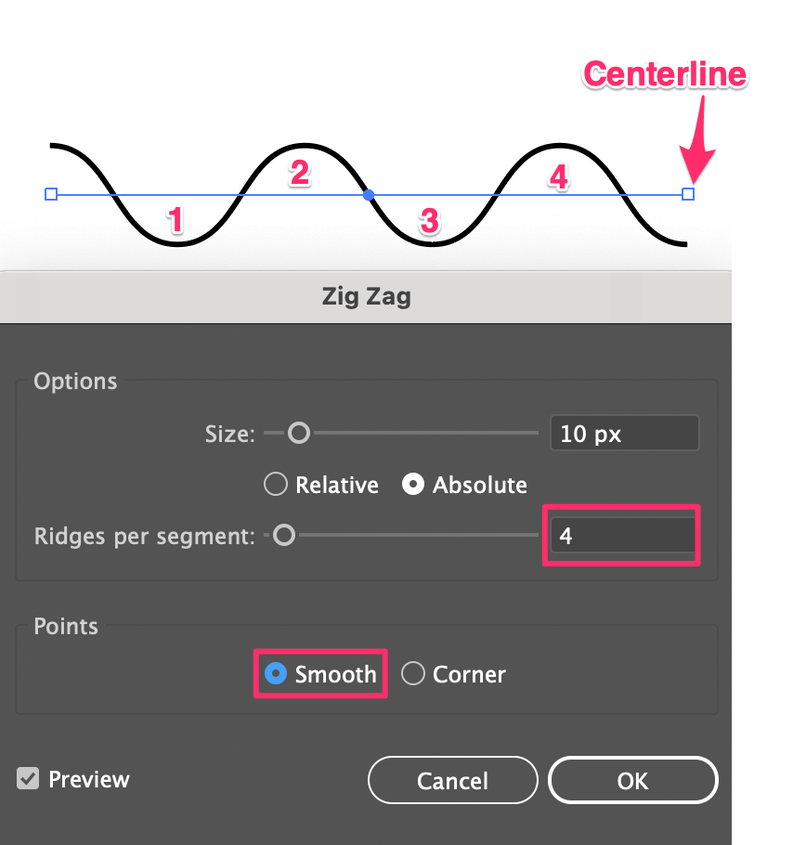
Step 3: Change the Points option to Smooth. You can change the Size and Ridges per segment accordingly. Size determines how far the wave will be from the centerline, and Ridges per segment sets the number of waves. Look at the comparison below.
This is the default setting, with 4 ridges per segment.
This is what it looks like when I increase Ridges per segment to 8 and I decrease the size by 2 px so the waves are smaller and closer to the centerline.
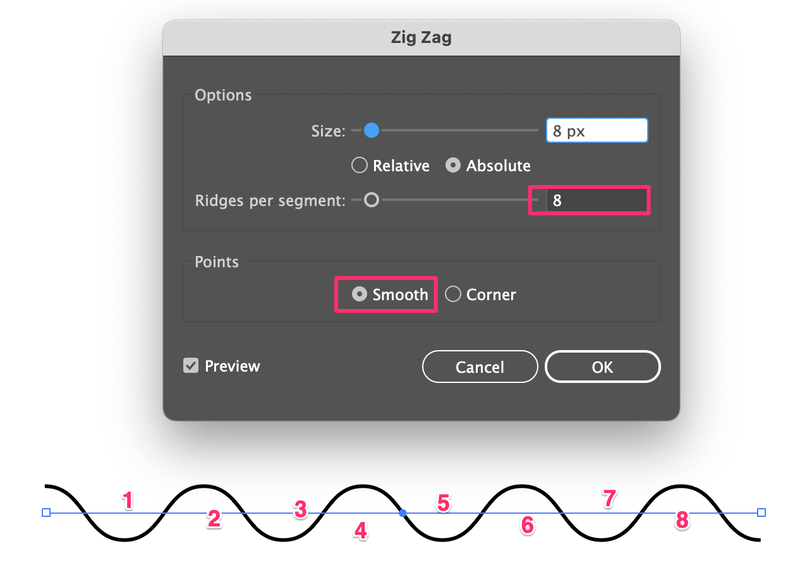
Got the idea? When you decrease the size, the wavy line will get “flatter”.

Method 2: Curvature Tool
Step 1: Start with a line. Use the Line Segment Tool or Pen Tool to draw a line. It can be curved or straight because we’re going to curve it to make waves anyways. I’ll continue with the example of using a straight line.
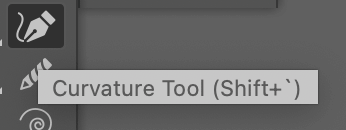
Step 2: Select the Curvature Tool (keyboard shortcut Shift + `).
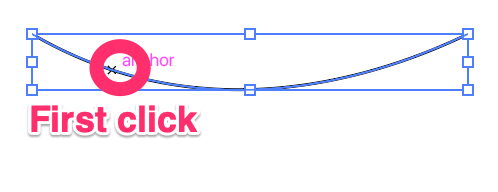
Step 3: Click on the straight line and drag it up or down to make a curve. As you click, you add anchor points to the line. So I added one anchor point on my first click and I dragged it down.
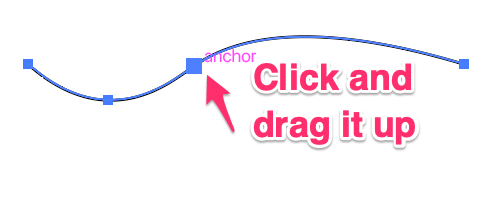
Click on the line again and drag the anchor point up or down to create a wave. For example, the first anchor point I dragged down, so now I’m going to drag it up.
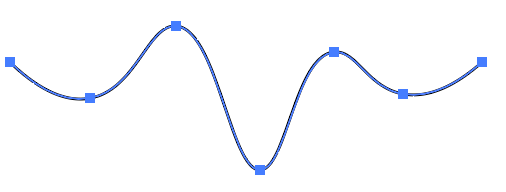
The wave is starting to form. You can click multiple times depending on how wavy you want the line to be and you can move around the anchor points to make dramatic wavy lines.
Method 3: Envelope Distort
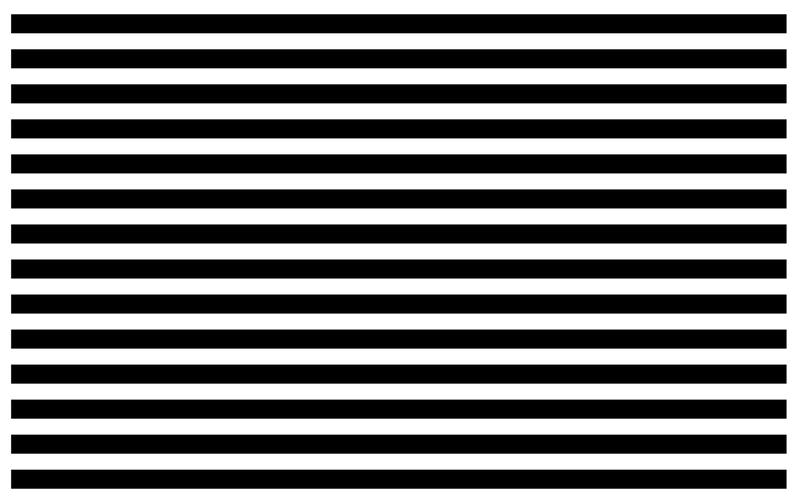
Let’s have some fun with this method. Let’s use the rectangle tool to create a line.
Step 1: Select the Rectangle Tool (keyboard shortcut M) from the toolbar and create a long rectangle. Something like this, that looks like a thick line.

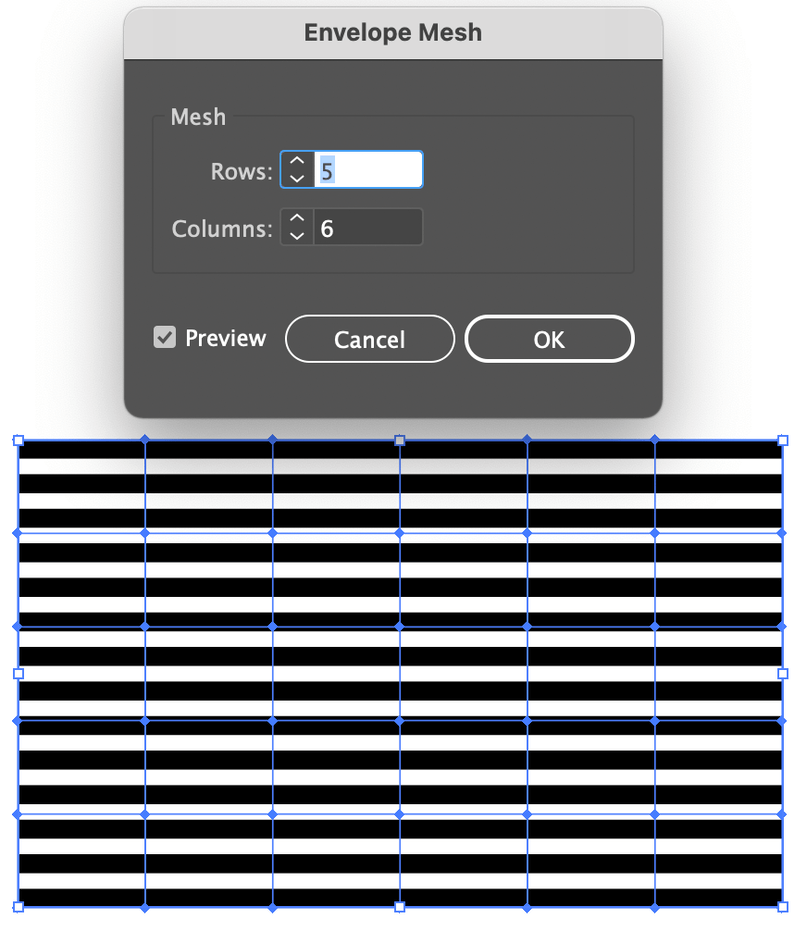
Step 2: Duplicate the line (rectangle).

Select the duplicated line and hold Command + D (keyboard shortcut for step and repeat)to repeat the action and make multiple copies of the line.
Step 3: Select all lines, go to the overhead menu and select Object > Envelope Distort > Make with Mesh.

Choose the columns and rows and click OK. The more columns you add the more waves you get.
Step 4: Select the Direct Selection Tool (keyboard shortcut A) from the toolbar, and click and drag to select the first two columns. When the columns are selected, you will see anchor points on the rows.
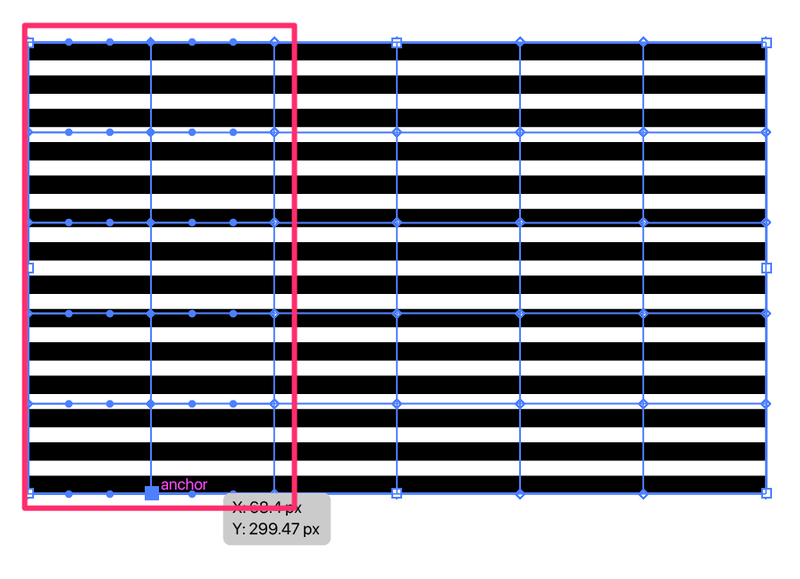
Click on the anchor point of the line between the two columns and drag it down, you’ll see that all rows will follow the direction.
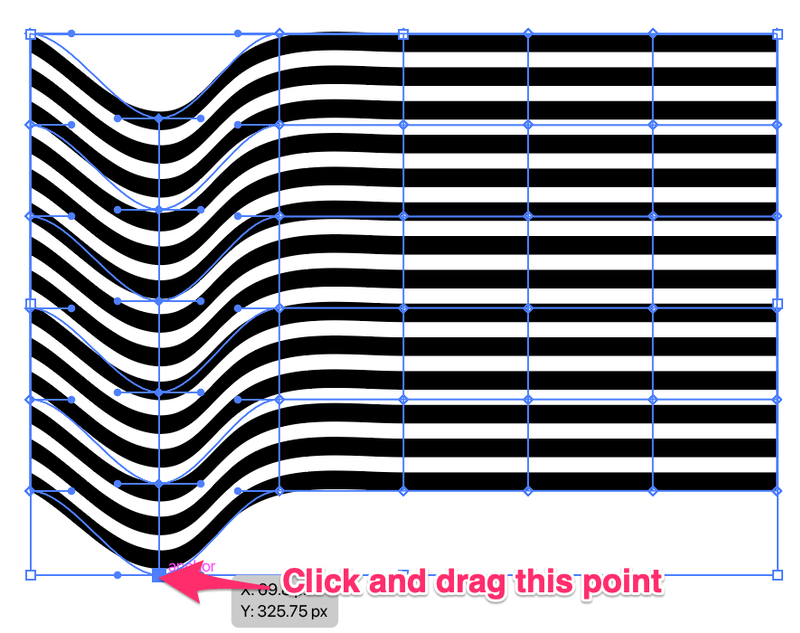
Step 5: Select the next two columns and repeat the same step.
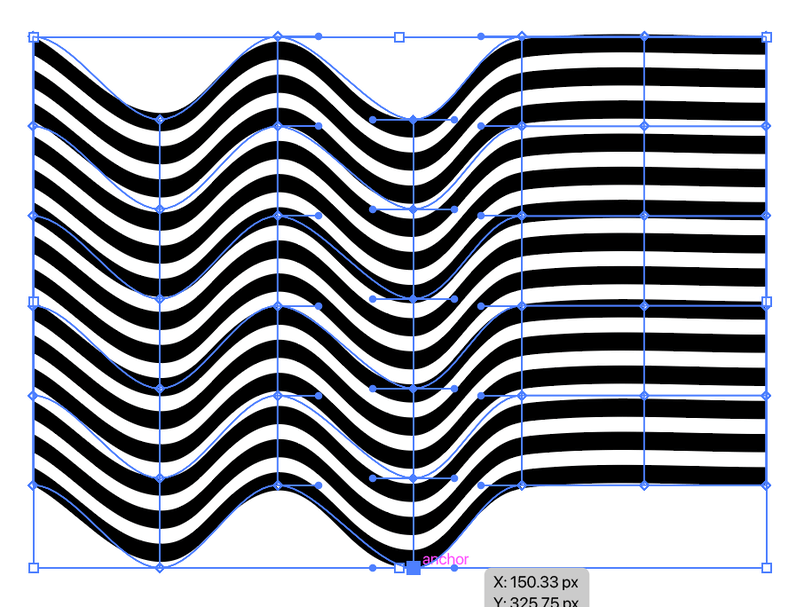
Now you know what to do. That’s right! Select the last two columns and repeat the same step.
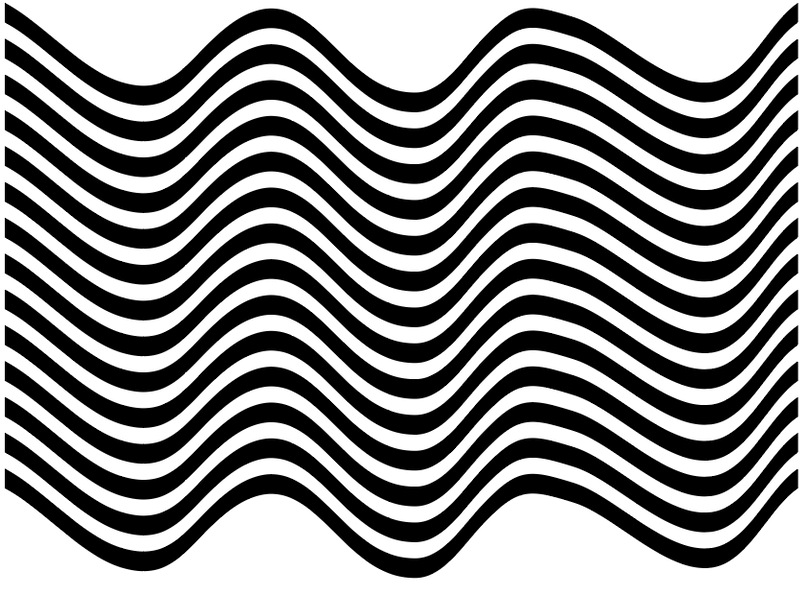
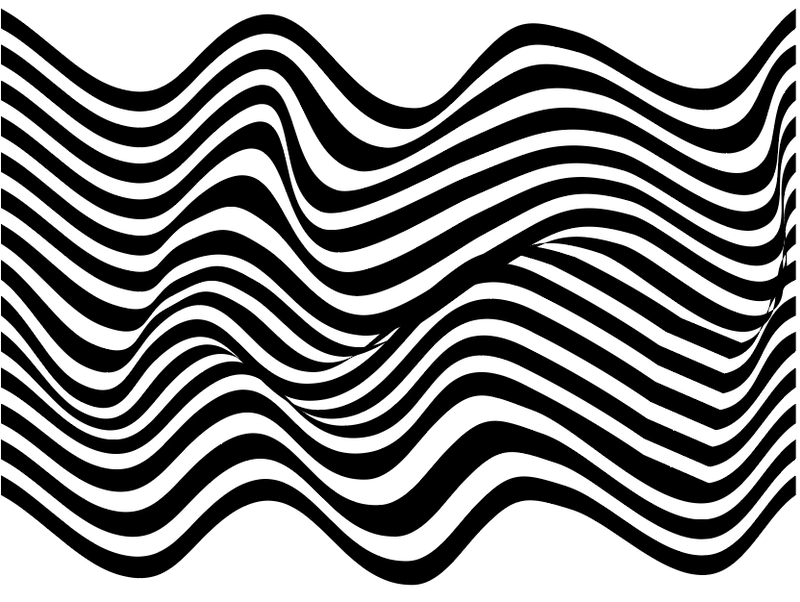
That’s it! Now if you want to have some more fun with the wavy lines, you can click on individual anchor points on the rows and columns to make some cool effects.
How about this?
Wrapping Up
If you want to make a wavy line with identical waves, the Zig Zag effect would the best option because it’s easy and quick. All you have to do is select the smooth corner and adjust the number and size of the waves.
If you want to create some random wavy lines, you can have fun with Method 2 and Method 3. I personally love using Make with Mesh because of the effect it creates.
What’s your favorite method? Leave a comment below and let me know.
King Solomon
Very interesting and may God reward you June Esc