
There are many ways to create shapes in Adobe Illustrator. You can use the draw shapes from scratch, use the Pen Tool to trace an image to create shapes, group objects to make a new shape, and of course, use the Shape Builder Tool.
So what is the Shape Builder Tool and how does it work?
Shape Builder Tool is usually used to combine multiple overlapping shapes. Besides that, you can also merge, erase, and subtract shapes. It’s quite easy to use. All you need to do is select the shapes and use the Shape Builder Tool to draw through the shapes.
In this tutorial, you’ll learn what can you do with the Shape Builder Tool and how to use it.
Note: The screenshots from this tutorial are taken from Adobe Illustrator CC Mac.
How to Use the Shape Builder Tool in Adobe Illustrator
Before getting started, note that the Shape Builder Tool only works with closed paths, so make sure the shapes and lines are intersecting/overlapping. You can turn on the preview mode as you design to see it clearly.
If you don’t know where the Shape Builder Tool is in Adobe Illustrator, you can find it on the toolbar and this is what it looks like.
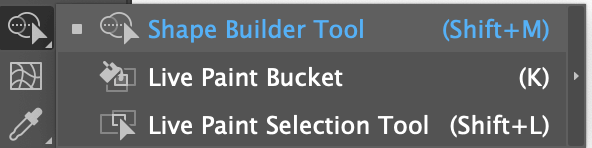
Or you can use the Shape Builder Tool keyboard shortcut Shift + M to activate it.
I’m going to show you a couple of examples of how to use the Shape Builder Tool.
Merging Shapes
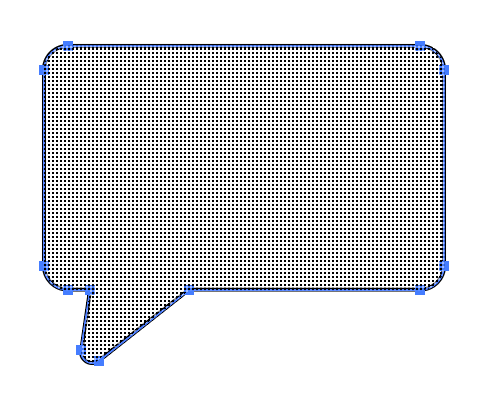
Here’s a simple but practical example. We all need to use a speech bubble or chat bubble at some point right? Instead of searching for a stock speech bubble icon, you can spend the same amount of time making your own.
Step 1: Create the shapes that you want to merge or combine. Depending on the shape of your bubble, create a rectangle, rounded rectangle, or circle (or anything else).
For example, I’m going to create a rectangle and a triangle with rounded corners.
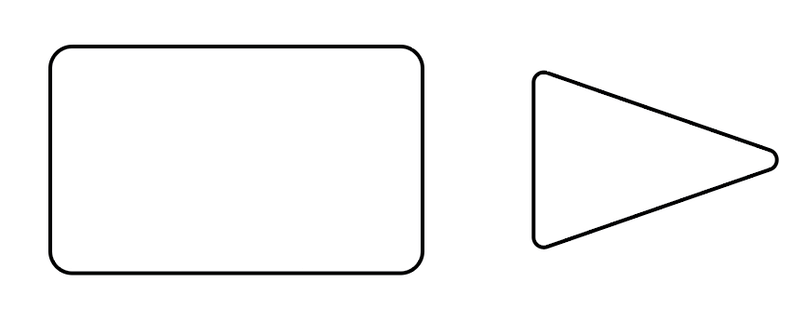
Step 2: Move and position the shapes to form the shape you want to create. Again, the paths/outline of the shape must be overlapping.
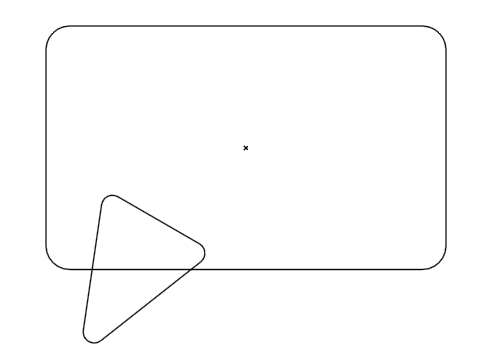
You can hit Command + Y or Ctrl + Y to preview whether the lines are overlapping and just hit the same shortcut again to go back to the normal working mode.
Step 3: Select the shapes you want to combine, choose the Shape Builder Tool on the toolbar, click on the first shape, and drag through the rest of the shapes you want to merge.
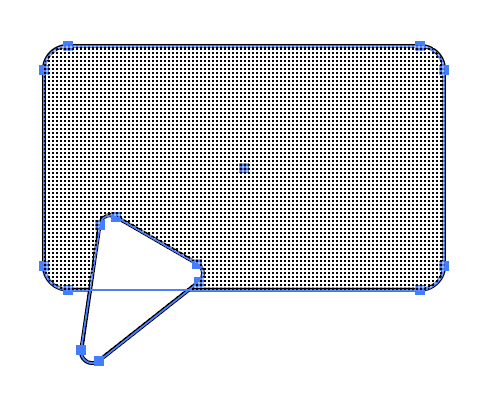
You’ll know where you’re drawing through based on the shadow area. For example, I start from the rounded rectangle and will draw through the rounded rectangle.
Once you release the mouse (or stylus if you’re using a graphic tablet), you’ll see the two shapes merged and you get a chat box/ speech bubble.
Tip: If you accidentally overdraw the area, hold the Option or Alt key to draw backward from where you started.
You can fill it with color, add text or other elements to this new shape.

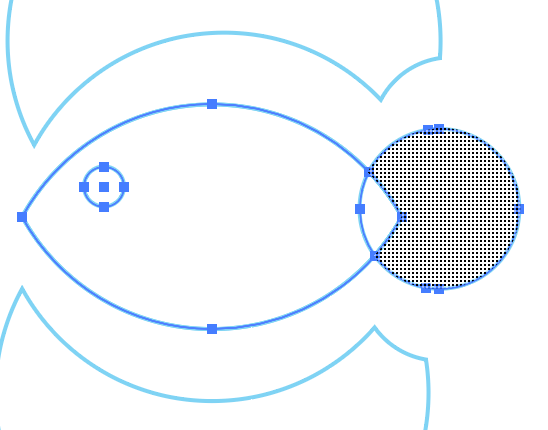
When you create more complex shapes, it’s not only about merging, sometimes you might want to delete part of the shape or subtract a shape and move it somewhere else.
Guess what I’m trying to create here.
No clue? You’ll see it later on. First I’ll explain how to use the Shape Builder Tool to erase and cut shapes.
Subtracting/Cutting Shapes
If you want to cut out part of the overlapping shape, simply select the shapes, activate the Shape Builder Tool, and click on the part you want to subtract/cut. When you click on an area, it becomes an individual shape.
For example, I’m going to cut and move the two big circles, so I simply click on them. As you can see, now I can move the parts I clicked on.

I guess you can kinda see what I’m trying to create now, right? 😉
Now, I’m going to merge some parts.
Then I can delete it right away or move it away just in case I want to use the shape later.
Erasing Shapes
Besides using the Eraser, you can also use the Shape Builder Tool to cut part of a shape by hitting the Delete button.
Select the parts subtracted and don’t need to use anymore, simply hit the delete key to erase them.
This is what’s left after I deleted the unwanted area.
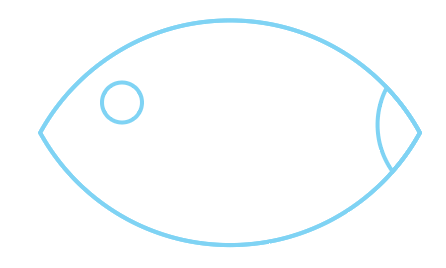
I know it doesn’t look like a fish yet. Now simply select the shape that’s supposed to be the tail, and flip it horizontally. Reposition a bit and you can merge the shapes again.
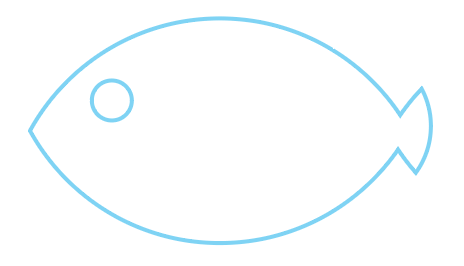
There we go. If you want to make a silhouette, you can also subtract the eye so that when you fill color, it won’t disappear. And of course, feel free to add more shapes.

Wrapping Up
It’s easy to use the Shape Builder tool to create new shapes. Remember the shapes or paths must be overlapping when you use the Shape Builder Tool. It has to be more than one shape, otherwise, even though it does show the shadow area when you choose the tool, it won’t combine or subtract shapes.