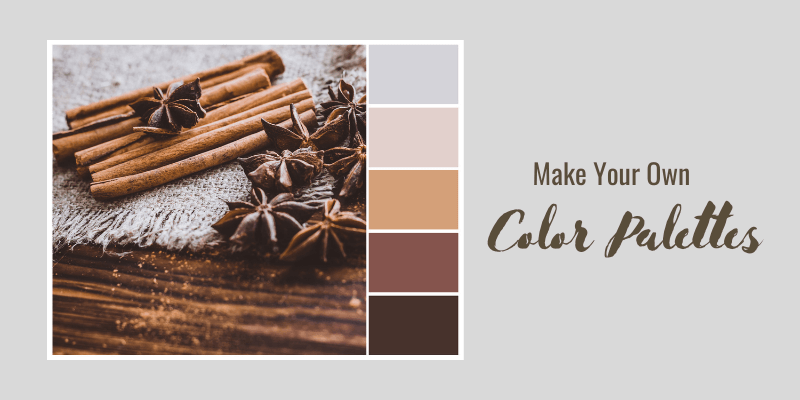
Making your own color palettes is super fun and it adds uniqueness to your design. Sounds great, but I understand that sometimes it’s hard to come up with ideas on our own, that’s when we’ll need some extra help.
Based on my experience as a graphic designer for more than ten years, I think the easiest way to come up with ideas is to get inspired by things around us, such as images or objects related to the projects that we do.
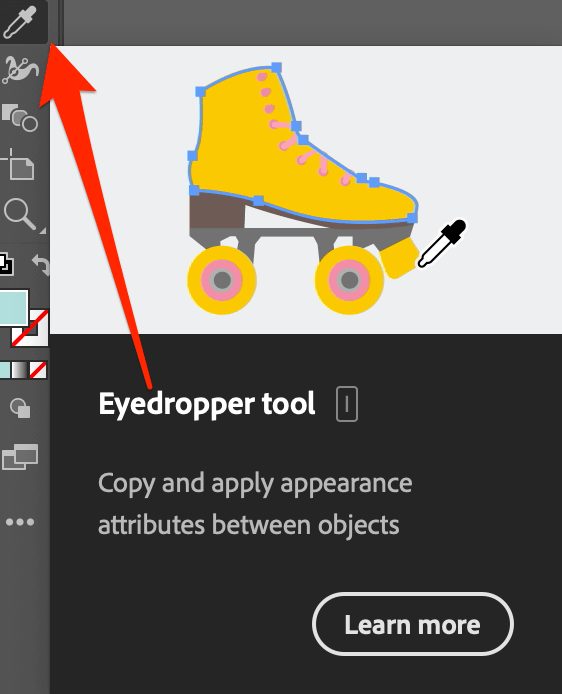
That’s why the Eyedropper tool is one of my favorites when it comes to making color palettes. It allows me to sample colors from images. However, if I want to create a nice blend of two colors, the Blend tool is definitely the go-to. If I really run out of ideas, there’s still an option – Adobe Color!
In this tutorial, I’m going to show you three useful ways to create a color palette in Adobe Illustrator using the Eyedropper tool, Blend tool, and Adobe Color.
Note: all screenshots from this tutorial are taken from Adobe Illustrator CC Mac version. Windows or other versions can look different. For keyboard shortcuts, Windows users change the Command key to Ctrl, Option key to Alt.
Method 1: Eyedropper Tool (keyboard shortcut I)
Best for: Making a color palette for branding projects.
The Eyedropper tool is used for sampling colors, which allows you to sample colors from any image and make your own color palette based on the image colors. This is actually a cool way to find colors for branding.
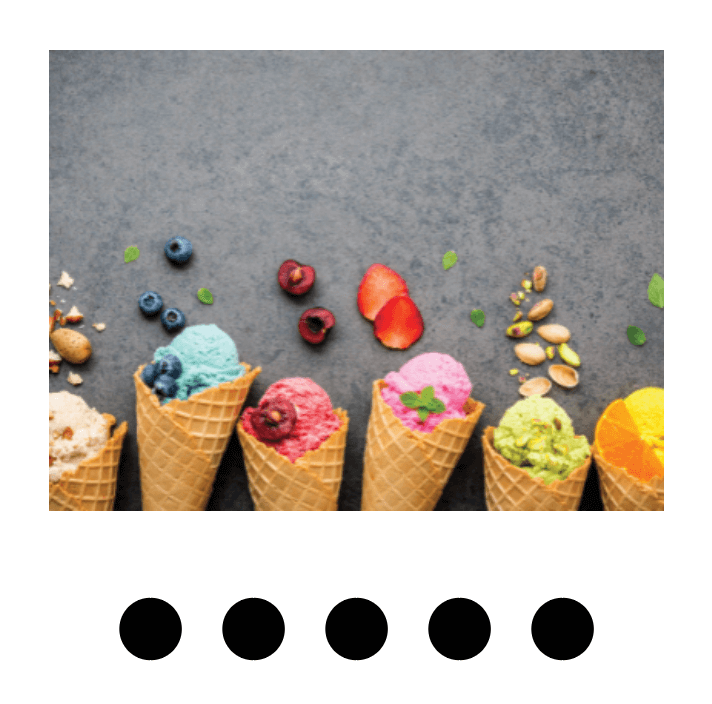
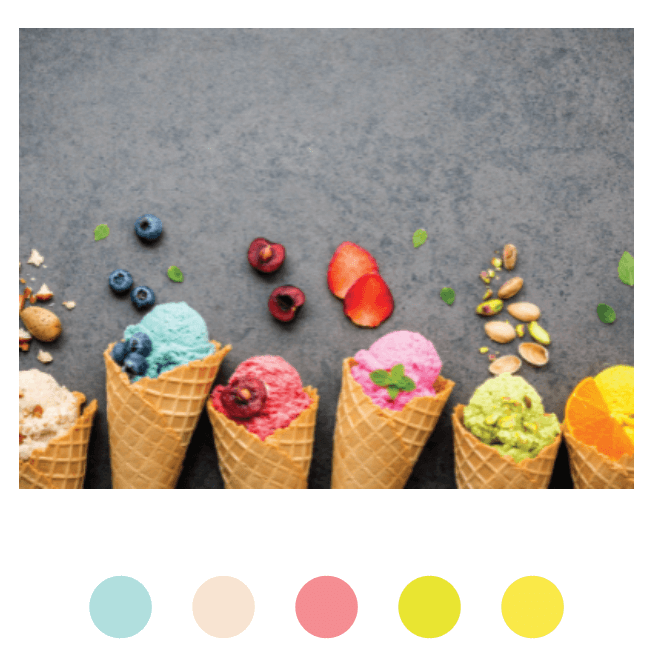
For example, if you want to create a color palette for an ice cream brand, you can search for ice cream images, and use the eyedropper tool to sample colors from different images to find out which combination works best.
So how to make a color palette for branding using the Eyedropper tool?
Step 1: Place the image in Adobe Illustrator.
Step 2: Create a circle or square and duplicate the shape multiple times based on how many colors you want to have on the palette. For example, if you want five colors on the color palette, create five shapes.
Step 3: Select one of the shapes, (in this case, a circle), choose the Eyedropper Tool on the toolbar, and click on the color that you want to use on the image to sample color.
For example, I clicked on the blue ice cream so the selected circle was filled with the blue color that I sampled from the image.
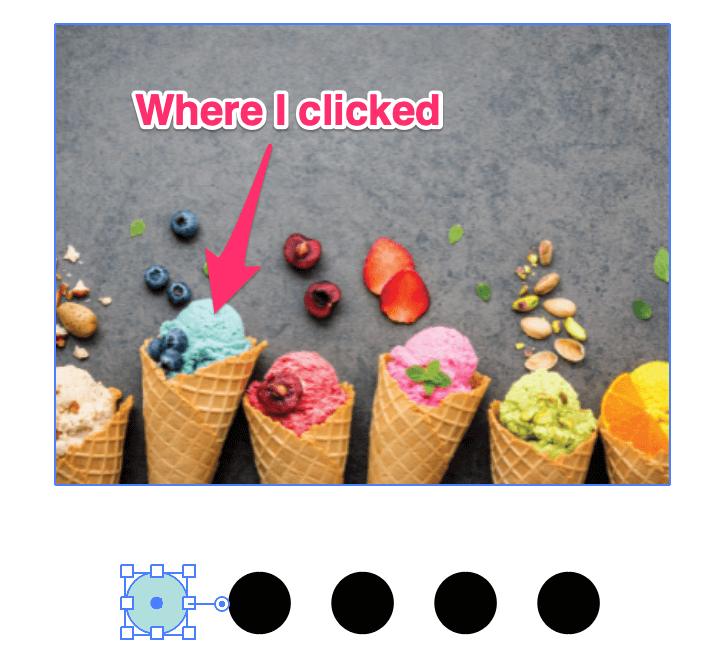
Repeat this process to fill the rest of the shapes with your favorite colors from the image, and there you go! A nice color palette for your ice cream brand project.
Step 4: Once you’re happy with your palette. Select all and click New Color Group on the Swatches panel.
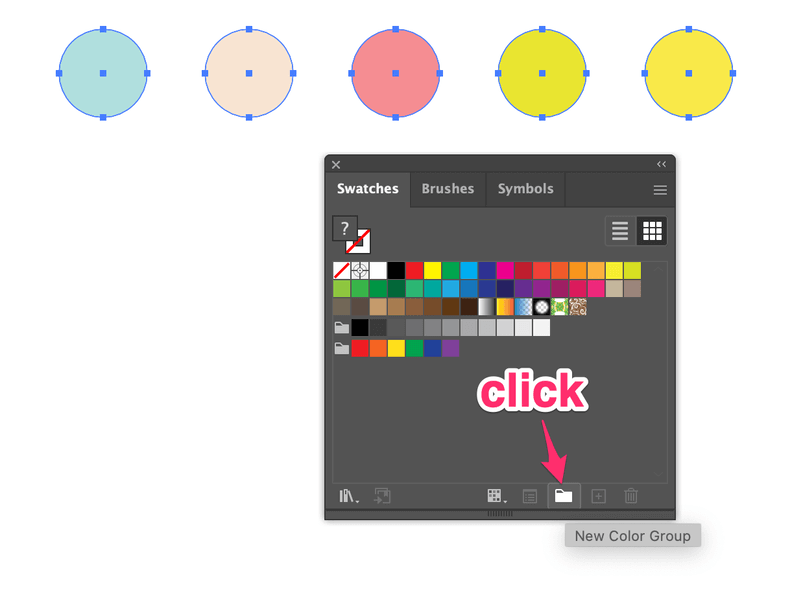
Name your new palette, choose Selected Artwork, and click OK.

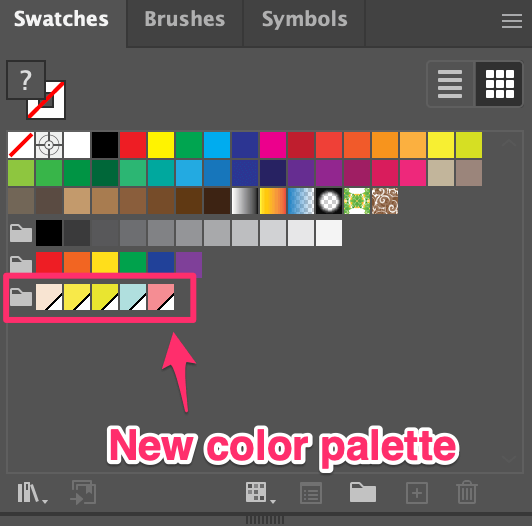
You should see the color palette on your Swatches panel.
If you want to save this new color palette that you just created for future use, read: How to Save a Color Palette in Adobe Illustrator.
Method 2: Blend Tool
Best for: Blending colors and making color tones palettes.
You can quickly create a color palette from two colors using the blend tool. I like how it blends the tones, so if you have two base colors, the blend tool will create a palette with nice blended colors in between.
For example, you can make a palette from these two colors by following the steps below.

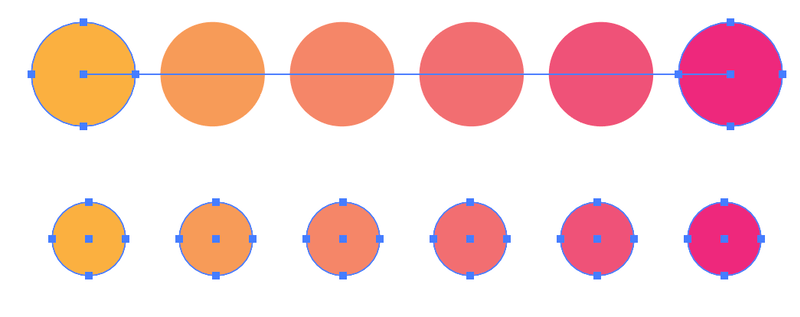
Step 1: Hold the Shift key to move the circles apart from each other, the more colors you want on the palette, the longer the distance should be between the two circles.
For example, if you want to have six colors, this is a good distance.

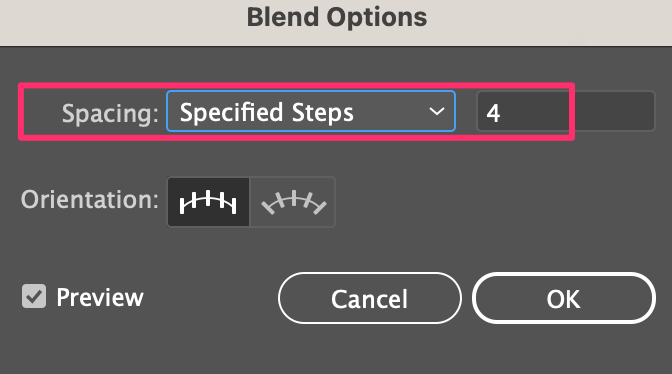
Step 2: Select both circles, go to the overhead menu Object > Blend > Blend Options, change the Spacing to Specific Steps, and input the number.
The number should minus the two shapes you already have, so if you want a six-color palette, put 4. 2+4=6, simple math!
Step 3: Go to the overhead menu Object > Blend > Make.

Actually, it’s up to you if you want to do Step 2 or Step 3 first, the result will be the same.
An important note here, although you see six circles, there are actually only two (the first and last one), so you’ll need to create six shapes and sample the colors using the eyedropper tool from Method 1.
Step 4: Create six circles or the number of colors you made with the blend tool.

Step 5: Sample the colors one by one. As you can see, if you select all the colors, the bottom row shows all circles selected, while the top row only selects the first and last circle.
If you want to add them to your Swatches, select the six circles and add them to your Swatches panel following Step 4 from Method 1.
Method 3: Adobe Color
Best for: Getting inspiration.
Running out of ideas for colors? You can choose or create a new palette from Adobe Color. This is the easiest way to make a color palette in Illustrator because you can directly save the colors to your libraries which is quickly accessible in Adobe Illustrator.
If you go to color.adobe.com and choose Create, you can make your own color palette.
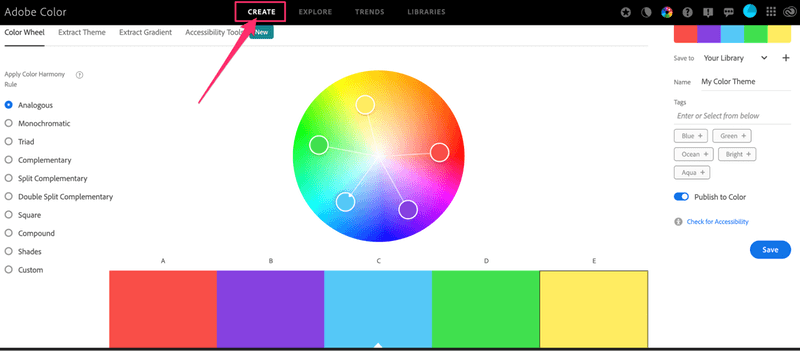
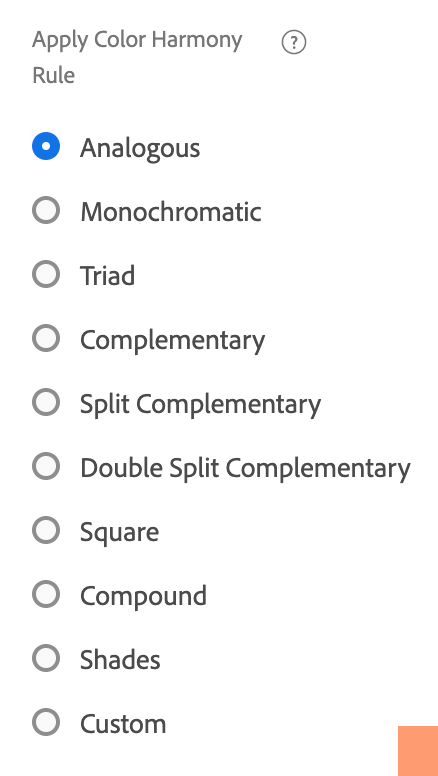
There are different harmony options you can choose from.
You can also make adjustments to the working panel under the color wheel.
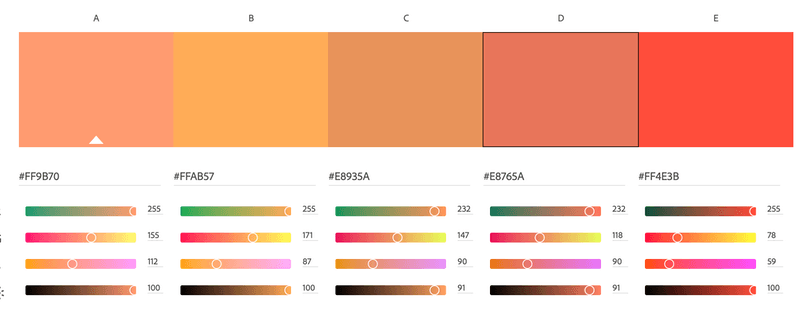
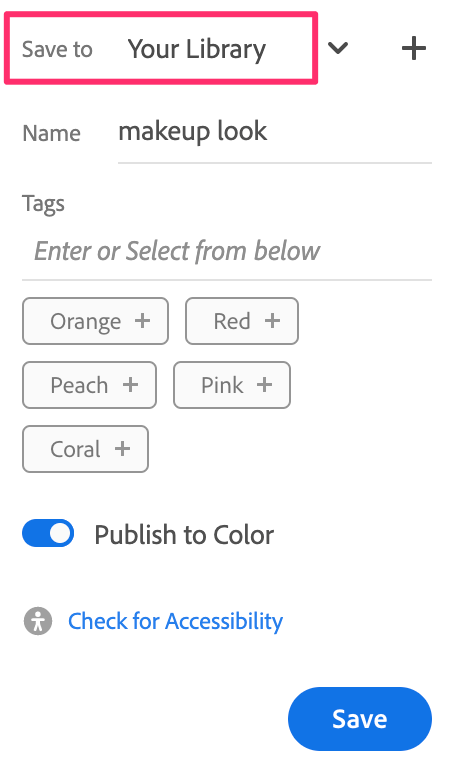
Once you’re happy with the palette, you can save it on the right-hand side. Name your new palette, and choose to save it to Your Library so that you can easily find it in Adobe Illustrator.
How to find the saved color palette in Adobe Illustrator?
Go to the overhead menu Windows > Libraries to open the Libraries panel.
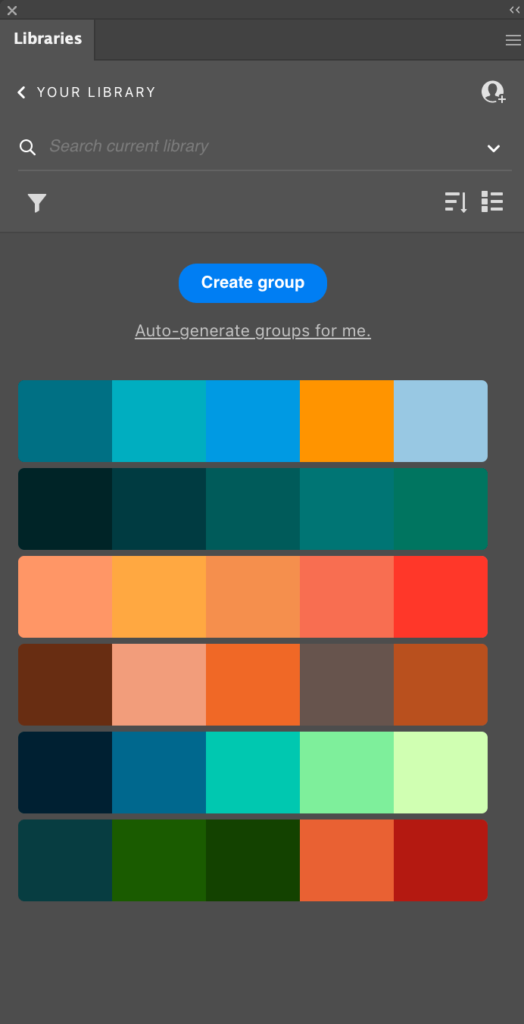
And you’ll see the saved color palette there.
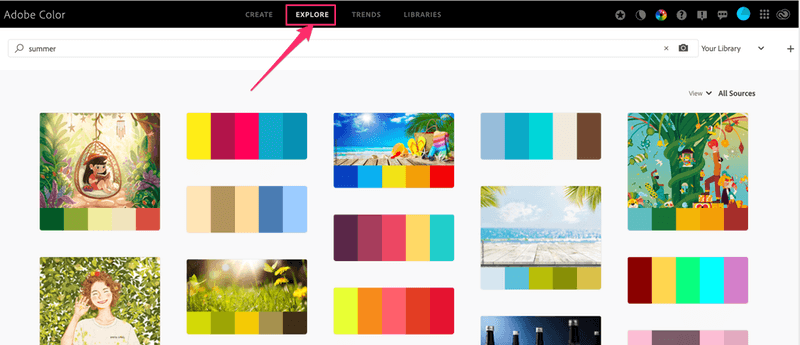
Don’t want to create your own? You can click Explore instead of Create and see what they have! You can type in what kind of color scheme you want in the search bar.
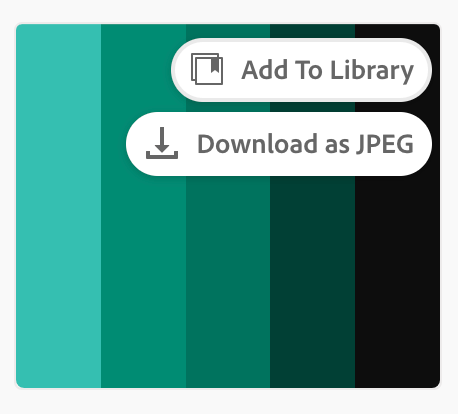
When you find the one that you like, simply click Add To Library.
Wrapping Up
All three methods are great for making a color palette, and each method has its “best for”. The Eyedropper Tool is best for making a color palette for branding. The Blend tool, as it sounds, is great for blending colors to make a palette following color tones. Adobe Color is the go-to when you run out of ideas because you can get so much inspiration from there.
Have you tried any of the methods above? Let me know how you like them and if they work for you 🙂
Wolfe Rain
Thanks for this! But HOW do you get the palette from Adobe Kuler in to Illustrator?
I found 2 ways, 1) import png and colour picker, and 2) import ASE swatch – in to NEW illustrator color group.
But the issue I have is I want to save the color group, but it will only let me save the entire swatch.
I can delete a color group, but not much else.
How do you organise a swatch in to a proper resource for a single project?
June Escalada
I think the easiest way to customize your own swatch is using the eyedropper.