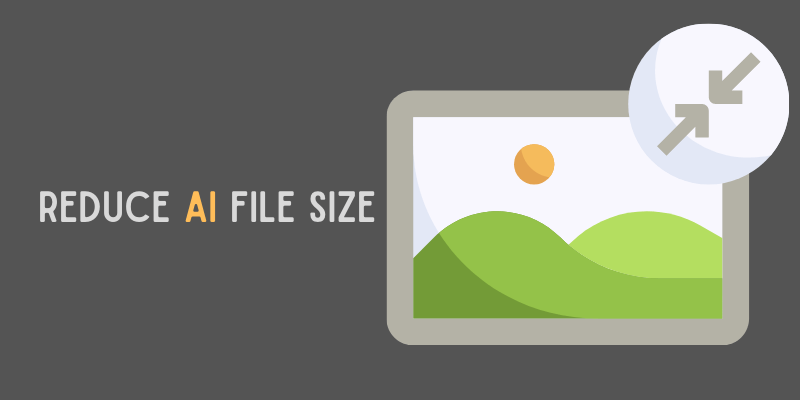
Taking too long to save a file or your file is too large to share on an email? Yes, compressing or zipping the file is one way to reduce the Illustrator file size, but it’s not the solution to reducing the size of the actual design file.
There are many ways to reduce sizes, including using plugins. But in this tutorial, I’m going to show you four easy ways to make Illustrator files smaller and save your file faster without any plugins.
Depending on your actual file, some methods work better than others, see which solution works best for your case.
Note: the screenshots from this tutorial are taken from Adobe Illustrator CC Mac version. Windows and other versions can look different.
Method 1: Save Option
This is the most effective and easiest way to reduce your Illustrator file size without affecting the artwork. You can reduce the file size by unchecking one option when you save the Illustrator file.
Step 1: Go to the overhead menu File > Save As.
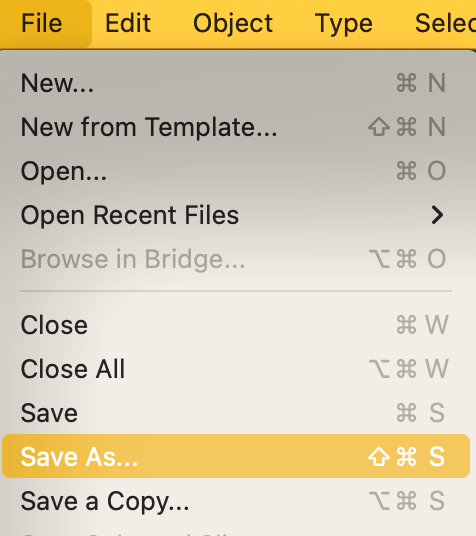
Step 2: Name your file, choose where you want to save it, and click Save.
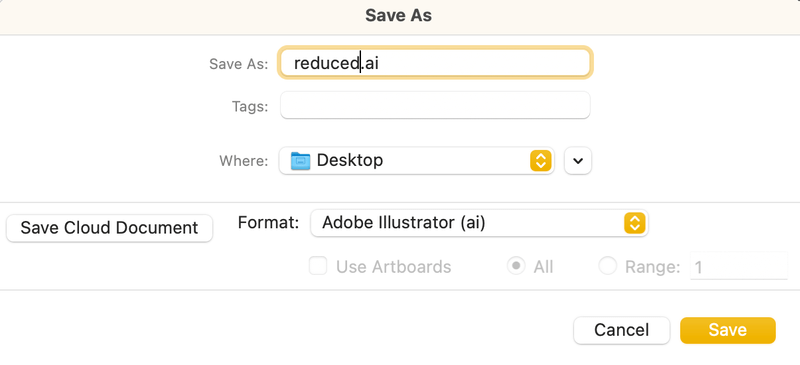
The Illustrator Options dialog box will pop up after you click Save.
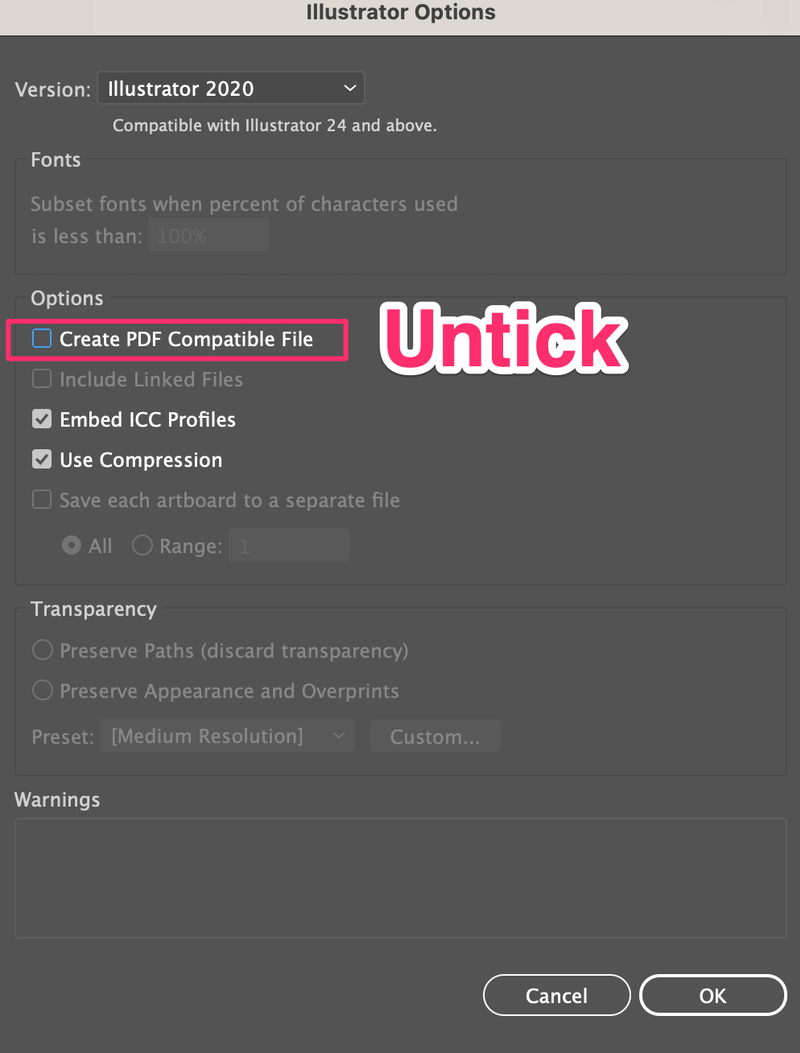
Step 3: Untick the Create PDF Compatible File option and click OK.
That’s it! By unchecking this option, your Illustrator file size will be reduced. If you want to see a comparison, you can save a copy of the same document but leave the Create PDF Compatible File option checked.
For example, I saved a copy with the option ticked and named it original. You can see the reduced.ai file is smaller than the original.ai.

It’s not such a huge difference here but when your file is really large, you’ll see the difference more obviously because other than seeing the difference in file sizes, it also takes less time to save the file with that option unticked.
Method 2: Use Linked Image
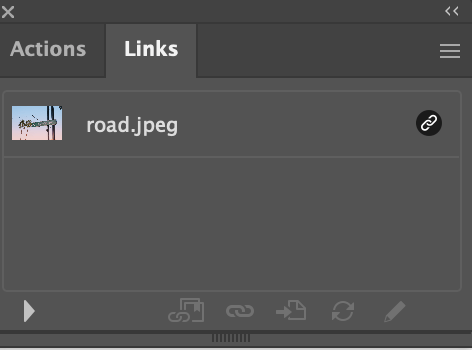
Instead of embedding images in Illustrator documents, you could use linked images. When you place an image in Adobe Illustrator, you’ll see two lines across the image, that’s a linked image.

If you open the Links panel from the overhead menu Windows > Links, you’ll see that the image is shown as a link.
However, this is not a perfect solution because the linked images only show when they are in the location where you link to.
If you need to open the illustrator file on another computer that doesn’t have these images or if you move the images to a different location on the same computer, the link will show missing and the images wouldn’t show.
For example, I changed the location of the image on my computer after I placed the image in Illustrator, although you can still see the image, it shows a missing link.
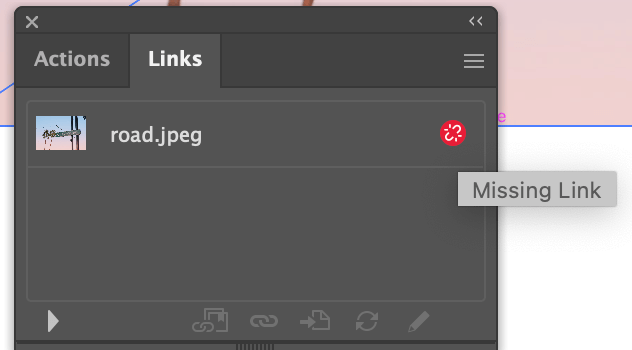
In this case, you’ll need to relink the image to where you relocate the image on your computer.

Method 3: Flatten Image
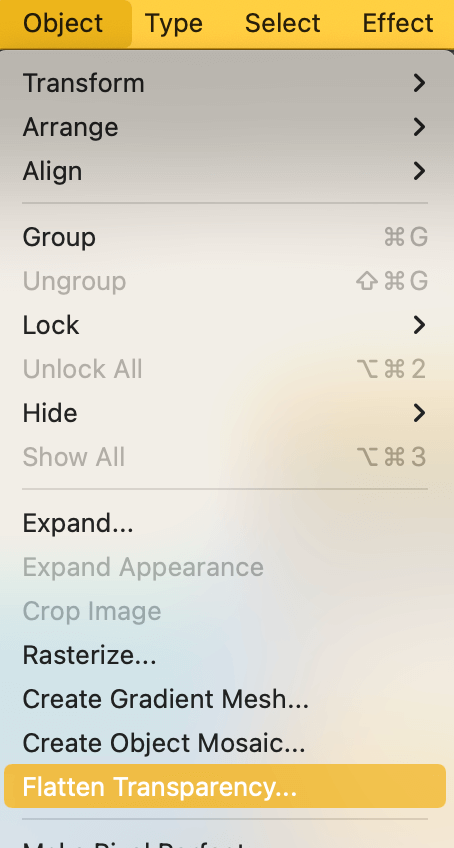
The more complex your artwork, the larger the file. Flattening an image basically is simplifying a file because it combines all layers and makes it one. However, you won’t find a Flatten Image option in Adobe Illustrator, because it’s actually called Flatten Transparency.
Step 1: Select all layers, go to the overhead menu, and choose Object > Flatten Transparency.
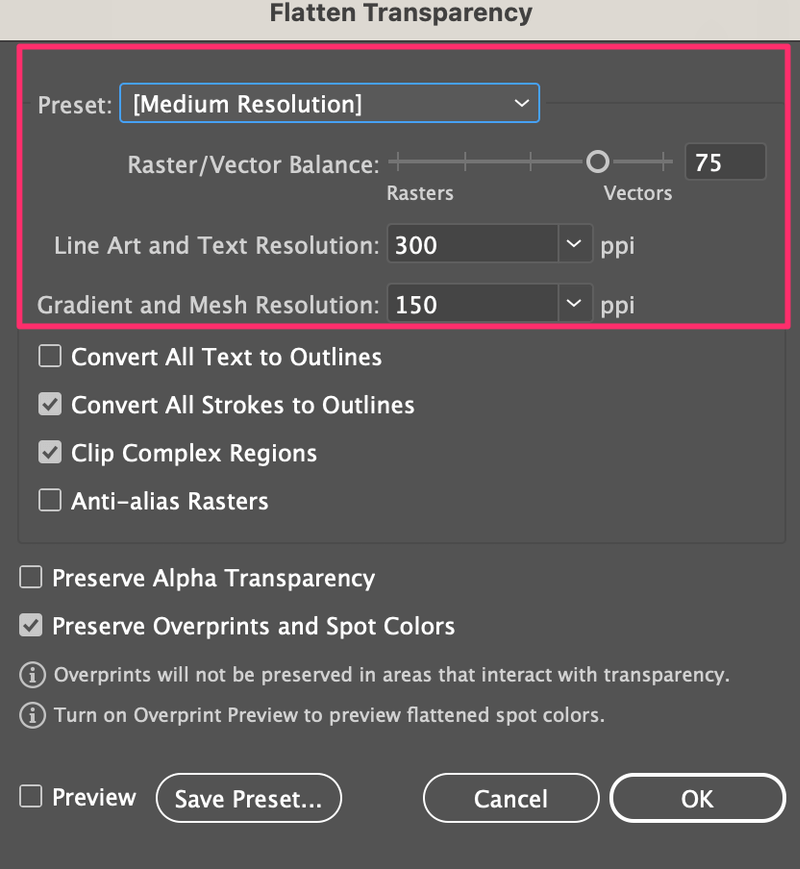
Step 2: Choose a resolution/image quality and click OK. The lower resolution, the smaller file.
I saved an original file just to show you the comparison. As you can see, flatten.ai is about half the size of the original file with multiple layers.

Tip: I highly recommend you save a copy of your file before you flatten the image because once an image is flattened, you can’t make edits to the layers.
Method 4: Reduce Anchor Points
If your artwork has a lot of anchor points, that means it’s a complex design. Remember what I said earlier? The more complex your artwork, the larger the file.
There’s a way to delete some anchor points in order to make the file smaller, but it doesn’t change the size significantly. Doesn’t hurt to give it a try though 🙂
I’ll show you an example and you can decide if this method works for you.
For example, I used the brush tool to draw these and as you can see, there are many anchor points.
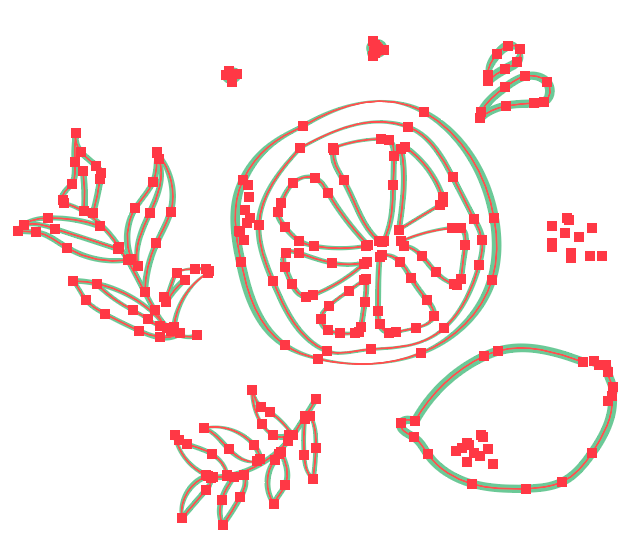
Now let me show you how to reduce some anchor points and how would it look. You can duplicate the image to see the difference.
Step 1: Select all the brush strokes, go to the overhead menu, and choose Object > Path > Simplify.
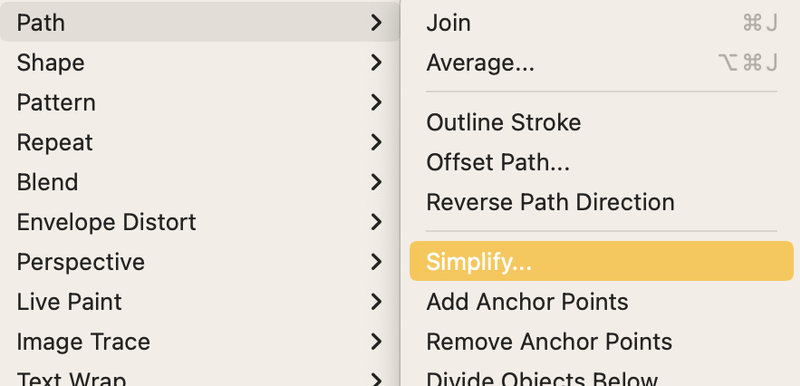
You’ll see this toolbar which allows you to adjust the anchor points. Move left to reduce and more right to increase.

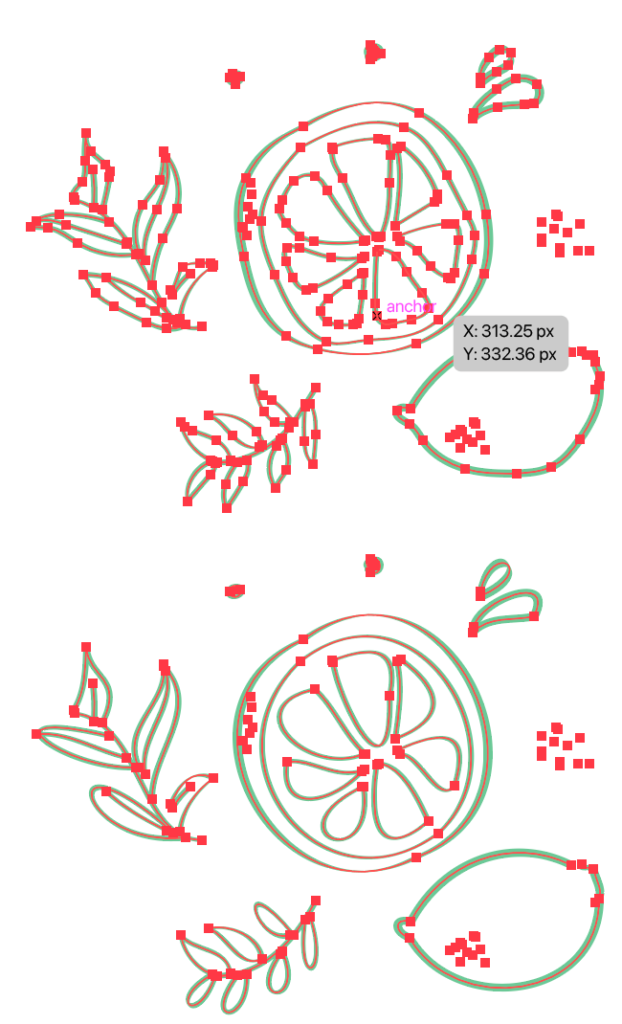
Step 2: Move the slider to the left to simplify the path. As you can see, the artwork at the bottom has fewer anchor points and it still looks okay.
Final Thoughts
I would say Method 1 is the best way to effectively reduce Illustrator file size without decreasing the image quality and such. Other methods work as well but there can be some small “side effects” that come with the solution.
For example, using the flatten image method does reduce the file size significantly, but it makes it more difficult for you to edit the file later. If you’re 100% sure about the file, just saving the file as a record to send it to print, then this is the perfect method.