
Is the gold color or a gradient? I would say it’s a gradient because it does take more than two colors to create a gold effect. Is there a gold color in Illustrator? Not really.
So if you want to make anything look gold in Adobe Illustrator, all you need to do is create a gold gradient and fill the object with the gradient. If you want to add the gold effect to the text, there’s an extra step, and I’ll show you how.
In this tutorial, you’ll learn how to make different styles of gold gradients and how to create the gold effect on text or objects in Adobe Illustrator.
Note: The screenshots from this tutorial are taken from Adobe Illustrator CC Mac version. Windows or other versions can look different.
How to Make Gold Color/Gradient in Adobe Illustrator
If you’re not familiar with mixing colors, you can find a gold image and use the Color Picker to sample the two to three colors to make a gold color gradient.
Quick Tip: If you want to make a smooth gold color, use colors that are in the same tone, and if you want to make a more metallic gold color/effect, use colors that are in high contrast or mix light and dark colors in between. Also, the more Gradient Sliders you add, the more “metallic” feel it will be.
For example, if you use these three colors:

You’ll get a soft/smooth gold effect like this:

And if you use these colors:

You’ll get a more metallic gold effect like this:

I’ll show you how to make the gold gradient in the steps below.
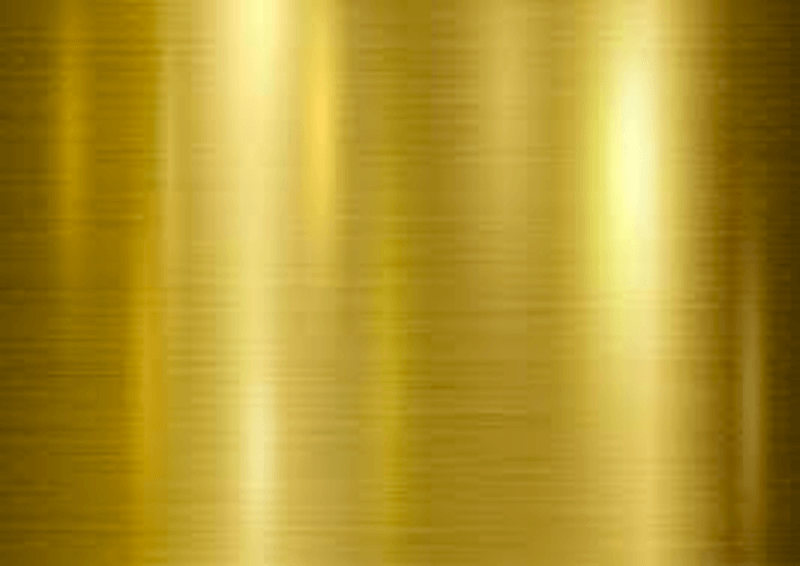
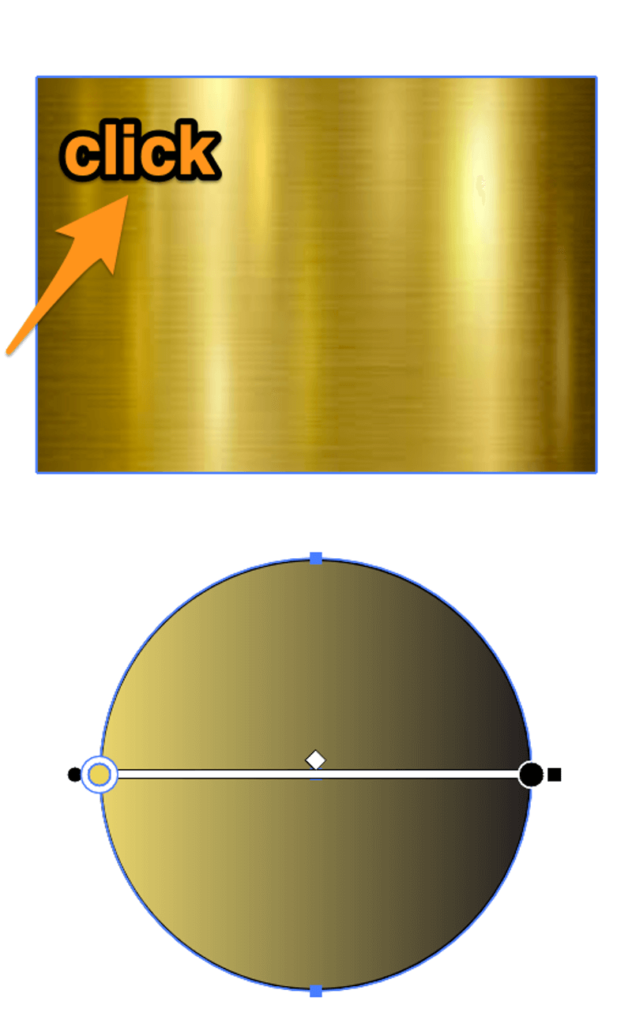
Step 1: Find a gold texture image and place it in Adobe Illustrator. This will be the image which you will sample the color from. For example, I want to make a gold gradient similar to this image.
If you’re choosing your own color to create the gold gradient, you can skip this step.
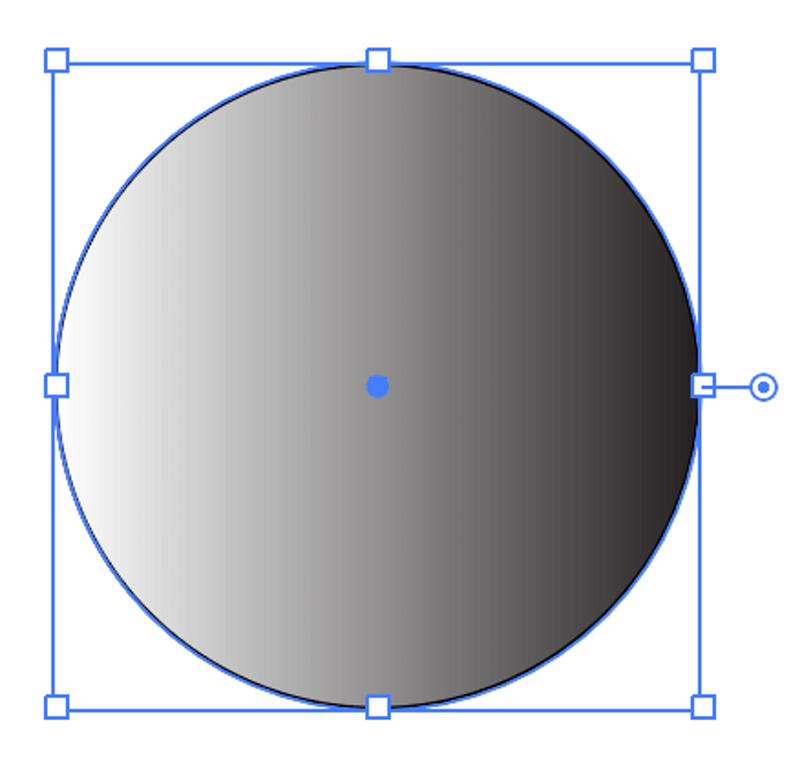
Step 2: Create a shape because you can see how the color looks as you adjust it. It can be any random shape, for example, I always use a circle.
Step 3: Select the shape, and click Gradient under Fill and Stroke at the bottom of the toolbar.
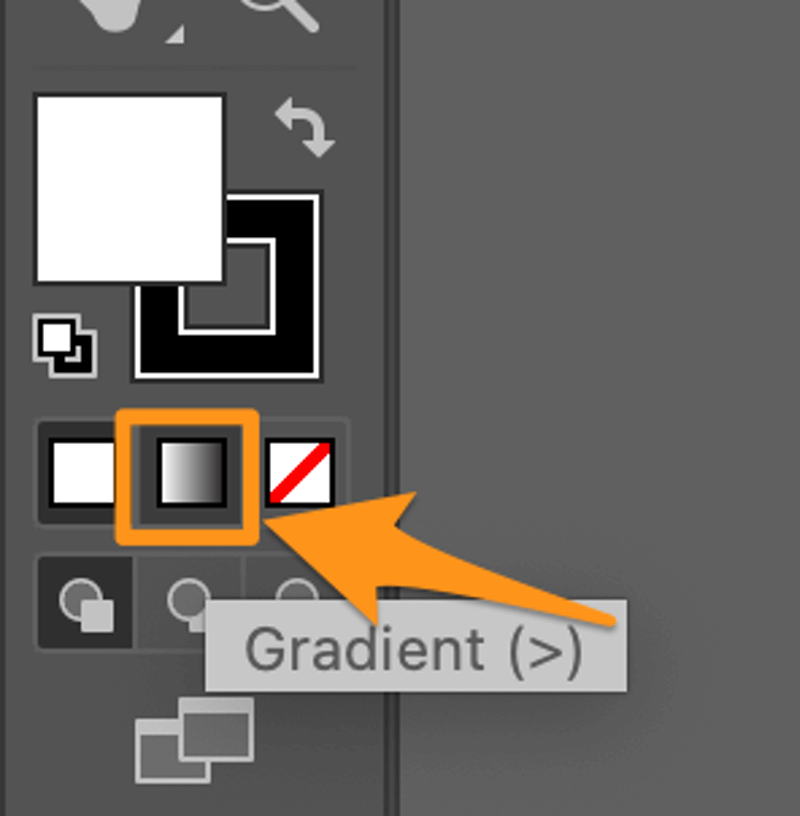
You’ll see your shape filled with a gradient color.
And the Gradient panel will pop up.
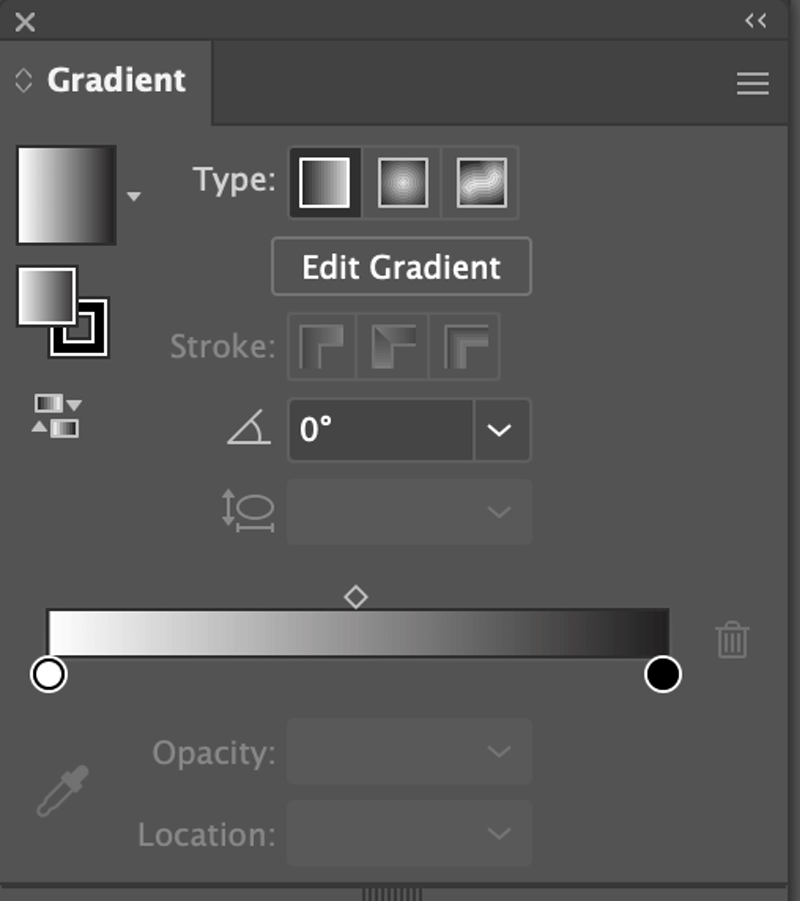
The default gradient color is grayscale, so the next step is to change the color to gold. As I mentioned before, you can choose your own colors or sample colors from a gold texture image. In this example, I’ll show you how to sample color from an image.
Step 4: Click on the first Gradient Slider.
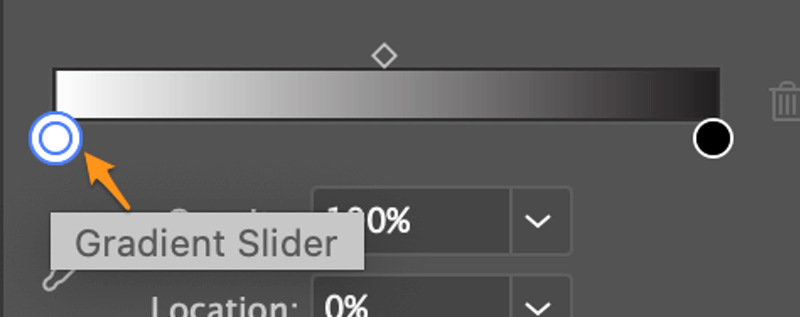
Then click on the Color Picker below that looks like the Eyedropper Tool, and click on the gold texture image to sample the first color.
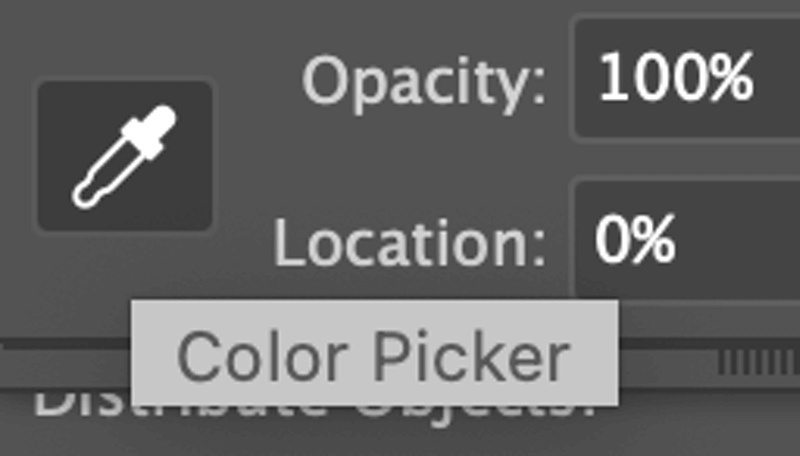
When you click on the image, you’ll see the gradient changes its color based on the color area you clicked on.
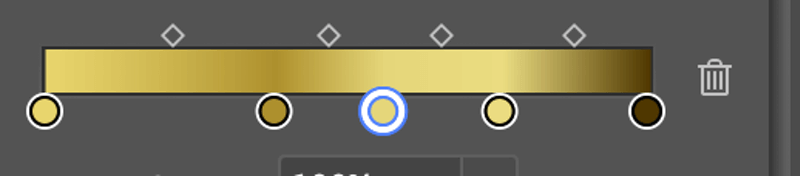
Repeat this process for the other Gradient Slider. As you can see, now there are only two Gradient Sliders, so the gold color is very soft/smooth. (Remember I mentioned above that fewer Gradient Sliders = Softer Gradient?)
Now you can click on the Gradient color on the Gradient panel to add new Gradient Sliders and use the Color Picker to sample more colors.
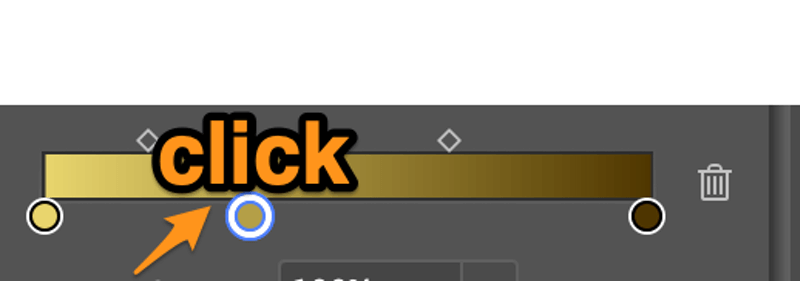
I would say, about three to five sliders would be a good amount. If you want a more metallic feel, mix the light and dark colors together. For example, this is what I got.
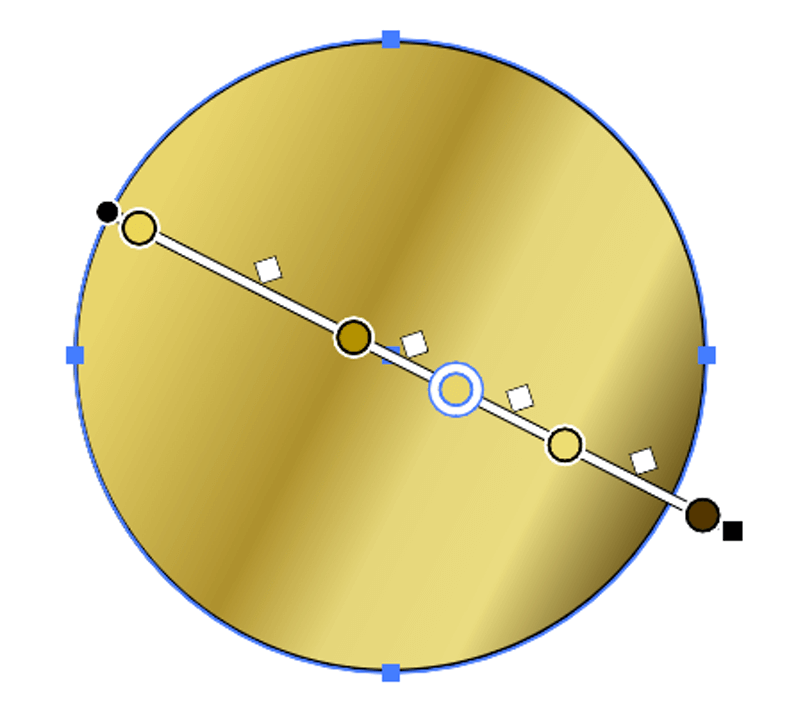
You also rotate the gradient slider on the shape and change the orientation.
Bonus: How to Save a Gradient Color
You can save the gradient to your Swatch so that you don’t have to create a new one every time you need to use a gold color. Plus, it’s super useful if you’re using it for a brand or business to keep the color consistency.
Step 1: Change the Stroke color to none.
Step 2: Open the Swatches panel from the overhead menu Window > Swatches.
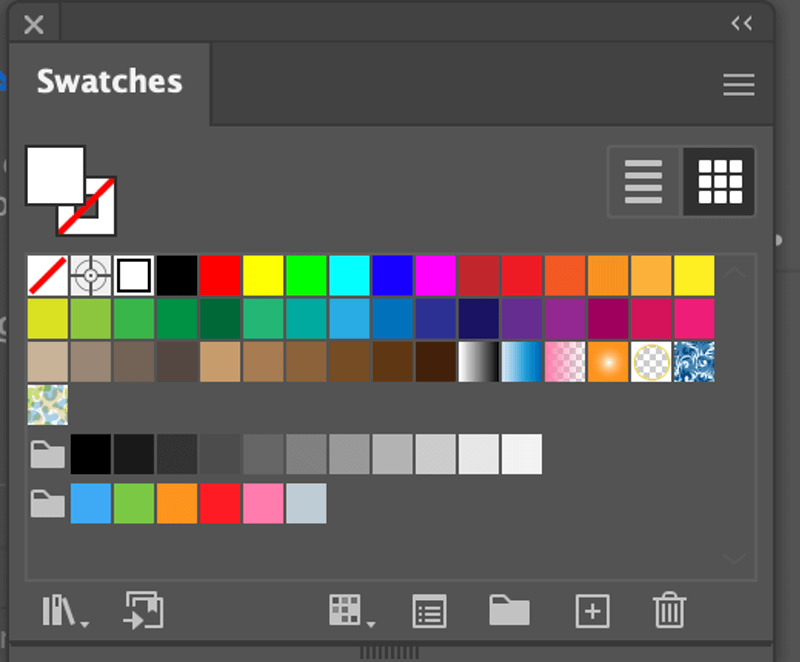
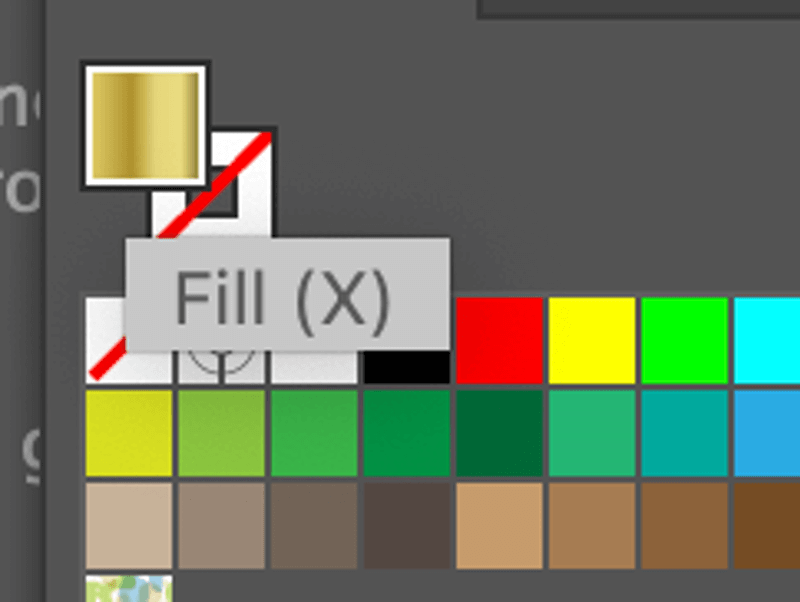
Step 3: Select the shape filled with the gold gradient, and you’ll see the Fill color on the Swatches panel changed to the gold color.
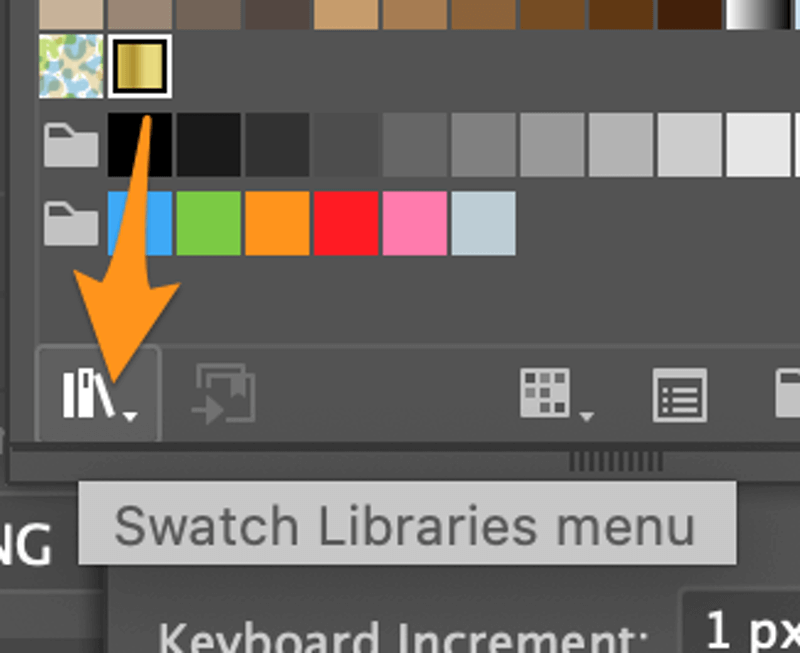
Step 4: Click on it and drag it to the end of the last Swatch color or pattern, right above the color folders.
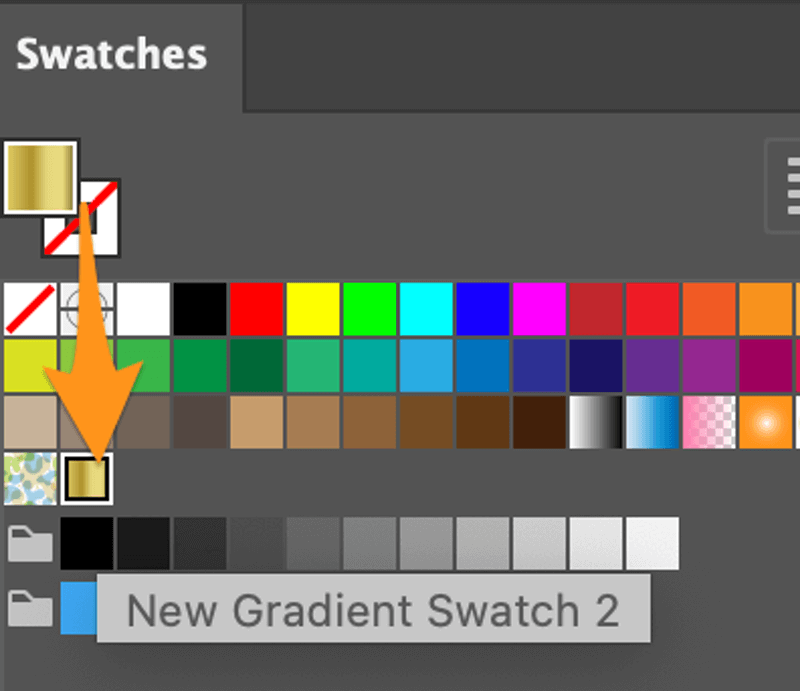
Step 5: Select the new swatch (gold gradient), click on the Swatch Libraries menu, and choose Save Swatches.
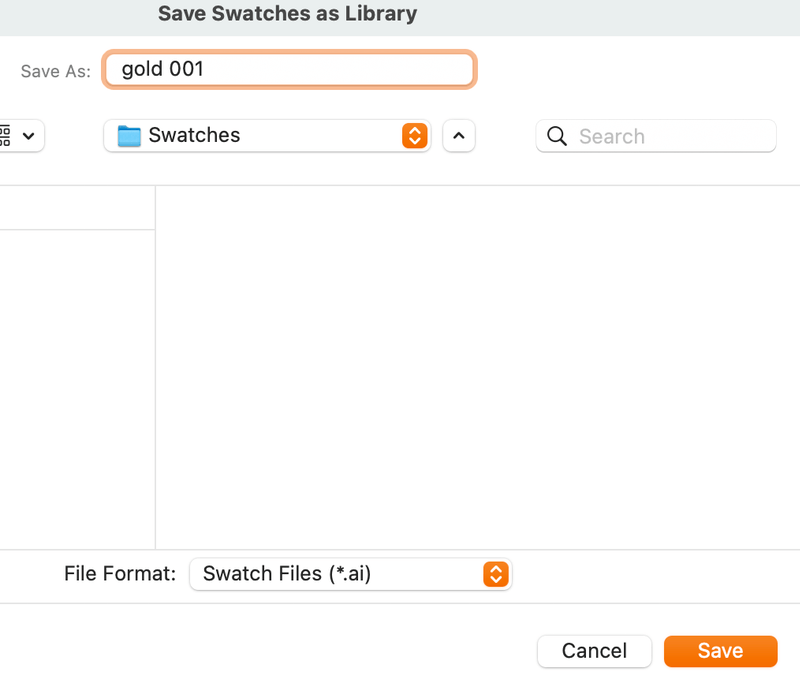
Once you click Save Swatches, you can name the gradient, and click Save. It’s important to name it so that later you can find it easily.
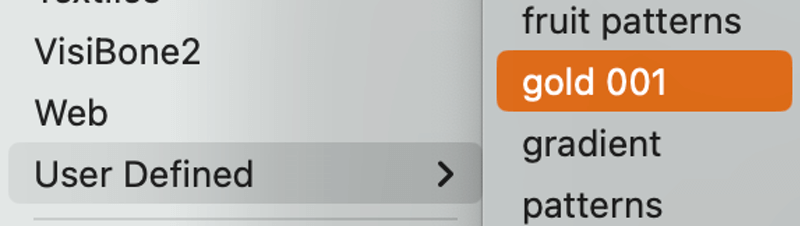
You can find custom swatches from the Swatches Library menu > User Defined.
Now that you have your gold color made, you can easily change the object or text color to gold and create the gold effect in Adobe Illustrator.
Filling an object with a gold gradient is pretty straightforward, all you need to do is select the object and choose the gold color/gradient from the Swatches panel. However, making a gold text effect requires an extra step, so I’ll show you an example of adding a gold effect to the text below.
How to Add Gold Effect to Text in Adobe Illustrator
Once you have created the gold color/gradient, there are only two more steps to make text gold in Adobe Illustrator.
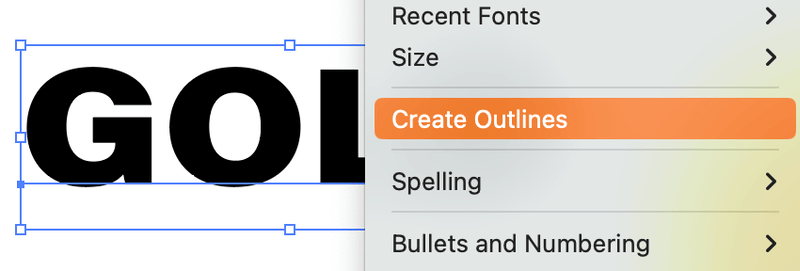
If you don’t know already, you won’t be able to add a gradient to live text, so you’ll need to outline the text first. Follow the steps below to make a gold text effect in Adobe Illustrator.
Step 1: Select the text you want to add the gold effect to, right-click and choose Create Outlines.
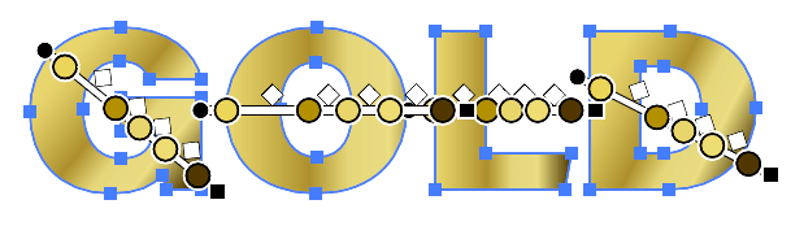
Step 2: Select the outlined text and choose the gold gradient from the Swatches panel that you just created.

That’s it!
Tip: If you want to change the gradient orientation, you can choose the Gradient Tool from the toolbar, and rotate the gradient sliders that appear on the text.
Wrapping Up
Making a gold effect or gold color is basically creating a gold gradient, and you can easily do it by finding a gold texture image, and sampling a couple of colors from the image. Then you can save the gradient and fill the object or text with the gold color/gradient.
Zoe
Helpful tip. Thankyou
June Escalada
You’re welcome, Zoe!
Happy new year!
Farah
Very helpfull
Anna
Thank you so much for this helpful step by step instruction, I really appreciate it as a starting out graphic designer.
June Escalada
Hey Anna! You’re welcome!
John
This was just what I needed to add gold text to a client logo. Thanks so much.
June Escalada
You’re welcome, John 🙂