
Don’t stress out if you don’t have InDesign or are not familiar with it, you can create a simple book cover design in Adobe Illustrator as well, and actually, there is even more room for creativity.
Don’t worry about the pages or layouts, Illustrator can handle two pages of book cover design, even less to worry about if you already have a ready-to-use template.
In this tutorial, you’ll learn how to design a book cover in Illustrator using a template and create one on your own.
Before you make a book cover, you need to know which size the book will be. Not sure which book size to use? I did the research for you and put together a quick overview of some popular book sizes (or “trim sizes” from the publishing term).
Common Book Sizes
Depending on what type of book you’re making a cover for, there are different sizes for paperback books, pocketbooks, children’s books, comics, etc.
Some common paperback book sizes are:
- 5 inches x 8 inches
- 5.25 inches x 8 inches
- 5.5 inches x 8.5 inches
- 6 inches x 9 inches
- 4.25 inches x 6.87 inches (pocketbook)
Many children’s book has their own popular sizes:
- 7.5 inches x 7.5 inches
- 10 inches x 8 inches
- 7 inches x 10 inches
If you’re designing for a hard-cover book, the cover size will be slightly larger than the book pages. Here are three standard hardcover sizes:
- 6 inches x 9 inches
- 7 inches x 10 inches
- 9.5 inches x 12 inches
Found your book size? Let’s go ahead and design a book cover in Adobe Illustrator.
2 Ways to Make Book Cover Illustration in Adobe Illustrator
You can customize a template or design your own book cover in Adobe Illustrator. Obviously, the template method is easier, especially if you’re new to this, but if you can’t find an ideal template, creating your own is a better option.
If you need some ideas on book cover design, you can see some examples from famous book cover designers like Chip Kidd and Peter Mendelsund. If you want to create an illustration book cover, see some examples from book illustrators.
It all depends on the type of books you’re designing the cover for. Anyway, I’m going to show you the essential steps of both methods and you can decide which one to use.
Note: Screenshots are taken from Adobe Illustrator CC Mac version. Windows or other versions can look different.
Method 1: Use Book Cover Template
Using a ready-to-use template is convenient. However, there’s only one ready-to-use book template in Adobe Illustrator. It might not be the best template but I’m going to show you how it works and you can use the same method on other templates you download.
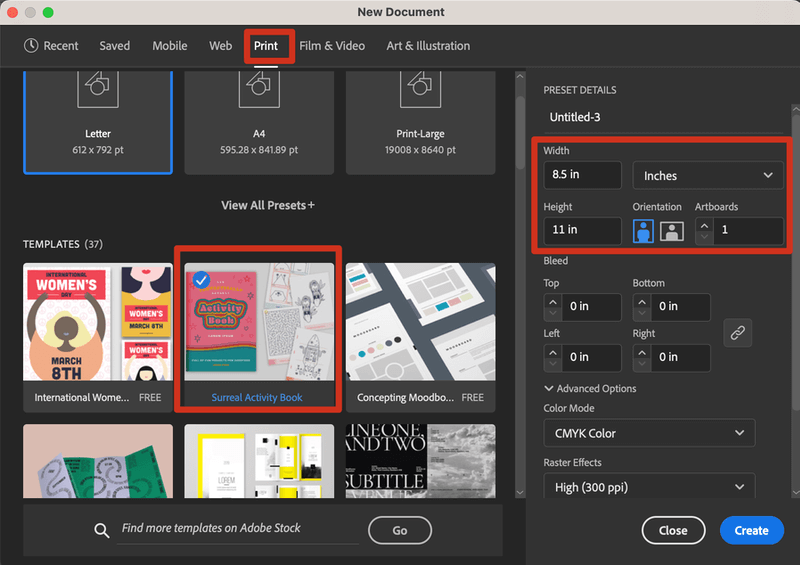
Step 1: Create a new document in Adobe Illustrator, go to the Print templates and you will see a book option named Surreal Activity Book. Choose that option, change the measurement unit to Inches, and click Create.
If you are using a downloaded template, go to File > New from Template and choose your Illustrator template file.
If the template isn’t what you’re looking for, you can find many other book templates on Adobe Stock. Adobe Stock isn’t included in your Adobe Creative Cloud plan, but you can download up to ten free templates with its 30-day free trial.
I think it’s totally worth it to give it a try especially when you urgently need to get a book cover design done and don’t know where to start. Plus, you can cancel the subscription within the 30-day trial if you don’t need or want to use it anymore.
Step 2: Find or change the missing fonts. In most cases, there will be missing fonts because you might not have the template fonts installed on your computer.
If you use a template from Adobe Stock, most fonts are Adobe Fonts, so you can simply click Activate Fonts. Otherwise, click Replace Fonts to replace the missing fonts with your existing fonts.
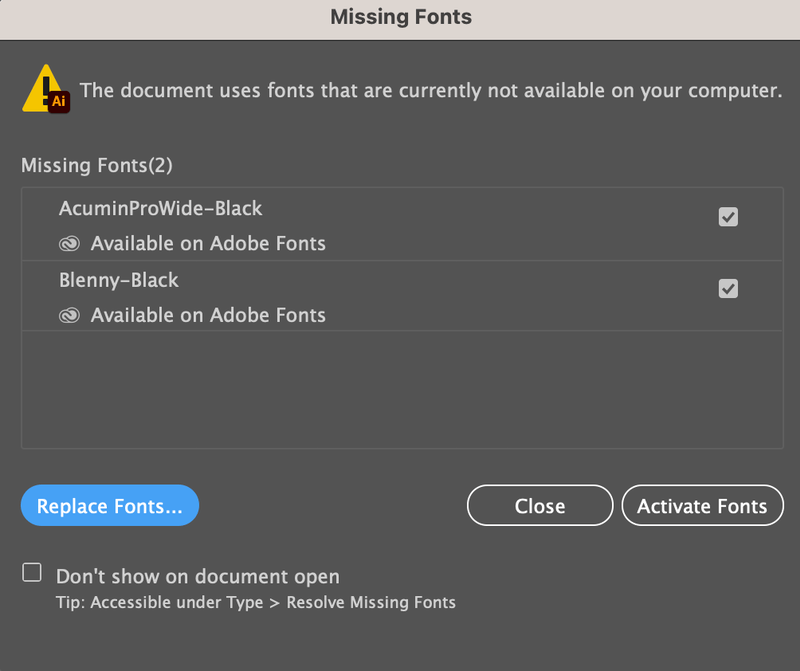
Once you activate or replace fonts, the book template will open. The first two artboards you see are the front and back covers.
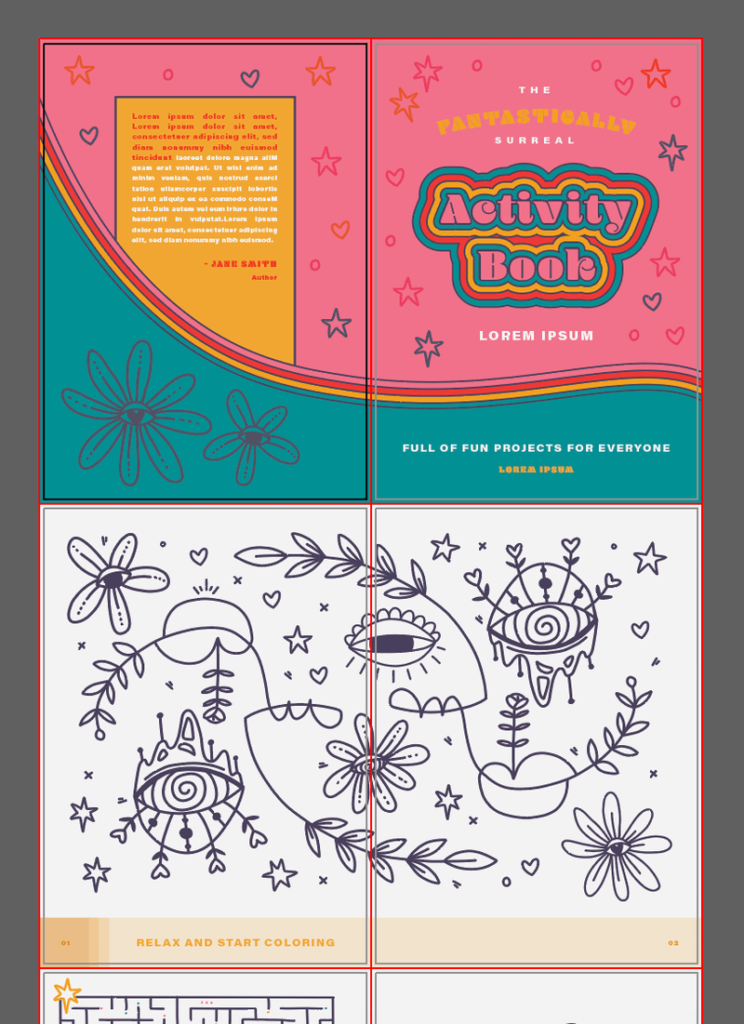
Step 3: Customize the book cover. You can edit any elements on this template and delete the artboards (pages) that you don’t need.
For example, the first thing you can do is change the book’s name. Simply select the text and change it.
Then you can change the other elements such as color, delete or add new shapes to the book cover until you get the result you need.
Tip: If you choose to use a template, it’s important to choose a template that’s similar to your ideal book cover, because you only need to change a couple of things. Otherwise, you might as well just create a new design from scratch.
Method 2: Design a Book Cover in Adobe Illustrator
Once you know the book size, simply create artwork that fits within the size proportionally. The only tricky part is the spacing between the front and back pages because it’s hard to decide the exact thickness of the book.
Here are the steps to create a book cover from scratch in Adobe Illustrator:
Step 1: Create a new document and input the size for your book cover. For example, I’m making a children’s book cover, so I’m going to put 7.5 for width and 7.5 for height, increase the Artboards number to 2, and choose Inches as the unit.
Make sure the color mode is set to CMYK because it’s going to be a print file.
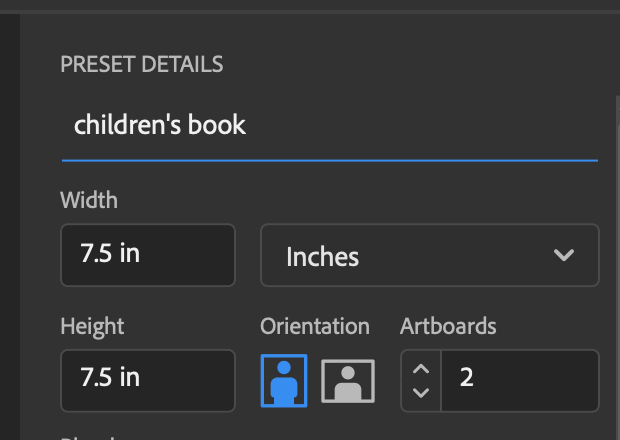
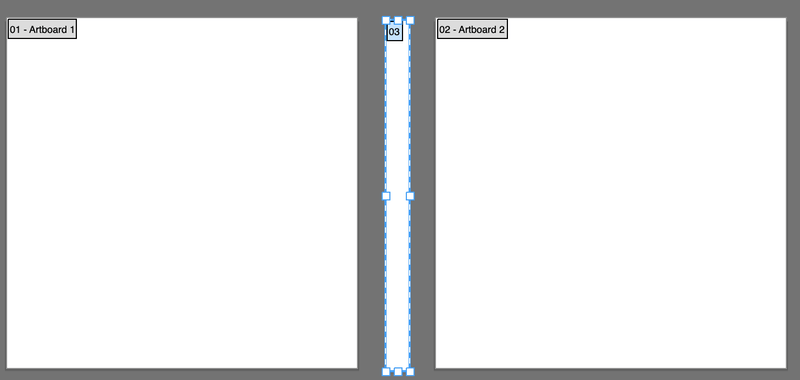
Click Create and you’ll see two artboards in the new document, which will be the front and back covers of the book.

If the book is thicker or if it’s a hardcover, you need to add an additional artboard for the binding/spine part (spacing between the front and back cover). The height should be the same as the cover size, but the width is what you need to figure out depending on the pages of your book.
For example, I moved one of the original artboards and added a new artboard in the center, and changed the artboard size to 0.5 inches x 7.5 inches.
Once you get the artboard set up, the next step is to create the design.
Step 2: Add elements like text and images to your book cover. Depending on what type of book you’re designing the cover for, you can add photos, create graphics or illustrations, or simply use typography as the design element of your cover.
Using photos as the cover is the easiest case because all you need to do is find stock images and add text (the book’s name).

In my case, for a children’s book, the cover is usually illustrations or graphics.

Step 3: Finalize your design and you can package your file and send it to your client or publisher.

How to Save Your Book Cover for Print
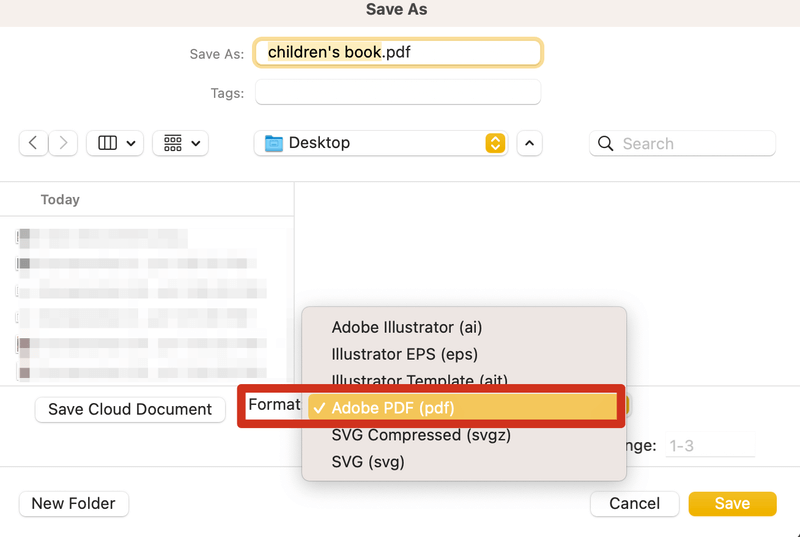
After creating a design for the book cover using either method 1 or 2, the next step is to save your .ai file as a PDF and at the same time package the file in case the print shop needs to make any adjustments.
Before packaging the file, go to the overhead menu File > Save As to save the file, because you can only package a .ai file when the file is saved.
Now it doesn’t matter whether you package the file first to save a PDF copy first.
Go to File > Save As and choose Adobe PDF (pdf) as the file format.
Click save and you can choose the PDF preset. Some book publishers require PDF/X-4:2008, but I usually save the PDF as High Quality Print.
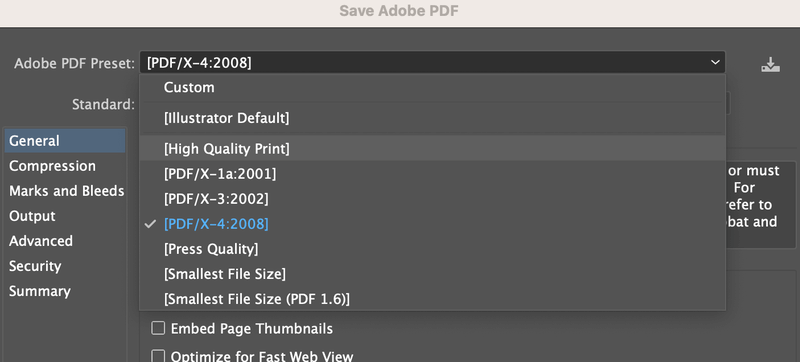
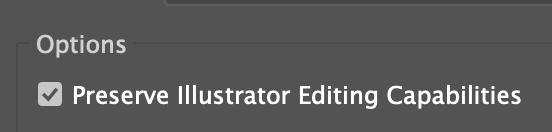
High Quality Print allows others to edit the file if you have the Preserve Illustrator Editing Capabilities option checked, but this option isn’t available when you save it as PDF/X-4:2008.
Once you change the settings, click Save PDF.

If you want to package the file, go to File > Package. Choose a location where you want to save the package folder and click Package.
You can put the PDF file inside the package folder and send them all together to the print shop.
Wrapping Up
See? InDesign isn’t the only Adobe software used to make publishing designs. Honestly, Adobe Illustrator is even better when it comes to graphic or illustration-style book cover designs. Make sure to save the file for print once you finish your artwork and it should be good to go!
Tajul Islam
Your topic is helffull for me. Thanks a lot.