Still downloading stock dotted lines? You don’t have to. It’s probably quicker to make a dotted line on your own than looking for a free one online.
Been there, done that. I knew that making a dashed line was easy, but I struggled to find out where the dotted line option was.
Cap & Corner and the dash value are the two key settings that you’ll need to work on. Other than that, you can also make a dotted line by creating a new brush.
In this tutorial, I’ll show you how to make a dotted line using two simple methods along with some additional tips.
Let’s dive in!
2 Ways to Make a Dotted Line in Adobe Illustrator
You can make a dotted line by creating a new brush, or changing the stroke settings and editing the dashed line.
Note: the screenshots are taken from Adobe Illustrator CC Mac version. Windows or other versions can look different.
Method 1: Create a dotted line
Step 1: Select the Ellipse Tool and create a small circle.

Step 2: Drag the circle to the Brushes panel. If it isn’t opened already, you can open the Brushes Panel from the overhead menu Window > Brushes.
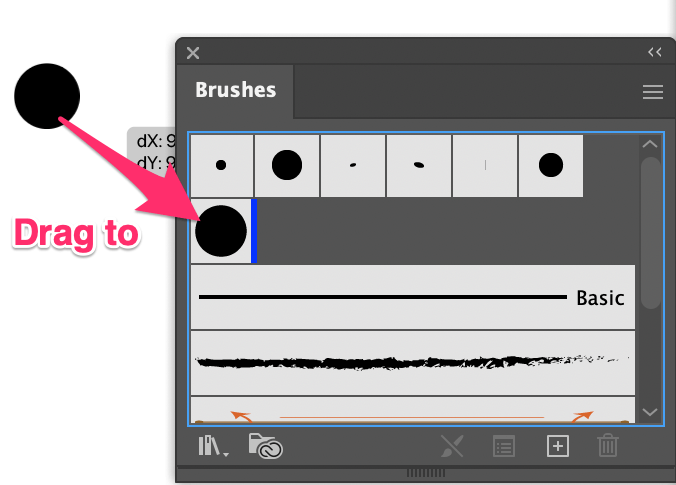
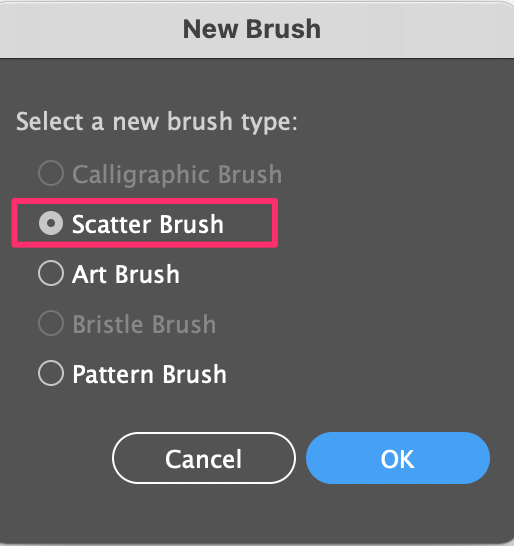
When you drag the circle to the Brushes panel, this New Brush dialog window will pop up, and you’ll see the default brush option is Scatter Brush. Click OK.
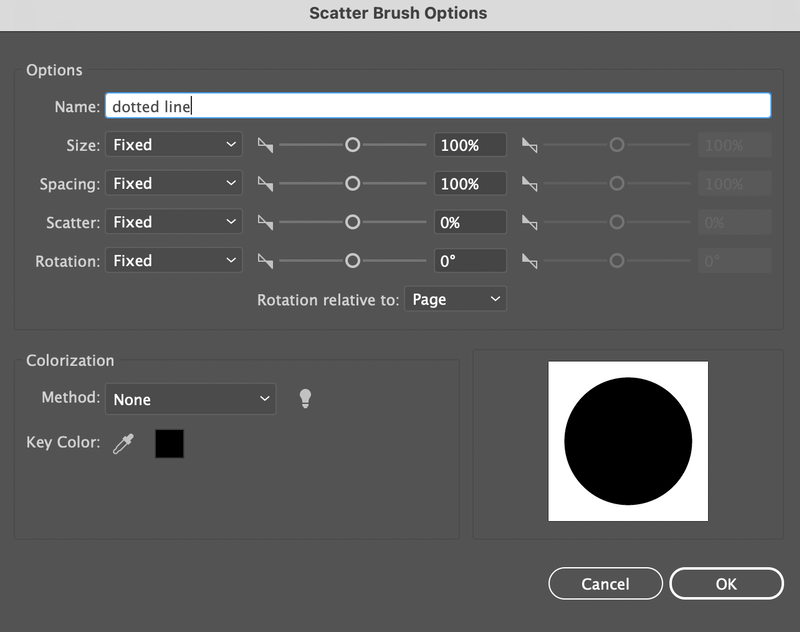
Once you click OK, you can change the Scatter Brush Options. You can change the brush name and leave the rest of the settings for now.
Step 3: Select the Line Segment Tool to draw a line.

Step 4: Go back to the Brushes panel and select the dotted line brush you just created. You’re going to see something like this.

As you can see there’s no space between the dots and they are too big.
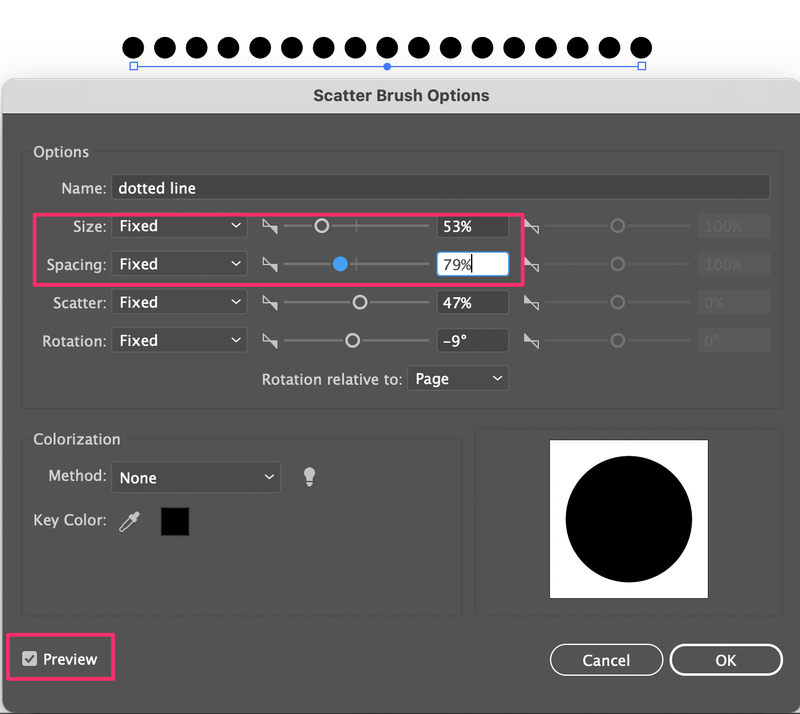
Step 5: Double-click on the brush on the Brushes panel to open the Scatter Brush Options window again. Check the Preview box and adjust the Size and Spacing to get a result that works best for you.
Method 2: Change the stroke style
Step 1: Use the Line Segment Tool to draw a line.
Step 2: Go to the Appearance panel and click on Stroke.
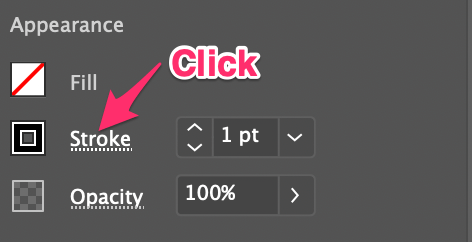
Step 3: Adjust the settings. Now you’ll have some options to adjust the line. Change the Cap to Round Cap and Corner to Round Join (the middle option for both).
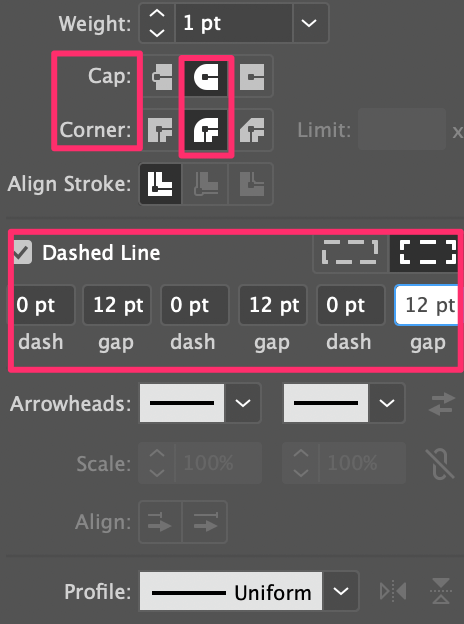
Check the Dashed Line box, and change all dash values to 0 pt. The gap value determines the distance between the dots, the higher the value, the longer the distance. For example, I put 12 pt and it looks like this.

If you want to make the dots bigger, simply select the line and increase the stroke weight.


Additional Tips
If you want to make dashed or dotted shapes. You can select any of the shape tools and then change the stroke style.
For example, if you want to create a dotted rectangle. Select the Rectangle Tool to draw a rectangle, and then change the stroke using either of the methods above. You can also change the dotted line color by changing the stroke color.

Want to make the lines more fun? You can change the Profile. How about this?

Wrapping Up
Both methods give you the flexibility to edit the size and spacing, but if you want to change the dotted line color, you’ll need to change the stroke color.
Technically you can create a color brush, but how many times are you going to use the same color? That’s why changing the stroke color is more effective.

JM
Thanks, that was very helpful. I’m looking forward to other tutorials like this one 🙂
June Escalada
Sure! We have new tutorials every week 🙂