Wait a minute, do you want to show the grid or make a grid? If you’re talking about showing the grid as a guide, you can do it in a couple of seconds. Simply go to the overhead menu View > Show Grid.
That’s it? No, we’re going deeper than that.
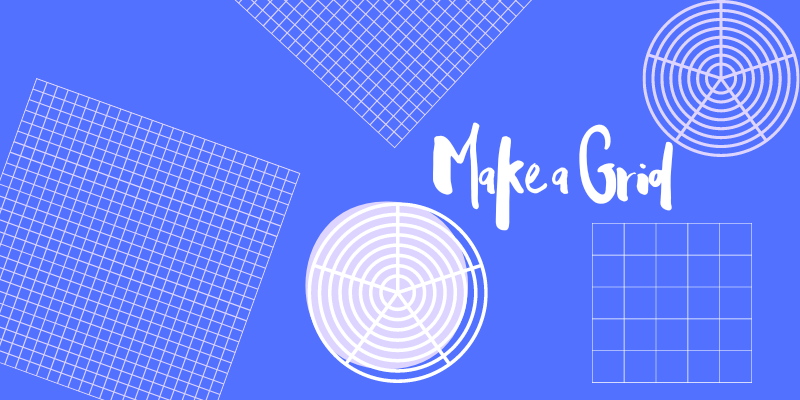
In this tutorial, I’m going to how to make an editable vector grid in Adobe Illustrator. You can make a polar grid and rectangular grid using the Polar Grid Tool and Rectangular Grid Tool. I’ll also show you what you can make with both types of grids.
So where to find the Rectangular Grid Tool or the Polar Grid Tool in Illustrator?
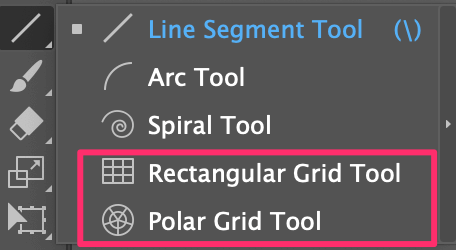
If you haven’t seen the grid tools before, you can find both grid tools in the same menu as the Line Segment Tool (keyboard shortcut \).
Note: the screenshots from this tutorial are taken from Adobe Illustrator CC Mac version. Windows or other versions can be different.
How to Use the Rectangular Grid Tool in Illustrator
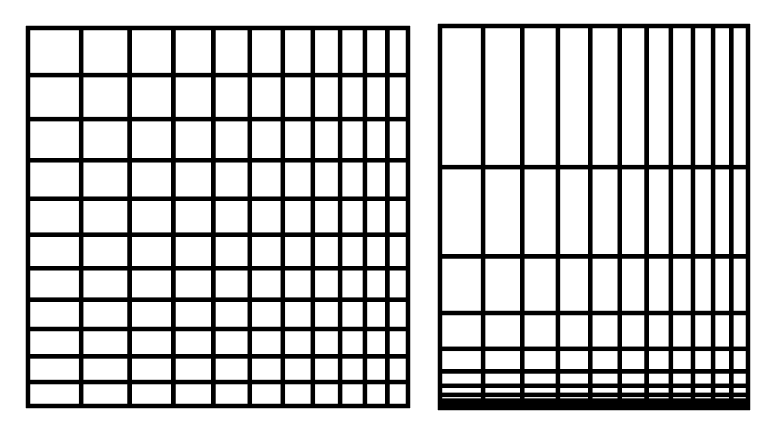
It literally takes two steps to create a rectangular grid. In Step 2, you can either create a freehand grid or type in the exact value if you already know the grid size.
So what are the two steps?
Step 1: Choose the Rectangular Grid Tool from the toolbar. If you’re using the basic toolbar, you can find the tool from the Edit Toolbar option or simply change the toolbar to the Advanced toolbar from the overhead menu Window > Toolbars > Advanced.
Step 2: Click and drag on the artboard to create a grid.
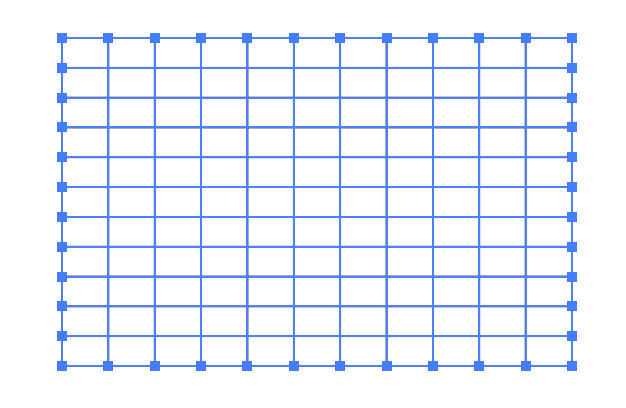
Alternatively, you can click on the artboard to open the settings and input the number of horizontal & vertical dividers and grid size (width and height).
The higher the number, the more grids it’ll create and more grids mean each grid is smaller than if you’d have fewer grids.
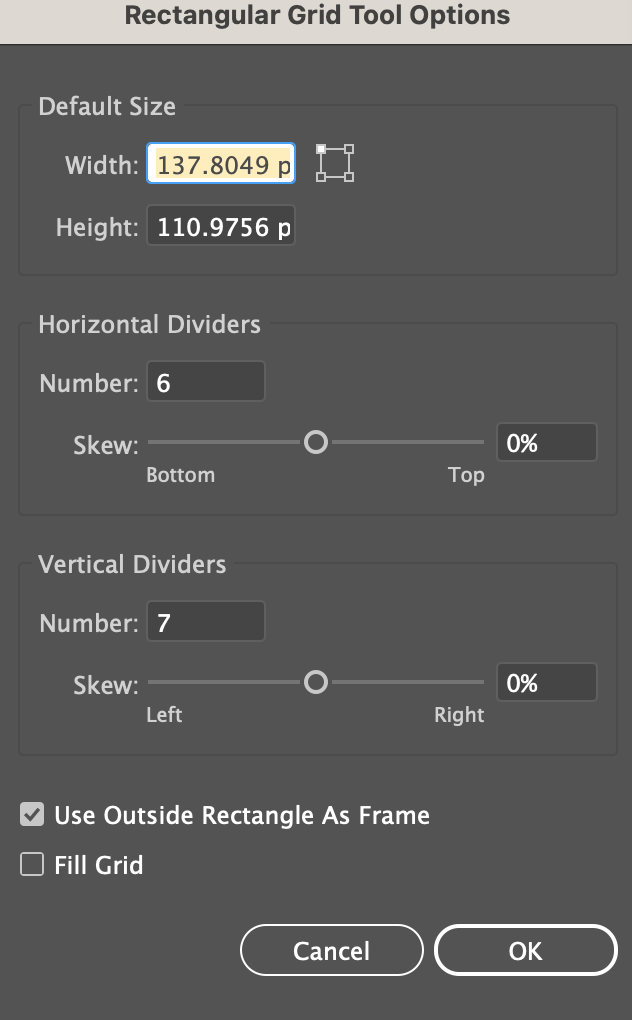
Obviously, you can add skew to tweak a traditional grid as well. Move the Skew slider left or right to try it out.
What Can You Do With Rectangular Grid
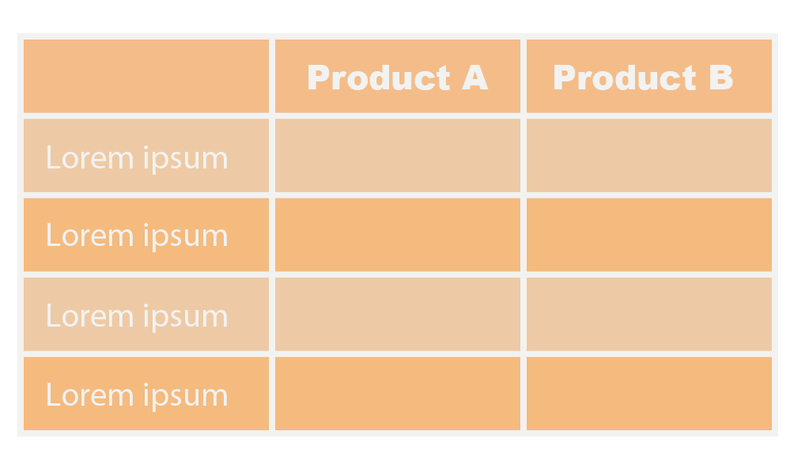
The tool is easy to use, but the trick is what you do with it. Here are a couple of ideas. You can make a table, use it as a background or make pixel art.
Make a table
I know there are other ways to make a table, but this is not a bad idea, plus you can edit it freely. Since the grid is made of lines, you can ungroup the grid to move the lines or use the Direct Selection tool (keyboard shortcut A) to move them.
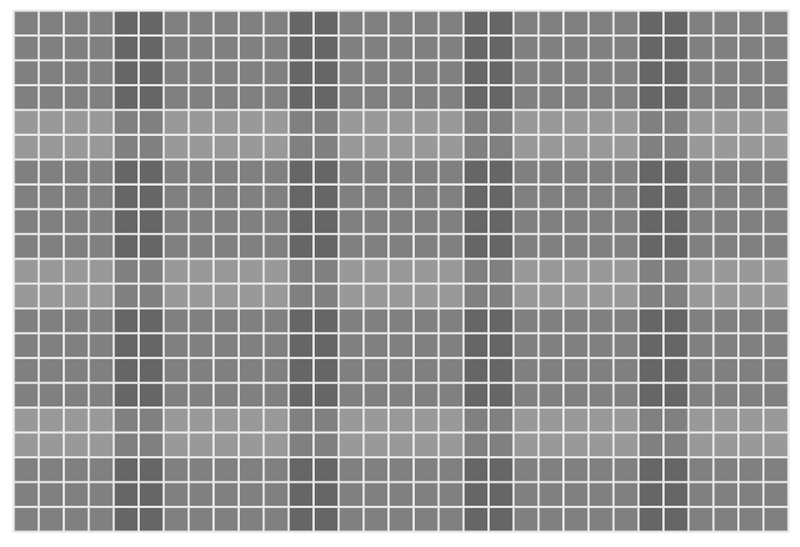
Make a grid background
Plain lines or color, a grid background give a retro feel to the design. You can use change the opacity and use it as background decoration, or make it bold. Up to you and your creative mind.
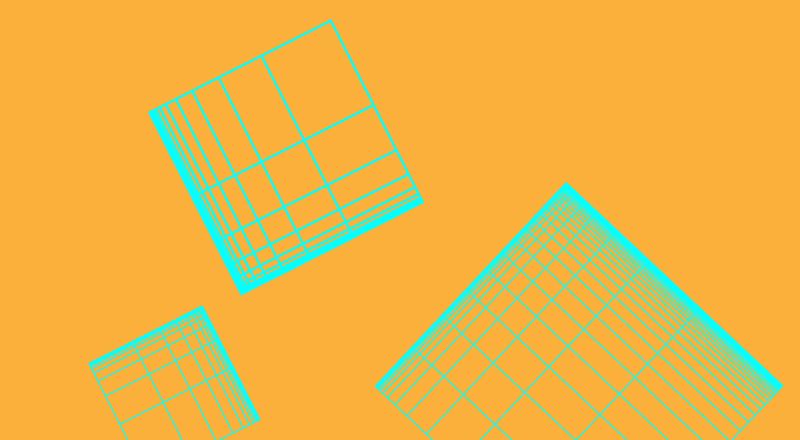
How about a plaid background?
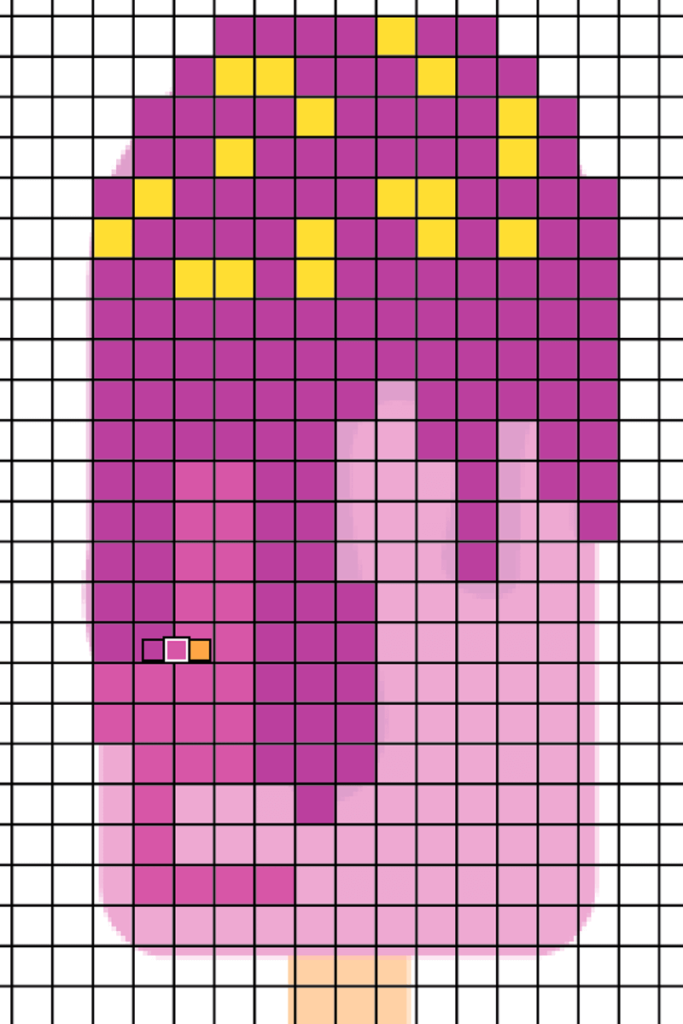
Make pixel art
When you create pixel art using the rectangular grid, make sure to increase the number of dividers because you’d want pretty small grids. Then you can use the Live Paint Bucket to paint on the grids.
How to Use the Polar Grid Tool
It’s basically the same way as making a rectangular grid. Simply select the Polar Grid Tool, click and drag to create a polar grid.
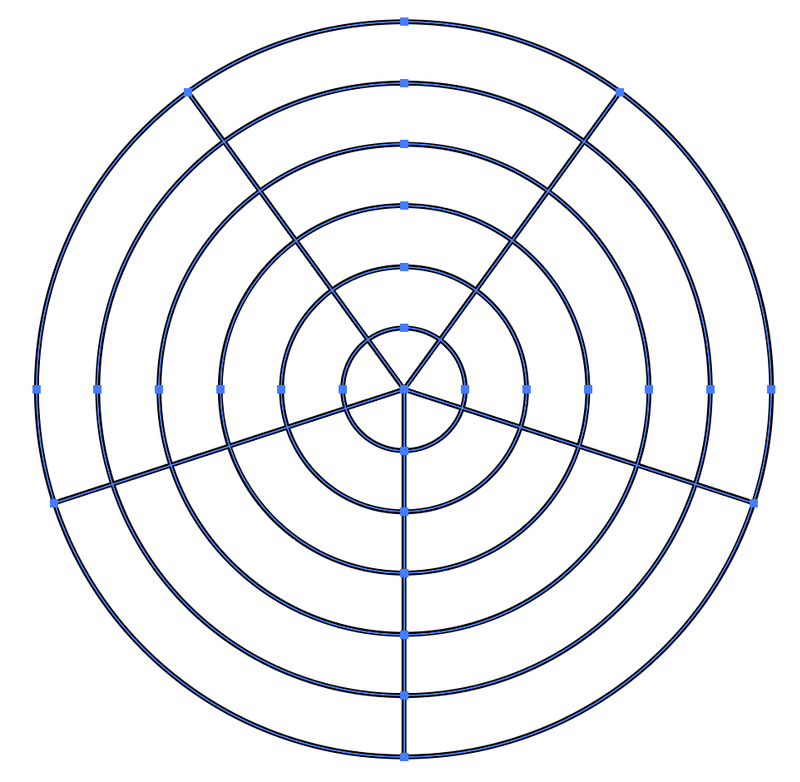
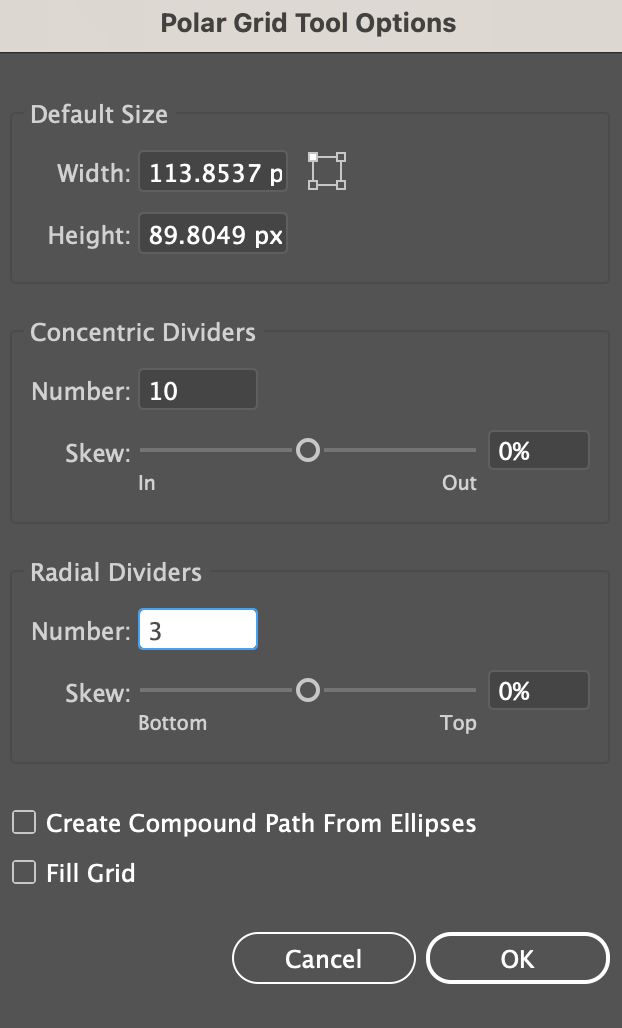
If you already know the number of lines you want to create, go ahead and click on the artboard to input the value in the Polar Grid Tool Options window. Instead of horizontal and vertical dividers, the options for the polar grid are concentric and radial dividers.
Bonus Tip
Here’s a keyboard shortcut trick. When you drag to create the polar grid, before letting go of the mouse, you can click the left and right arrows to increase or decrease the Concentric Dividers. Besides that, the top and bottom arrows control the number of Radial Dividers.
What Can You Do with Polar Grid
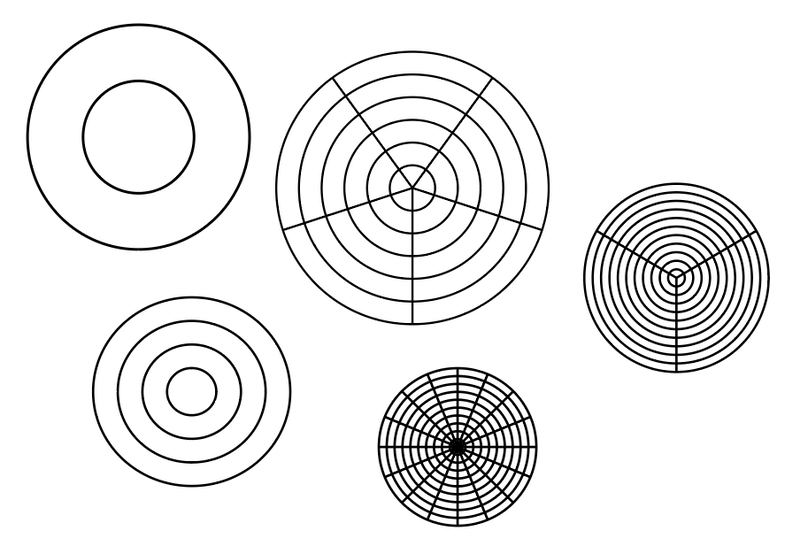
Honestly, anything you want. You can fill it with color to make something completely different such as a swirled candy, or any other circular pattern, icon, or background.
Make a swirled candy
All you need to do is create a polar grid, add color to it using the Live Paint Bucket, and use the Twist effect to make a swirled candy.

Ps. I like to set the concentric divider to 0 because the twist effect will look better.
Make a background
Shape background never gets outdated. Whenever you feel like your image background is too empty, throwing a couple of circular shapes can add some fun to the design.

Make a spider net
You’ll need to add some anchor points to the polar grid, use the Pucker & Bloat effect to make the shape, and add lines to make a spider net.
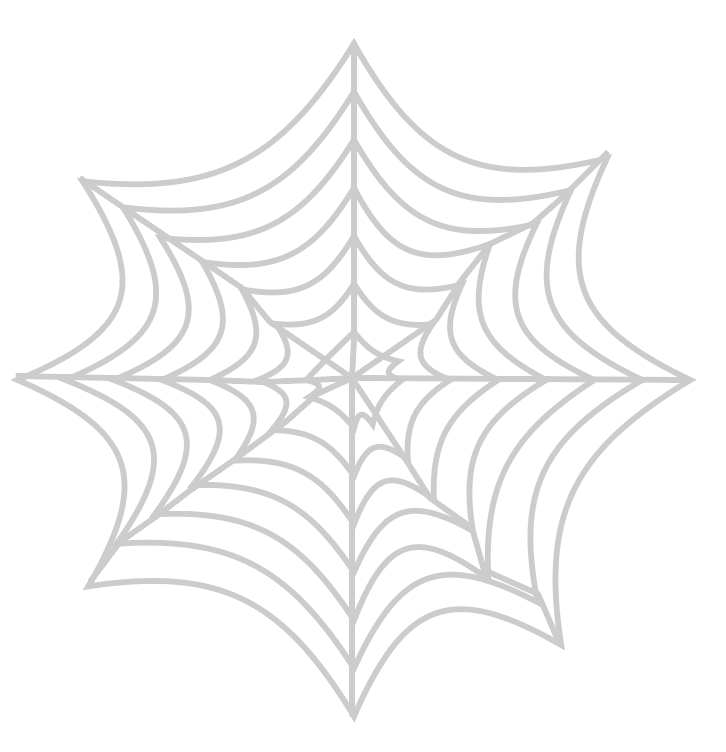
It’s easy to make but the adding anchor point step is essential because you need to align the anchor points on each side for the Pucker & Bloat effect to work fine.
Final Thoughts
Both grid tools are easy to use and you can make many things with them. Knowing the arrow keys shortcut helps a lot as well. The “difficult” part is how you play with the tool and come up with creative ideas.
rihana
thank you so much very useful. do you have a youtube channel ?
June Escalada
Hi Rihana, I don’t have a YouTube channel yet.