Making a ribbon is just like creating any other shape in Adobe Illustrator. Meaning, it starts from the basic shapes like a rectangle. Make a couple of copies, and combine shapes to create a new one. Or you can actually make a twisted ribbon from a line.
Sounds intriguing, right?
There are so many different types of ribbons, that it’s impossible to cover them all in one tutorial. So in this tutorial, I’ll show you how to make a classic ribbon banner and a few tricks to style it. Additionally, you’ll also learn how to make a 3D twisted ribbon.
Note: the screenshots from this tutorial are taken from Adobe Illustrator CC Mac version. Windows or other versions can look different.
How to Make a Ribbon in Adobe Illustrator
You can draw a ribbon using the shape tools in Adobe Illustrator, such as the Rectangle Tool and the Shape Builder Tool.
Follow the steps below to make a vector ribbon.
Step 1: Choose the Rectangle Tool (keyboard shortcut M) from the toolbar to draw a long rectangle.
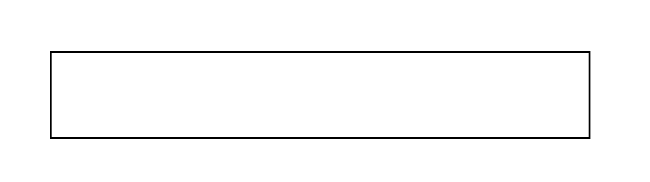
Step 2: Draw another shorter rectangle and move it to where it intersects with the longer rectangle.

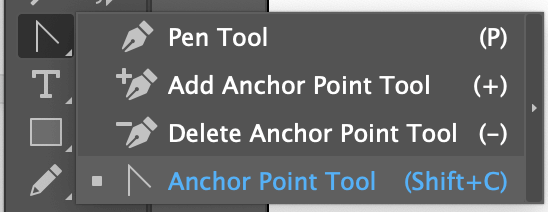
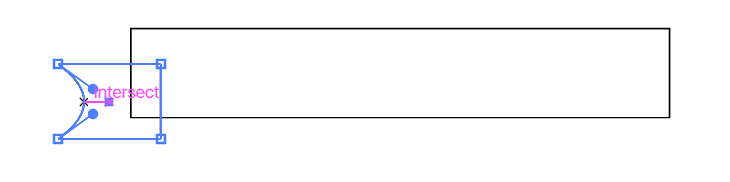
Step 3: Choose the Anchor Point Tool (keyboard shortcut Shift + C) from the toolbar.
Click on the left edge of the smaller rectangle and dragged it to the right.
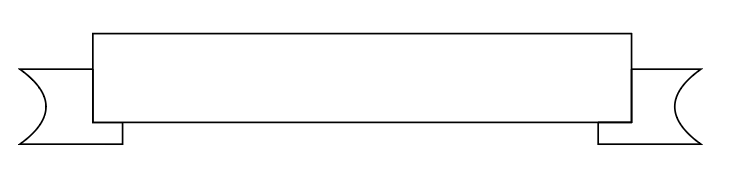
Step 4: Duplicate the shape and move it to the right side of the rectangle.
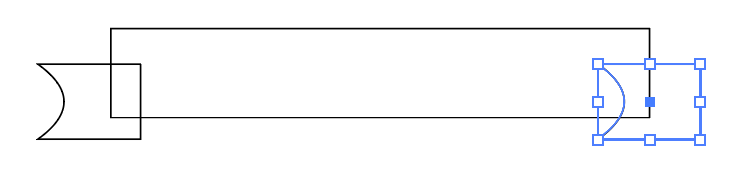
Flip the shape and you’ll see a ribbon banner shape.
No, we’re not done yet.
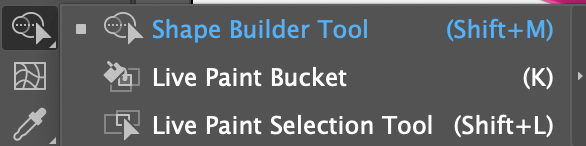
Step 5: Select all shapes and choose the Shape Builder Tool (keyboard shortcut Shift + M) from the toolbar.
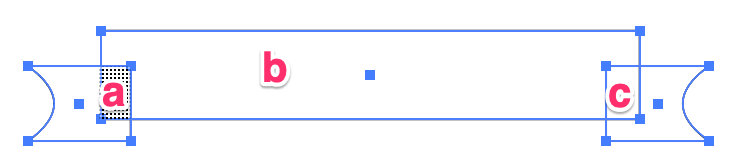
Click and drag through the shapes that you want to combine. In this case, we’re combining parts a, b, and c.
If you’re not familiar with the Shape Builder Tool, I do have a video explaining how it works!
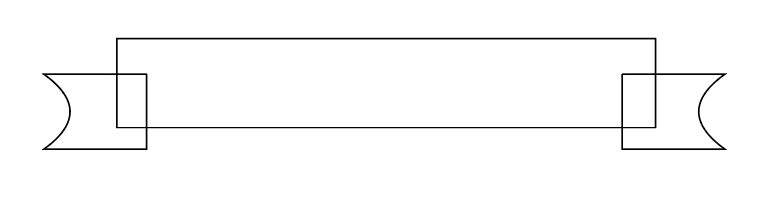
After you combine the shapes, your image should look like this.
You can use the line tool to add a small detail to the ribbon.
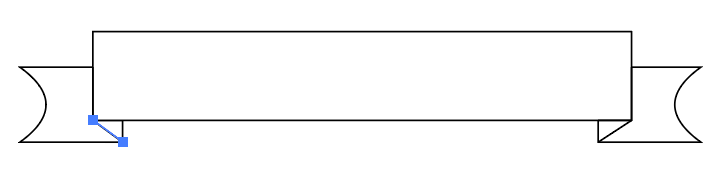
You can change the color, or add text to it and make a ribbon banner. If you plan to add a different color to that small triangle there, you can use the Shape Builder Tool to create a shape there.
How to make a ribbon banner in Adobe Illustrator
Now that you have created the ribbon shape, the next step is to style the ribbon and add text to make a ribbon banner. I’ll skip the steps of making a ribbon here since I already covered it above.
Now let’s begin with the styling part. Speaking of styling, color comes first.
Step 1: Fill the ribbon with colors.
Tip: After filling in the color, you can group the objects for now just in case you move some parts accidentally.

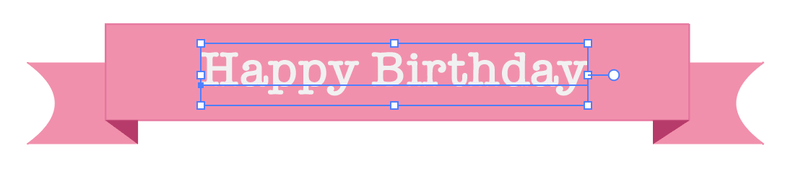
Step 2: Use the Type Tool to add text. Choose a font, size, and text color, and move the text on top of the ribbon.
If you’re happy with the look, you can stop here, but I’ll show you a couple of tricks below to make curved ribbons.
How to make curved ribbons in Adobe Illustrator
We’re not going to draw a ribbon from scratch, instead, we can distort the vector ribbon we created above to make it curve using Envelop Distort.
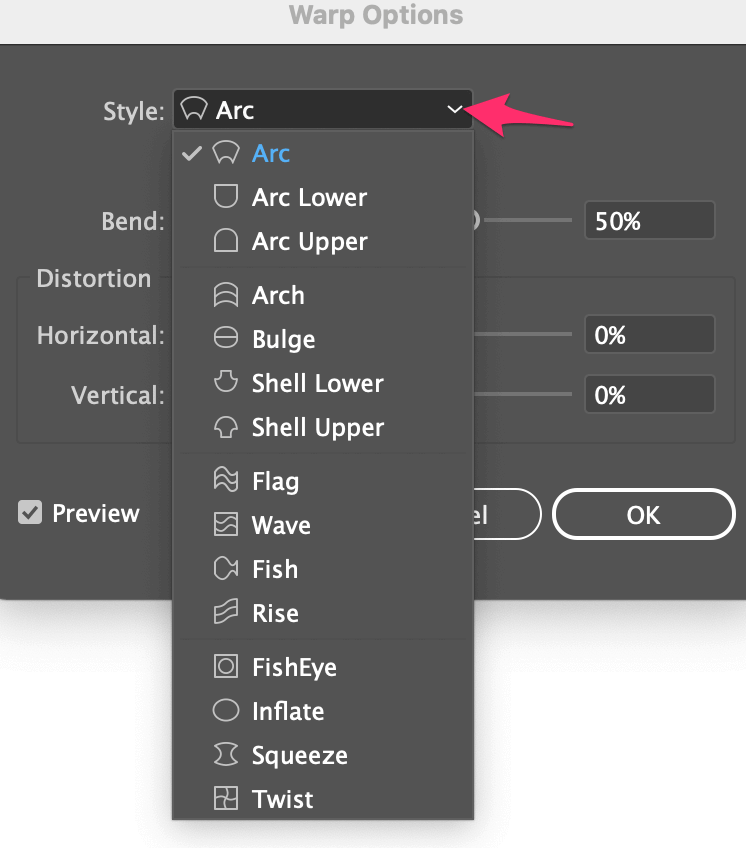
Simply select the ribbon, go to the overhead menu Object > Envelop Distort > Make with Warp. A Warp Options window will appear.
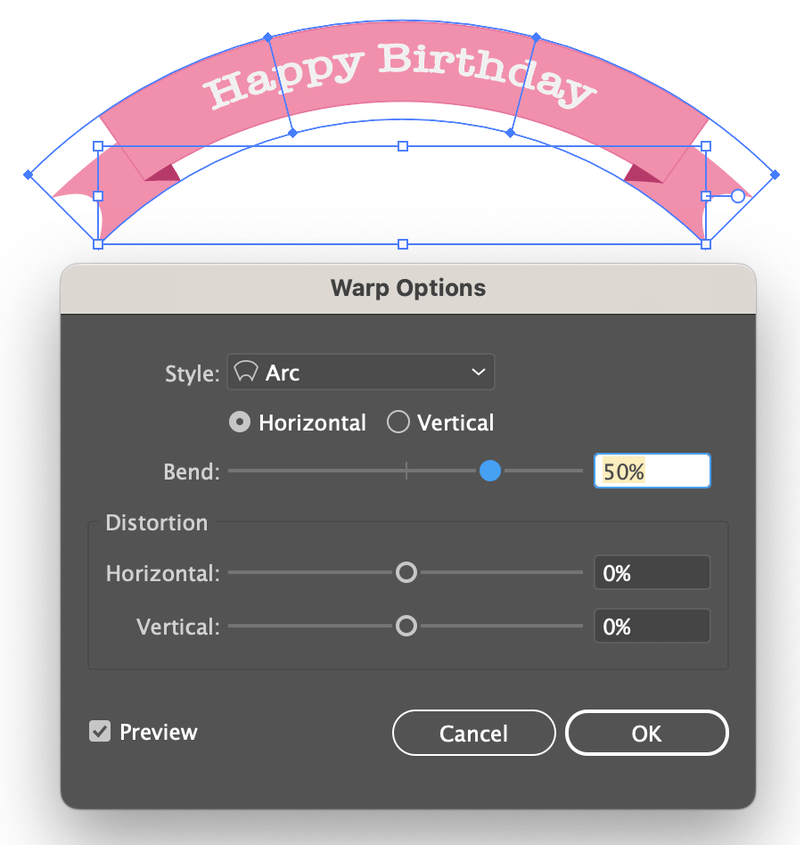
The default style is a horizontal Arc with a 50% bend. You can adjust how much it bends by moving the slider. For example, I changed it to 25% and it looks pretty good.

Click OK, and that’s it. You’ve made a curved ribbon.
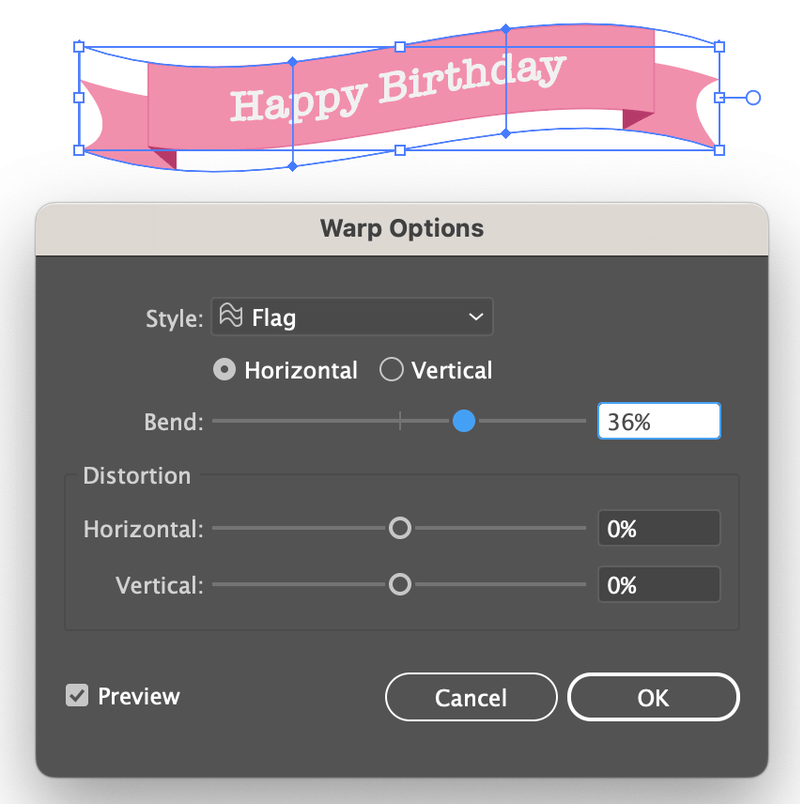
You can also click on the Style drop-down menu to see more style options.
For example, this is what the Flag style looks like.
How to Make a Twisted Ribbon in Adobe Illustrator
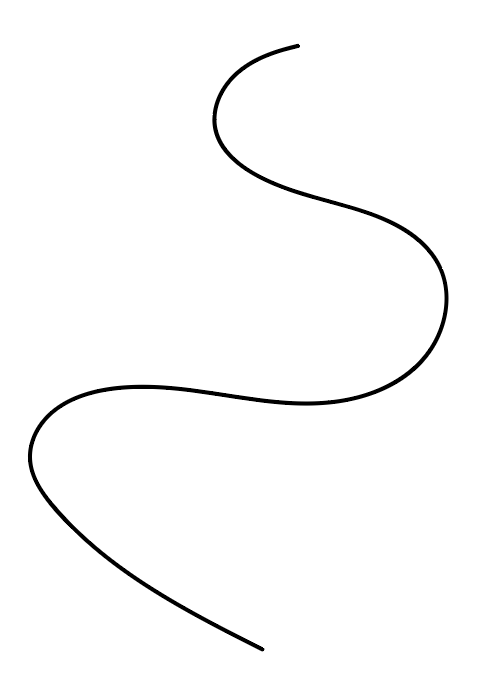
It only takes two steps to create a twisted ribbon in Adobe Illustrator. All you need to do is to draw a line and apply a 3D effect to the line. And actually, you can use this method to make a 3D ribbon too.
Step 1: draw a curved/wavy line. Here I used the brush tool to draw a line.
Step 2: Select the line, go to the overhead menu Effect > 3D and Material > Extrude & Bevel.
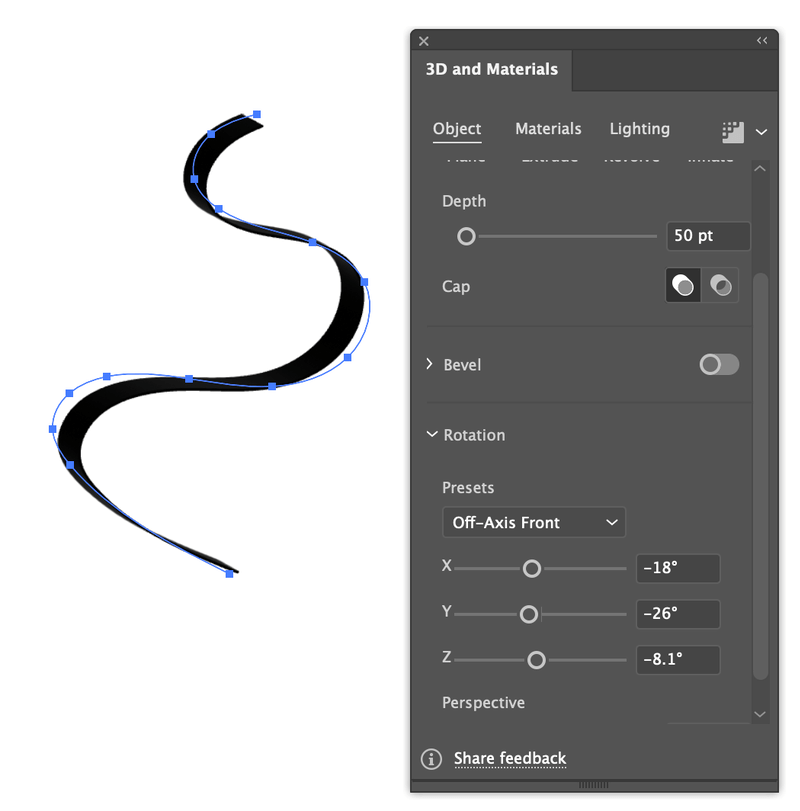
You can’t see the effect much because it’s in black. Change the color of the line to see how it looks.
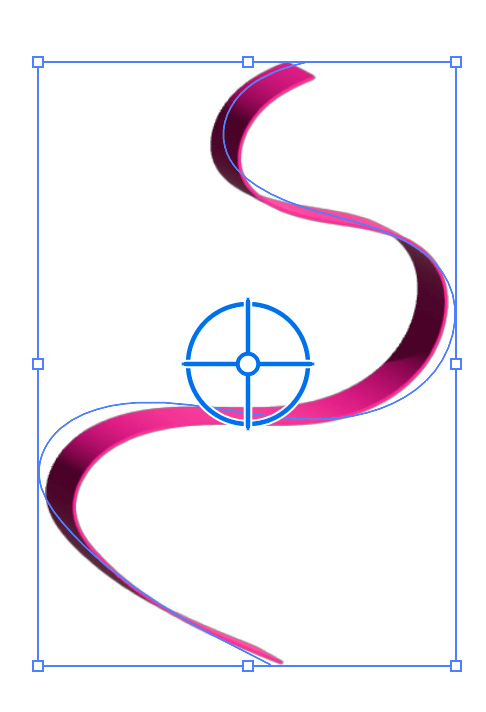
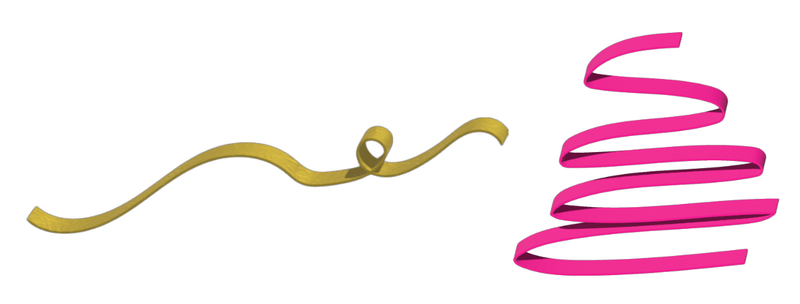
You can adjust the lighting and material, or rotate the ribbon to a preferred look.
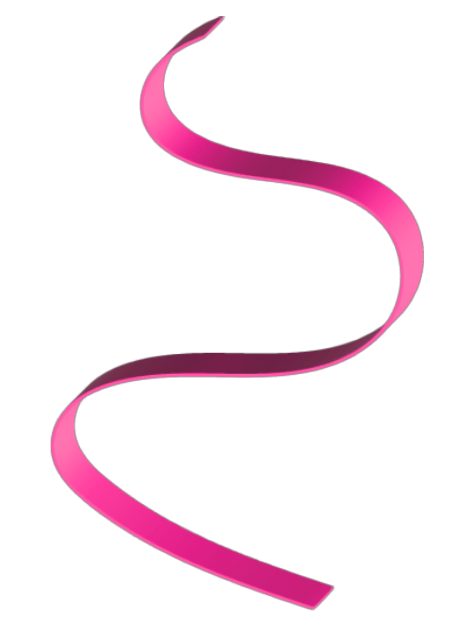
That’s it. So the shape of the ribbon depends on the line you draw. Depending on the shape, you can adjust the lighting to get the best result.
Wrapping Up
Now you should know how to create different types of ribbon banners and twisted ribbons. When you make a ribbon banner, make sure that your shapes are created properly using the Shape Builder Tool, otherwise, you might run into problems coloring the different parts.
Making 3D ribbons is pretty straightforward, the only “issue” you might run into is figuring out the lighting and perspective. Well, I wouldn’t even call it trouble. It’s more like being patient.
Let me know if you have any questions about making a ribbon in Adobe Illustrator.