In this article, you’ll learn what it means to expand objects in Adobe Illustrator, and how to use expand traced images or objects.
So what’s the purpose of the expand feature in Illustrator?
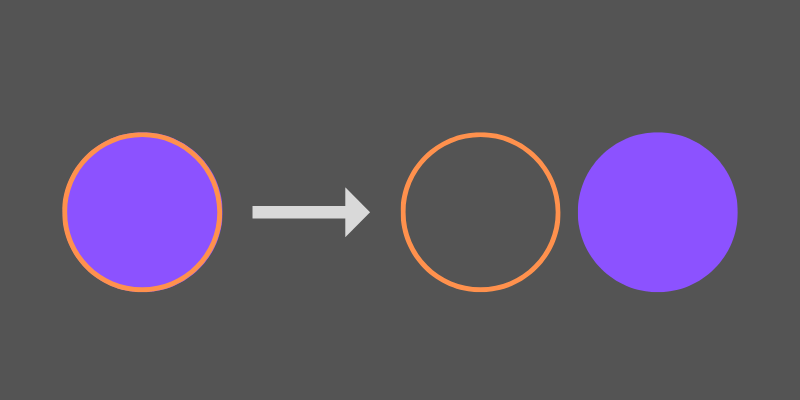
In simple words, expanding an object or image means dividing its attributes into separate objects, and you can edit the objects individually.
Depending on the object you’re trying to expand, it can be similar to ungroup, but it’s not exactly the same. I’ll show you a couple of examples below and you’ll get a better idea of what Expand does in Adobe Illustrator.
How to Expand an Object in Adobe Illustrator
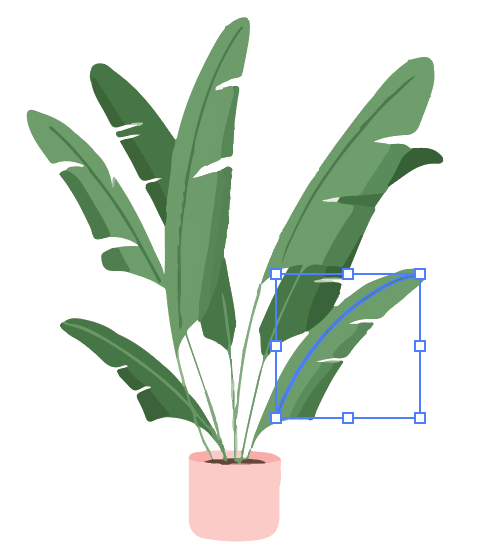
A very common use of the Expand feature in Adobe Illustrator is when you trace an image. Without expanding the image, you won’t be able to edit the shapes from a traced image. For example, let me show you how to expand this image in different ways.

Note: All screenshots from this tutorial are taken from Adobe Illustrator CC Mac version. Windows or other versions can look different.
Method 1: Expanding a Traced Image
Step 1: Select the image, go to the Properties > Quick Actions panel and choose Image Trace.
You can skip this method and go to Method 2 if you’re directly expanding an image you created in Adobe Illustrator.
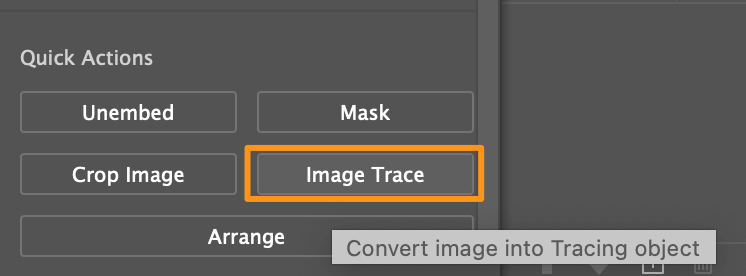
Choose an Image Trace result/effect. If you’re not sure what to choose, my Image Trace tutorial has a quick overview of what each effect looks like.
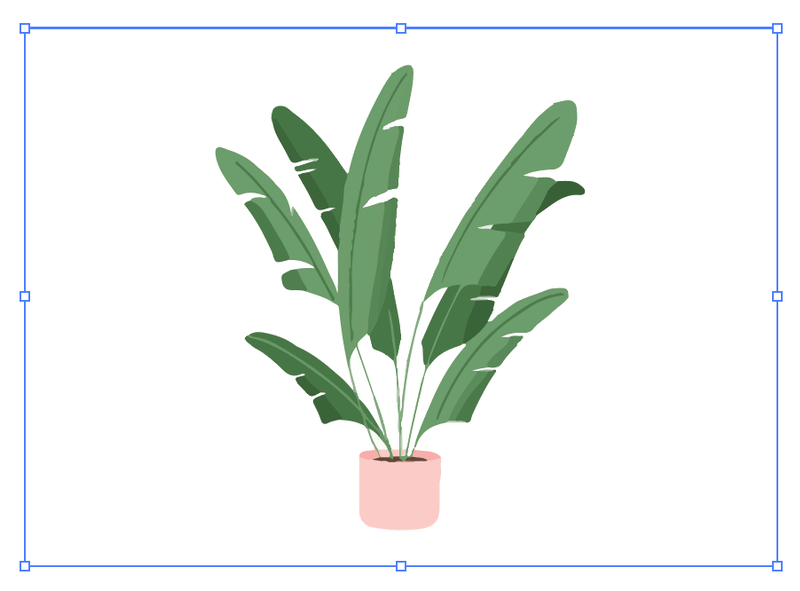
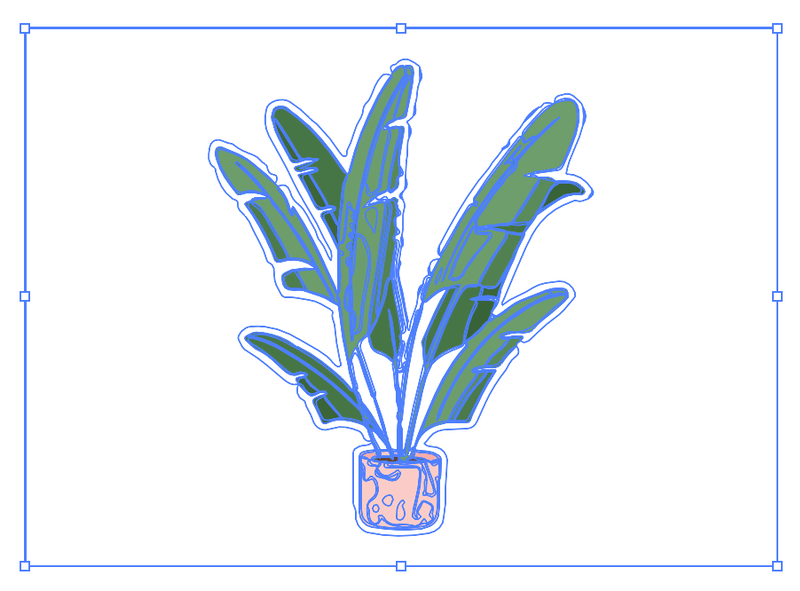
You’ll notice that when you select the image, you’re selecting the whole image instead of individual shapes or colors. That’s why you’ll need to expand the image in order to change the color or edit its form.
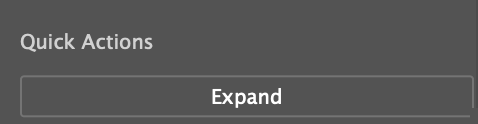
Step 2: With the traced image select, go back to the Appearance > Quick Actions panel and you’ll see an Expand option. Click Expand.
Now you should see the selected image divided into different shapes with outlines. The shapes are divided based on the same colors.
Technically, you’ve already expanded the objects but if you want to edit them, there’s one more step – ungroup the objects.
Step 3: Go back to the Quick Actions panel and click Ungroup, or you can directly right-click on the selected object and choose Ungroup.
Now if you click on a specific shape, you’ll be able to select only that part instead of the whole image, in this case, the whole plant.
Method 2: Expanding Objects
This method is useful when you want to separate the fill and stroke or expand a gradient. I’ll show you both examples.
First of all, let’s say we want to divide the fill and stroke color of this star.

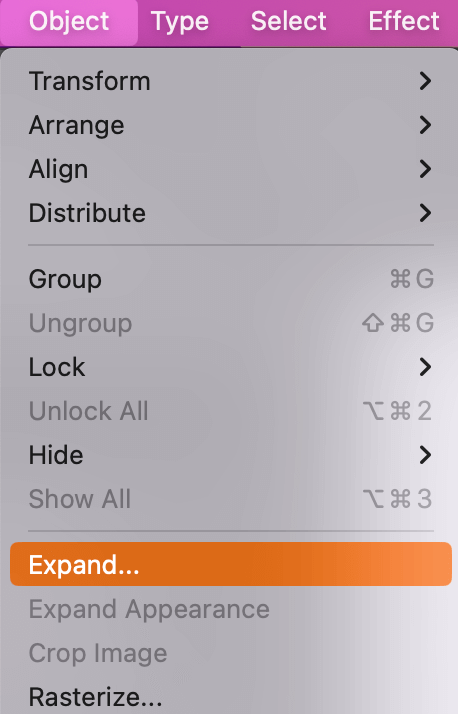
Step 1: Select the object, go to the overhead menu and choose Object > Expand.
You’ll see the Expand settings window where you can choose the attribute that you want to expand. Since the select object isn’t filled with any gradient, the option is grayed out. The expand options show based on your object’s attributes.
For example, my selected object (the star) has a fill color and a stroke color, that’s why only the Fill and Stroke options are available.
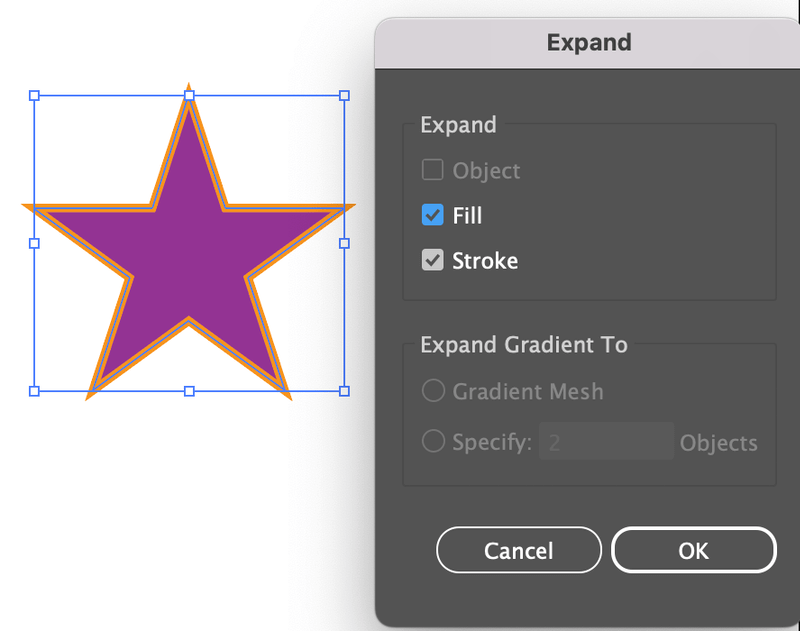
Step 2: Select the attribute you want to spend, and click OK. In this case, I selected both.
Now if you ungroup, you’ll see that the Fill and Stroke colors become two different shapes.

Now let’s see an example of expanding gradient. Here’s a circle filled with gradient colors.

In this case, in the Expand settings window, you’ll see the options Fill, Gradient Mesh, or Specify.
Gradient Mesh expands gradients to a single mesh object and Specify sets the tolerance for color values between color stops. When you choose the value for Specify, keep in mind that higher numbers maintain a smooth color transition and low numbers can create a more banded appearance.
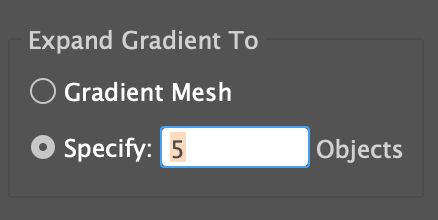
For example, I chose to expand the gradient specifically to 5 objects, so the circle is divided into five parts and four colors. I also don’t know why it’s four colors instead of five.

If you double-click on one of the color bars, you’re able to change the color.

You might be wondering what the expand Object does. It’s used to expand more complex objects, including live blends, envelopes, symbol sets, and flares. For example, when you distort text using Envelope Distort, the text has a box around it, and it’s still live text.

Now if you expand the object, it’ll convert the live text to an editable shape.

FAQs
Here are more questions related to expanding objects in Adobe Illustrator.
What’s the difference between expand and outline in Adobe Illustrator?
Creating outlines is normally used to convert text into edible vector objects and Expand can be used to turn any objects into edible shapes.
What is the difference between expand and expand appearance in Illustrator?
You might notice that the Expand Appearance option is often grayed out, that’s because Expand Appearance is only available when it’s a stroke or when an effect is applied on the object.
How to Undo Expand in Illustrator?
The easiest way to undo Expand or undo anything in Illustrator is by using the keyboard shortcut Command + Z (Ctrl + Z). If it’s not your last action, you can undo the action from the history panel.
What is the expand keyboard shortcut in Illustrator?
There isn’t a default keyboard shortcut for the Expand command, but you edit and create your own keyboard shortcut for it. Go to the overhead menu and choose Edit > Keyboard Shortcuts to create your own.
Conclusion
Expanding objects in Illustrator allows you to edit the shapes separately, and you should ungroup the expanded object in order to change its form or color. You can either use the Expand command from Quick Actions or go to Object > Expand while an object is selected.
Md.Manjurul Ahsan
Your article is always exceptional !
Morycah
Very informative and useful