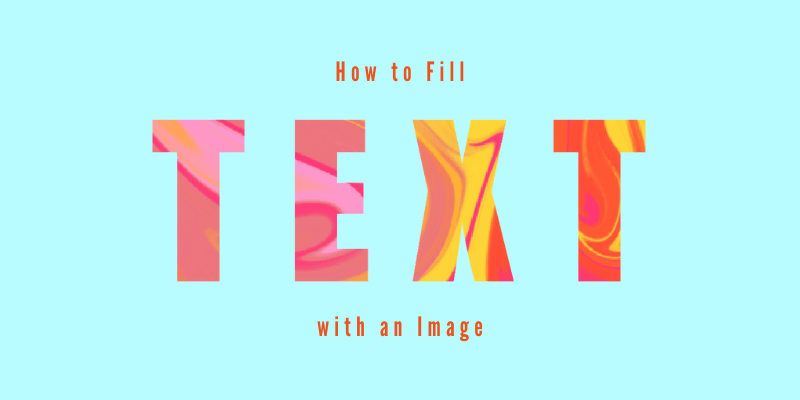
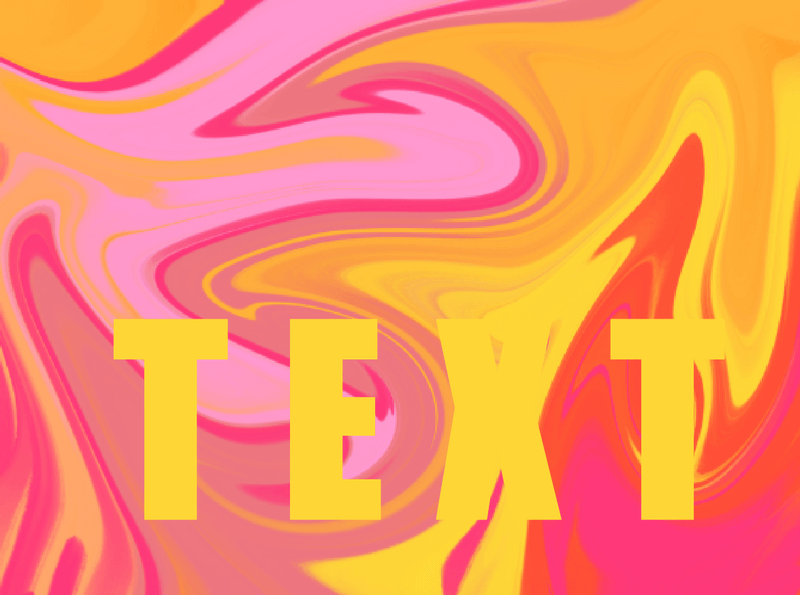
No idea what to do with the text when you get a project that’s heavily text-based? Here’s my trick. Use a fancy background to fill a keyword and make it the main design element.
My name is June. I worked for event companies for four years and the daily design involved a lot of text content, which made it complicated to create graphics because eventually, the focus should be the text. So I actually developed my text poster design “skill” from there.
In this tutorial, I’m going to show you how to fill the text with an image background along with some tips that will make your text look better.
The basic idea is to create a clipping mask. Follow the steps below!
Note: the screenshots from this tutorial are taken from Adobe Illustrator CC Mac version. Windows users change the Command key to Ctrl.
Step 1: Add text to Adobe Illustrator. It’s highly recommended to use a thicker font or bold text because it will better show the image on the text when you fill it.

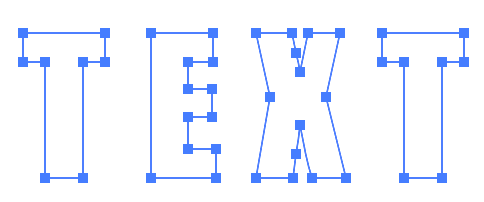
Step 2: Select the text you want to fill with an image, and use the keyboard shortcut Command + Shift + O to create an outline.

Note: you can change the character style of outlined text because when you create a text outline, the text becomes a path. If you’re not 100% sure about the font you’re using, you can duplicate the text before creating an outline just in case you want to change it.
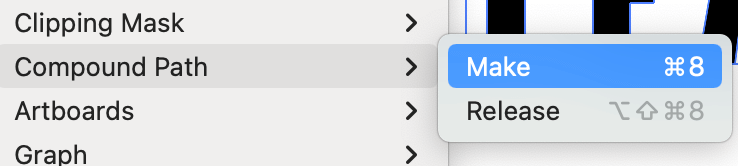
Step 3: Go to the overhead menu and select Object > Compound Path > Make or use the keyboard shortcut Command + 8 to make a compound path.
The original text fill color will disappear. You can add a fill color, but for now, just to keep track of where the path is. When you fill the text with an image later, the fill color will disappear.

Step 4: Place and embed the image you want to fill the text with.

Tips: Choosing the right image is essential, not all images can make the fill look good. For example, try to find an image that doesn’t have a lot of empty space. From my experience, I think 90% of the time, pattern background images are the best for filling text.
If you don’t know how to embed an image in Illustrator, check this out:
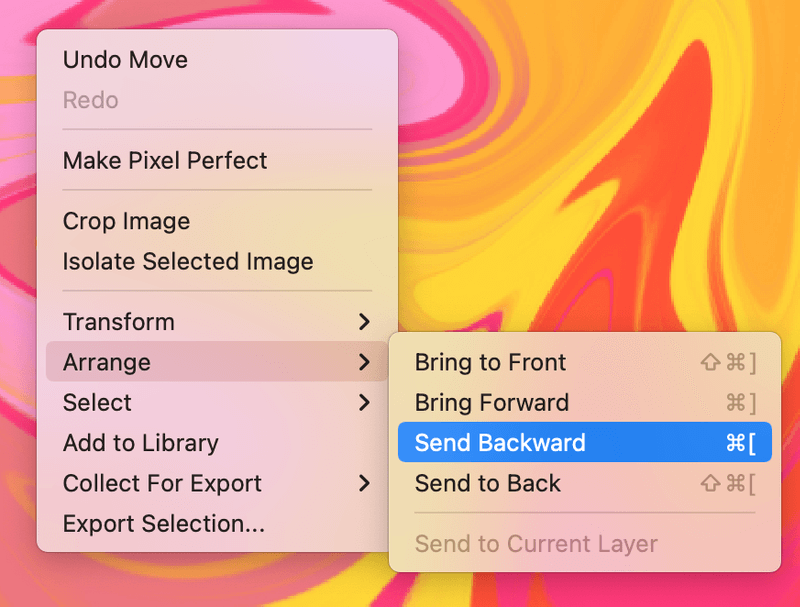
Step 5: Select the image, right-click, and choose Send Backward because you can’t create an outline if the image is on top of the text.
Step 6: Move the text to the area of the image that you want to fill. Resize the text if needed.
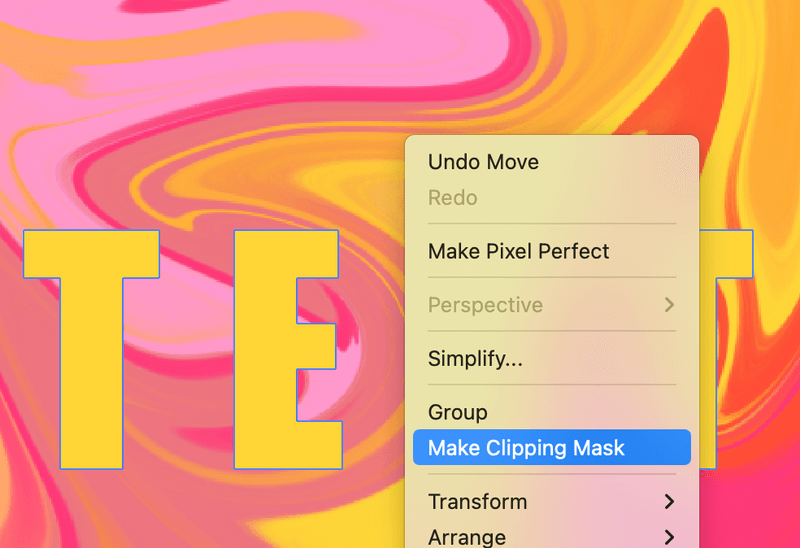
Step 7: Select both the text and image, right-click, and choose Make Clipping Mask.
There you go!

Conclusion
Choosing the right image and font are the keys to making a nice text effect. Generally, the thicker text is better for showing the image. Remember the text should always be on top when you make a clipping mask, otherwise, the image background will not show.
max
thanks, I just forgot how to do it. With your help, I am now back on track.
“so much to remember, so little brain capacity…
June Escalada
Awesome! Yeah, it happens! Sometimes I need to refresh my memory on certain tools that I don’t use often too.
Ally
Thank you for this! I couldn’t work out what I was doing wrong as I knew this was possible in Illustrator – turns out I was forgetting the ‘compound path’ step. Worked like a charm after that 🙂
June Escalada
You’re welcome Ally! Glad it worked out well for you!
David
Thank you so much for your help, really clear and easy to follow instructions. You have a new follower for sure.
June Escalada
Hey David! Thanks 😊
Mark W
Hey June, just wanted to thank you for your expertise related to “How to Fill Text with an Image in Adobe Illustrator”. I’ve not been formally trained to use Illustrator so I really appreciate your wisdom. You helped me create to perfect effect for my bookmark project. THANKS and God Bless You!