You can use multiple objects to cut a shape, simply draw a line to cut, or cut and divide a shape into multiple parts. The Eraser Tool and Knife tool can also be handy for cutting vector objects.
I love using the Pathfinder tool to cut, although it’s more famous for creating shapes. Well, sometimes you cut an object to create new shapes, right? So make sure to take a look at it.
In this tutorial, you’ll learn four easy ways to cut an object in Illustrator using different tools. I’ll also include tips on when to use which, with practical examples.
Note: all screenshots are taken from Adobe Illustrator CC Mac version. Windows or other versions can look different. Windows users change the Command key to Ctrl.
Method 1: Pathfinder tool
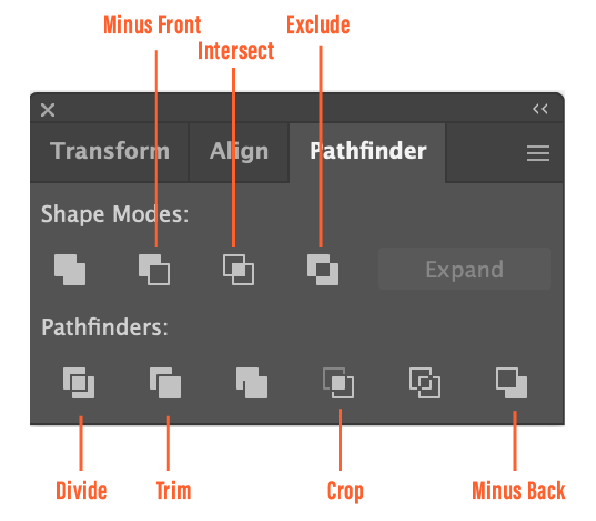
From the Pathfinder panel, you’ll find many different options to cut shapes. If you don’t see it under the Properties panel, go to the overhead menu Windows > Pathfinder to open it.
Note: If you want to use the pathfinder tool to cut, you need at least two overlapping objects. You can use any option from the Pathfinder panel on a single object.
I won’t go over all pathfinder options in this tutorial, as I’ll only cover the ones useful for cutting objects (which are 70% of the options), including Trim, Divide, Minus Front, Minus Back, Exclude, Intersect, and Crop.
See how you can cut an object using each of the options below. Once you decide how you want to cut your object, simply select the objects and click one of the options below. You can ungroup to separate the cut objects.
Trim
The Trim Tool cuts the shape from the top layer. You can create a paper-cut effect. For example, you can use it to make a logo cut out for some marketing materials.

Divide
The Divide Tool is similar to the Trim tool. It cuts and divides an object into different parts along its intersecting paths. You can use this tool to change the colors of different parts within a shape or move the shapes around to make a shape poster.
For example, you can turn something like this:

Into something like this:

As you can see, the only shapes I used were circles and squares but it created more shapes after I cut the overlapping paths using the Divide tool.
Minus Front & Minus Back
This is the easiest way to create a crescent moon. All you need to do is create two circles and click Minus Front (or Minus Back). Minus Front deletes the shape on top, while Minus Back deletes the shape at the bottom.
For example, here are two overlapping circles.
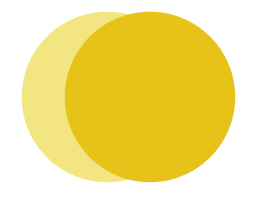
If you choose Minus Front, it’ll delete the circle on the top, which is the darker yellow color, so you’ll only see the lighter yellow in the shape of a crescent moon.

If you choose Minus Back, as you see, it cut out the bottom lighter yellow circle, leaving the darker yellow crescent moon.

Exclude
This tool deletes the overlapping area of overlapping shapes. It’s an easy way to cut overlapping areas. For example, you can use it to make abstract patterns decorative borders, and text effects.
For example, You can play with overlapping letters and make this effect.

Intersect
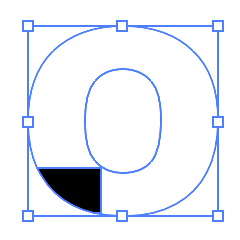
The Intersect tool is opposite to the Exclude tool because it only keeps the shape of the intersecting (overlapping) area shapes. For example, you can quickly make a quarter circle using this tool.
Simply overlap a circle and square.

Click Intersect.

Crop
It almost looks like the intersect tool except that the crop tool doesn’t delete the top object. Instead, you can see the selection, ungroup, and edit it. Let’s see an example.
As you can see, the letter “O” is the top object and the overlapping area is the small area between the letter L and O.
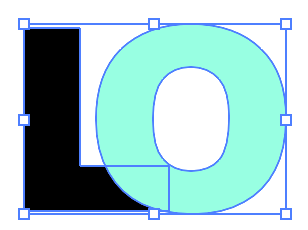
If you click Crop, you’ll still be able to see the outline of the letter O together with the overlapping area that’s cropped out.
You can ungroup to edit it.

In general, the Pathfinder tool is great for cutting objects to create new shapes.
Method 2: Eraser Tool
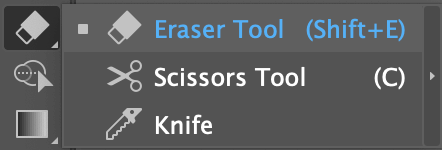
You can use the Eraser Tool to erase brush strokes, pencil paths, or vector shapes. Simply select the Eraser Tool (keyboard shortcut Shift + E) from the toolbar, and brush on the areas that you want to cut.
There are a few circumstances the Eraser Tool doesn’t work. For example, if you’re trying to erase live text or on a raster image, it wouldn’t work, because the Eraser Tool only edits vectors.
Simply choose the Eraser Tool and brush on the part of the object that you want to cut.
For example, I erase/cut a small part of the heart so that it doesn’t look so dull.

You can change the eraser size by pressing the left and right brackets keys [ ] on your keyboard.
Method 3: Scissors Tool
The scissors tool is great for cutting and dividing paths, so if you want to cut an object filled with strokes, the scissors can help.
I’ll show you a quick example of how to cut this cloud shape.

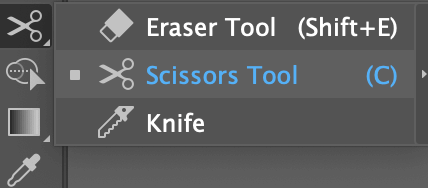
Step 1: Choose the Scissors Tool (keyboard shortcut C) from the toolbar.
Step 2: Click on the path to select a path in between the anchor points that you clicked.

For example, I clicked on the two points that I circled out. If you use the selection tool to click on the path in between, you can move it.
You can change the fill from stroke to color and see how the shape is cut.

Method 4: Knife Tool
You can use the knife tool to slice an object, a shape, or text to make different edits, separate shapes, and cut an object. If you want to make a freehand cut, this is the go-to.
You can cut or divide any vector shapes using the Knife tool. If you want to cut a shape from a raster image, you’ll need to trace it and make it editable first.
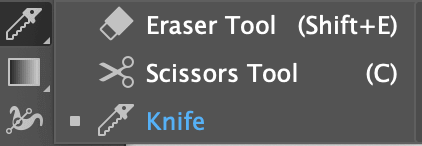
Step 1: Add the Knife Tool to your toolbar. You can find it from Edit Toolbar > Modify and drag it to wherever you want it to be on your toolbar.
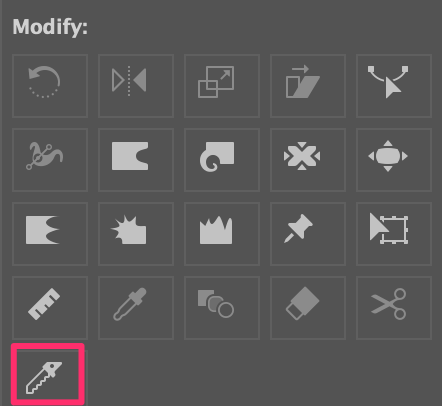
I recommend putting it together with other “erasing tools”.
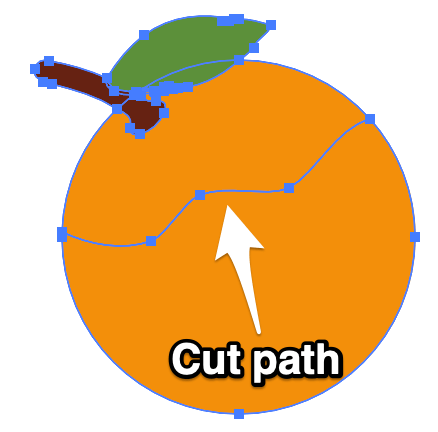
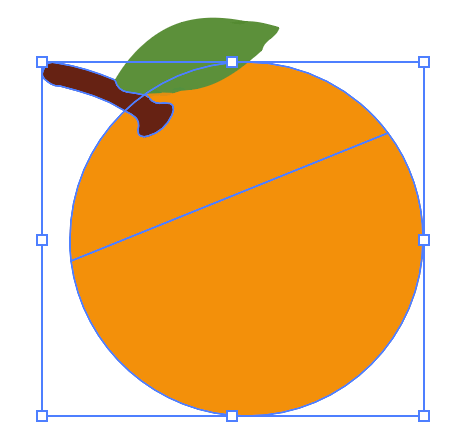
Step 2: Choose Knife from the toolbar and draw on the object to cut it. If you want to separate the shapes, you must draw through the entire shape.
Step 3: Ungroup to delete the part that you don’t want, move it or change its color.

If you want to cut straight, hold the Option key (Alt key for Windows users) while you draw.
You can also use the knife tool to cut and edit the outlined text to create a text effect like this:

Same process as cutting an object: Use the knife to draw the cut path, ungroup, and choose individual parts to edit.
Conclusion
I can’t say which tool is the best because they are good for different projects. Remember all of the tools I mentioned above have one thing in common: they only work on vector objects!
Whichever option you choose, you’re able to edit the anchor points of the vector. The Pathfinder panel is best for cutting to create new shapes. Scissors work best with paths and knife is best for a freehand cut.
jūra
thanks!
Alex
very good info, thanks