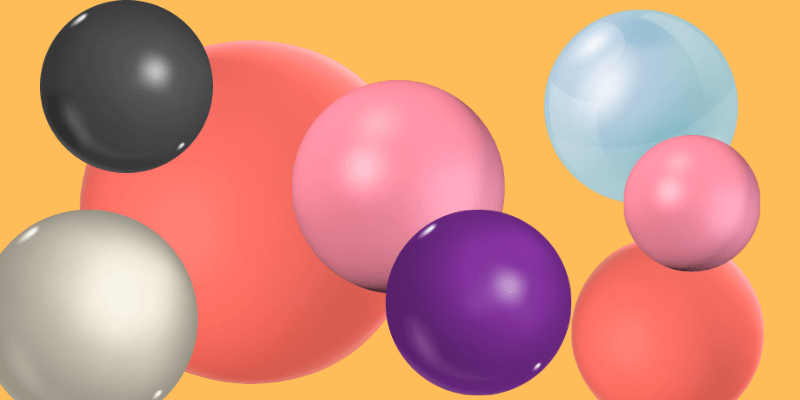
There are different ways to make an object look round in Adobe Illustrator. For example, you can use Clipping Mask, Envelop Distort, 3D tools, etc. Although everything starts with a circle, when you use the Clipping Mask and Envelop Distort, you create a round 2D circle.
But if you’re looking to make something more abstract and 3D, like a sphere, you’ll need to apply a 3D effect.
In this tutorial, you’ll learn how to use the 3D tool to make different types of spheres in Adobe Illustrator.
So, the solution is to add a 3D effect on a circle.
Not exactly, instead, you’ll be adding a 3D effect to a half circle. Let me show you how it works!
Note: All screenshots from this tutorial are taken from Adobe Illustrator CC Mac version. Windows or other versions can look different.
How to Make a 3D Sphere in Adobe Illustrator
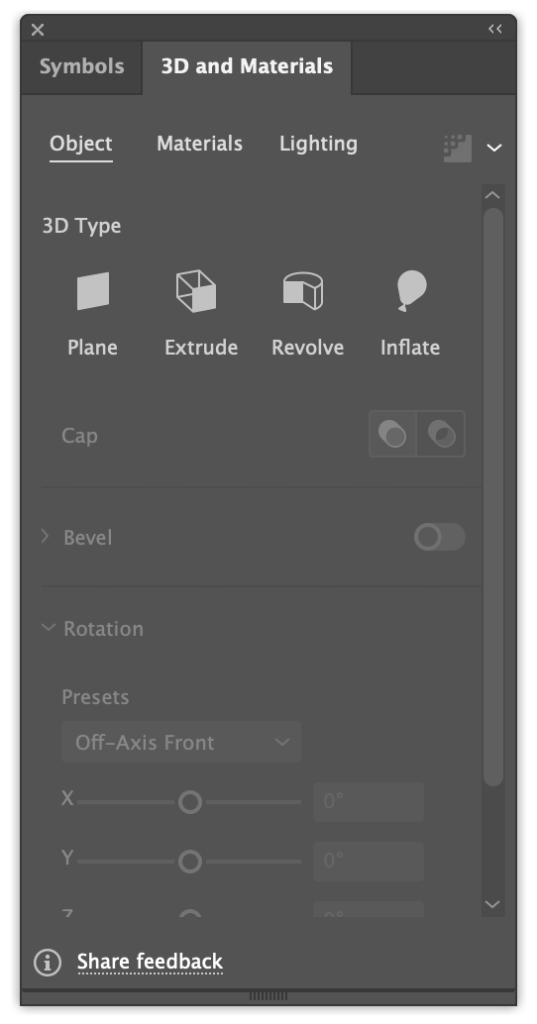
Before getting into the steps, let’s get the working panels ready. We’ll be using the 3D tool panel, and if you want to add an object or text to the sphere, you’ll be using the Symbols panel as well.
So go to the overhead menu Window > Symbols and Window > 3D and Materials to open both panels.
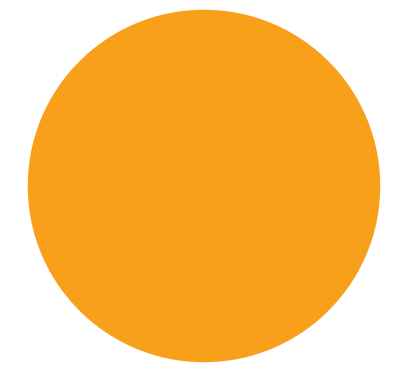
Step 1: Use the Ellipse Tool (keyboard shortcut L) to make a perfect circle.
Tip: I suggest getting rid of the stroke color and choosing a fill color so that you can see the 3D effect better. If you use black as the fill color, the 3D effect doesn’t show much.
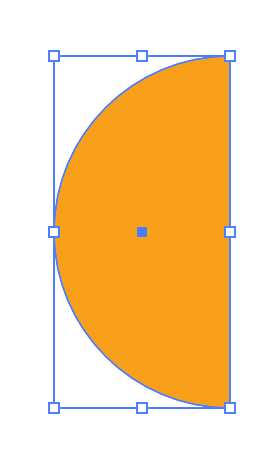
Step 2: Use the Direct Select Tool (keyboard shortcut A) to select one of the anchor points on the side and hit the Delete key to cut the circle in half.

You should get a half circle like this.
Step 3: Select the half circle, go to the 3D and Material panel, and click Revolve.

The first thing you see would be this 3D column shape, but that’s not it.
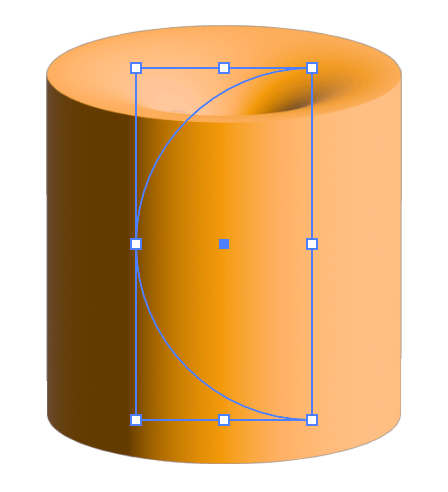
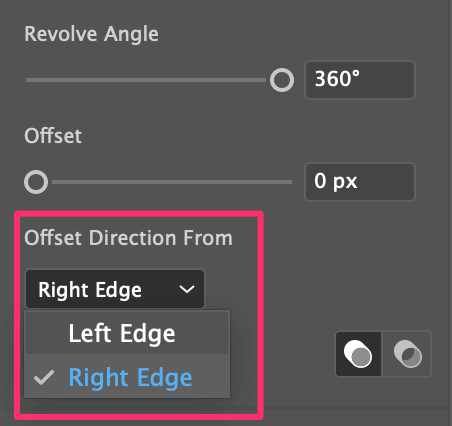
You need to change the offset direction.
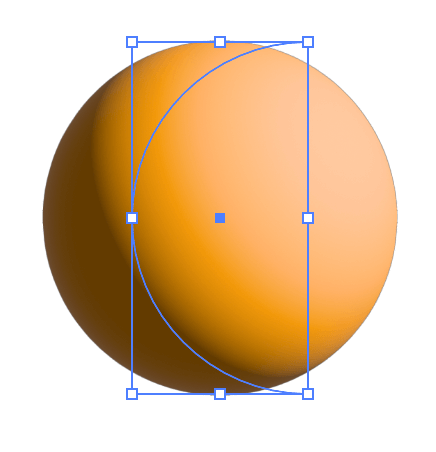
Step 4: Change the offset direction to Right Edge.
And here’s the sphere!
Feel free to adjust other settings like the material and lighting.
When you’re happy with the result, you need to exit the 3D mode and make it an object.
Step 5: With the sphere selected, go to the overhead menu Object > Expand Appearance to finalize the 3D sphere.
Now, what if you want to add text or an image to the sphere?
How to wrap text around a 3D sphere
When you add text to a sphere, you’ll convert the text into a symbol, that’s why I mentioned earlier we need to have the Symbols panel ready.
Let me show you how it works!
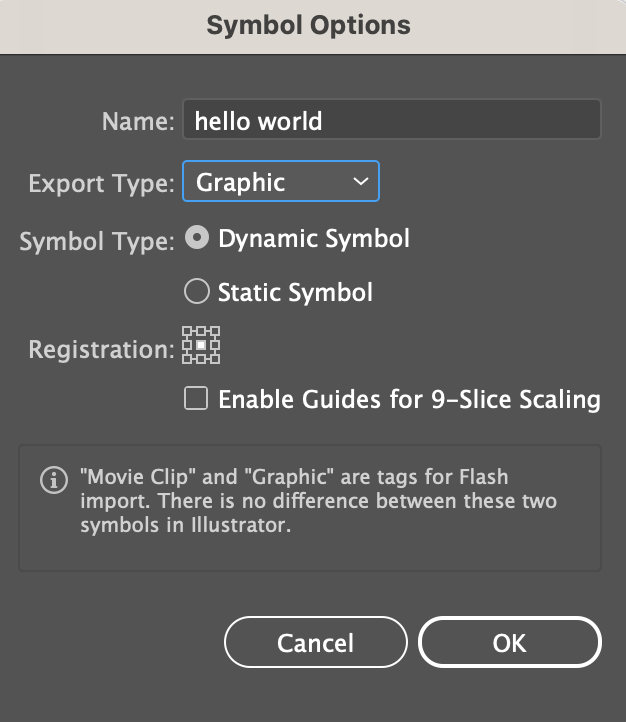
Step 1: Use the Type Tool (keyboard shortcut T) to add text. For example, I added “Hello World” and I aligned the text to the center.

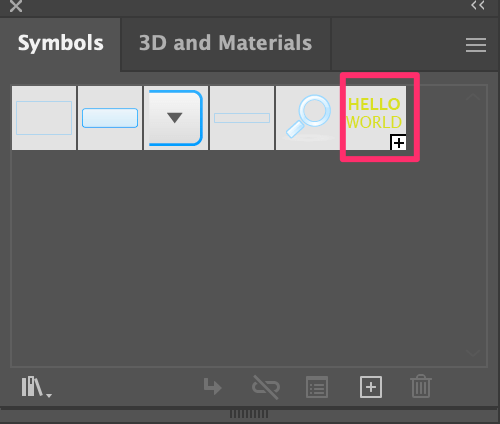
Step 2: Select the text and drag it to the Symbols panel. You can give it a name and click OK.
The text will show as a symbol on the Symbols panel.
Step 3: Make a 3D sphere. You can follow Steps 1 and 2 to make a half circle from above, but we’re going to use the classic 3D panel to wrap text around the sphere.
So instead of choosing Revolve directly from the 3D and Materials panel, go to the overhead menu and choose Effect > 3D and Materials > 3D (Classic) > Revolve (Classic).
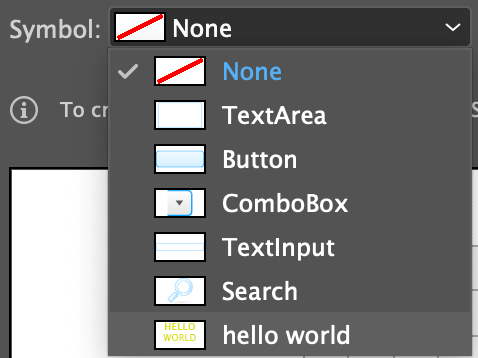
This will open up the classic 3D panel, and you can change the offset direction to Right Edge and click Map Art.

Step 4: Change the symbol from None to the text symbol you just created. In my case, it’s “hello world”.
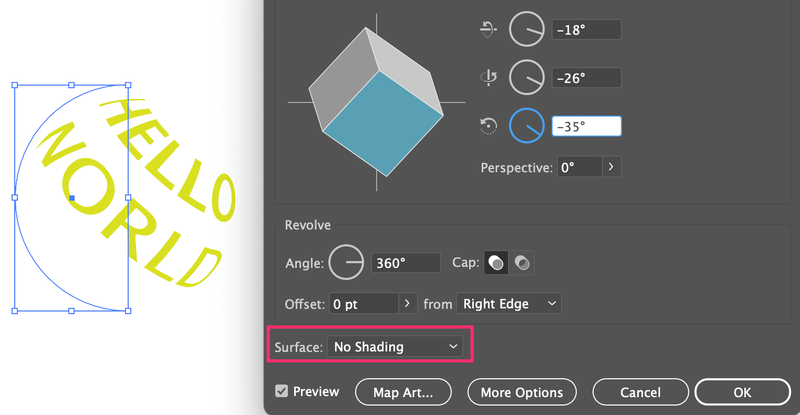
You should see the text on the working panel below and as you adjust the position of the text, it shows how it looks on the sphere.

Click OK once you’re happy with the position.
If you want to get rid of the background sphere color, you can change the Surface setting to No Surface. Feel free to rotate the direction too if you want.
Click OK and that’s it!
How to wrap an object or image around a sphere
Wrapping an object or image around a sphere in Adobe Illustrator works exactly the same as how you wrap text. So you can use the same method above to do so.
Instead of adding the text as a symbol, you would drag your object or image to the Symbols panel, and then use the same method above to finalize the 3D sphere with an image.
For example, if you want to put this map on the sphere, drag it to the Symbols panel.
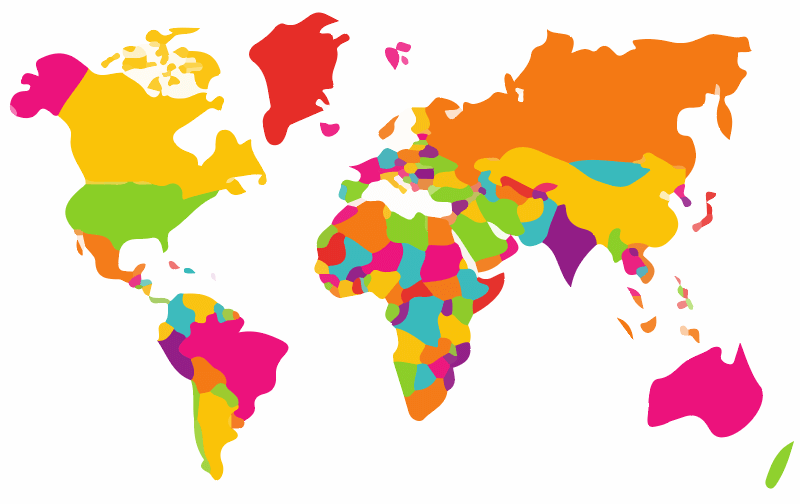
Use the 3D (Classic) tool to make a sphere, and choose the map as the Map Art.

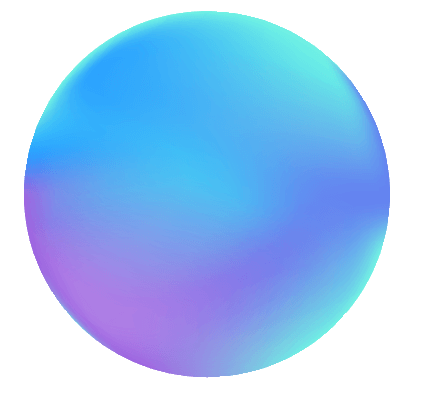
How to make a Gradient Sphere in Adobe Illustrator
You don’t necessarily need the 3D tool to make a gradient sphere. Instead, you can use the Mesh Tool. The advantage of using the Mesh Tool is that you get more control over the colors and shades. Here’s how it works.
Step 1: Decide which colors you want to use for the gradient sphere. You can choose the colors from the Swatches panel or sample colors using the Eyedropper Tool.
For example, I’m going to use this color palette I made using the Blend tool.

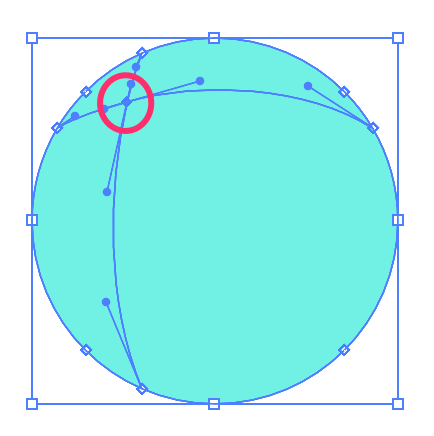
Step 2: Create a circle.
Step 3: Choose the Mesh Tool from the toolbar or use the keyboard shortcut U to activate the tool.
Click on the circle where you want to create the gradient. For example, I click on the top left corner, and you can see two intersecting lines. The gradient light will start from the intersection point.
Step 4: Use the Eyedropper Tool to sample a color from the palette, or you can directly choose a color from the Swatches.
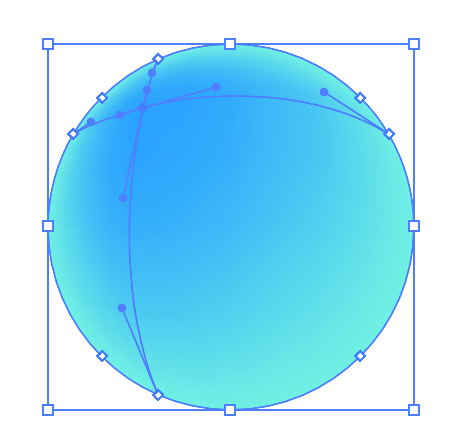
Keep adding points to the circle using the Mesh Tool.
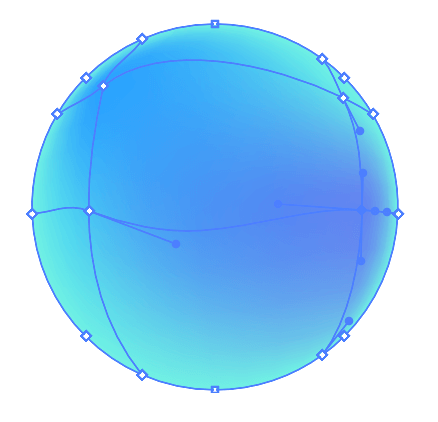
You can use the Direct Selection Tool to move around the anchor points and adjust the gradient and add as many colors as you like. That’s what I meant by getting more control over the colors.
Wrapping Up
The easiest and quickest way to make a sphere is by using the 3D feature in Adobe Illustrator. If you want to wrap text or images around the sphere, you need to use the classic 3D feature and choose the symbols from Map Art.
The Mesh Tool also creates a cool sphere with a gradient effect, and you get more freedom to play with colors. However, it can be hard to get the perfect point when you first started.
Which method do you like best?