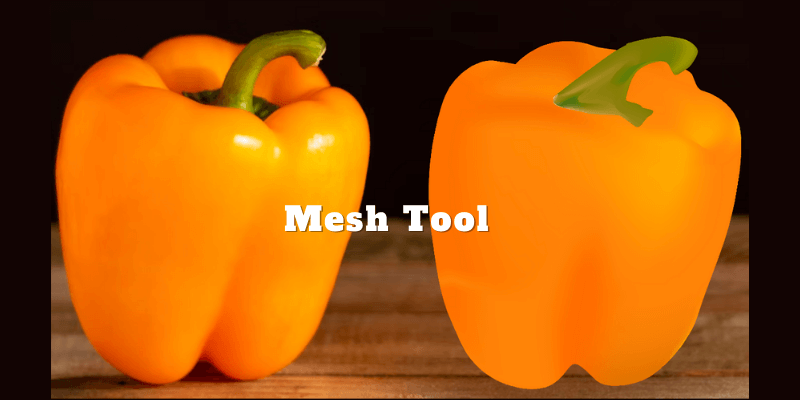
I usually use the Mesh Tool to create 3D-looking fruit images for ads, because I can manipulate the colors and I like how they look in between a flat graphic and a real photoshoot.
The Mesh Tool is awesome but it can be quite complicated for beginners because you’ll need to use several different tools to create a realistic or 3D effect.
In this tutorial, you will learn how to make an object look more realistic using the Mesh Tool and gradient mesh.
Note: all screenshots are taken from Adobe Illustrator CC Mac version. Windows or other versions can look different.
Where is the Mesh Tool in Adobe Illustrator
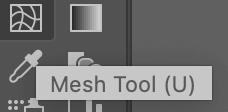
You can find the Mesh Tool from the toolbar, or activate it using the keyboard shortcut U.
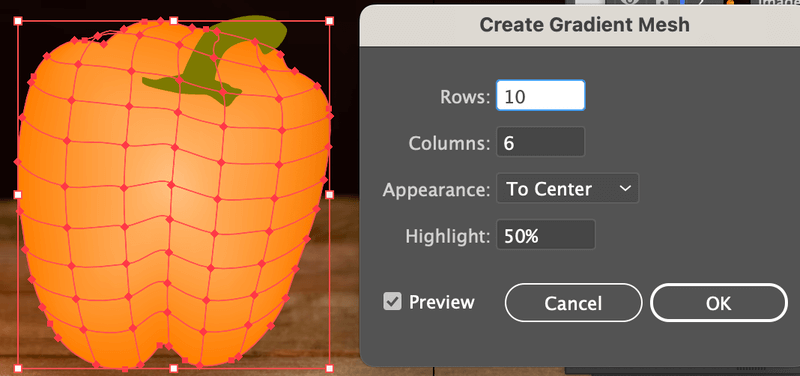
If you want to create a gradient mesh, another way to find it is from the overhead menu Object > Create Gradient Mesh. This tool only works when an object is selected. Otherwise, the Create Gradient Mesh option will grey out.
Either tool you choose, you’ll need to trace the object outline first. Follow the steps below to make a mesh.
How to Use the Mesh Tool in Illustrator
Since it’s commonly used to color fruits and vegetables, I’m going to show you an example of using the Mesh Tool to make a realistic bell pepper.

Step 1: Create a new layer on top of the image layer. You can lock the image layer just in case you move it or edit on the wrong layer by accident.
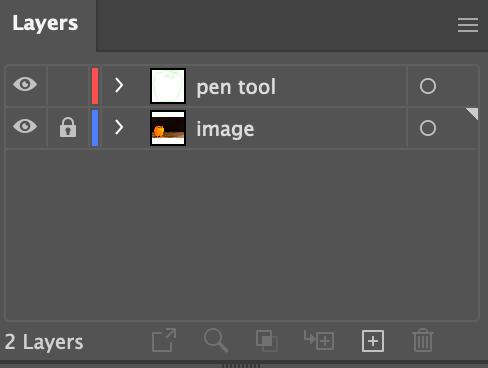
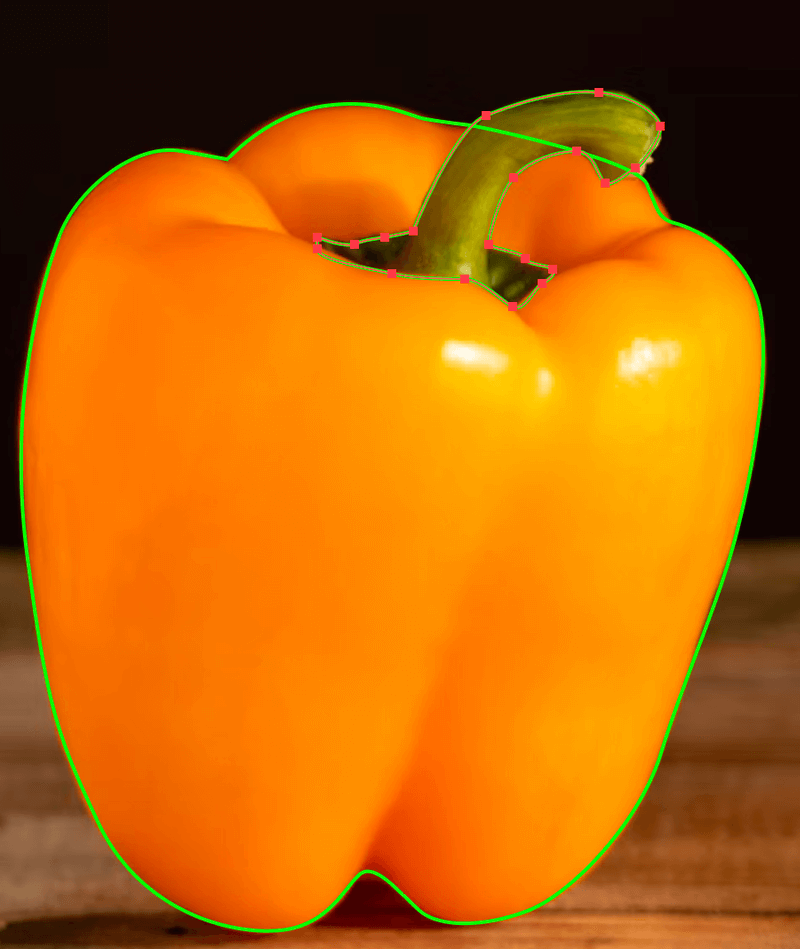
Step 2: Use the Pen Tool to outline the shape on the new layer. If you have multiple colors on the object, it would be a good idea to trace the outline separately. For example, I traced the bell pepper orange part first, and then the green part.
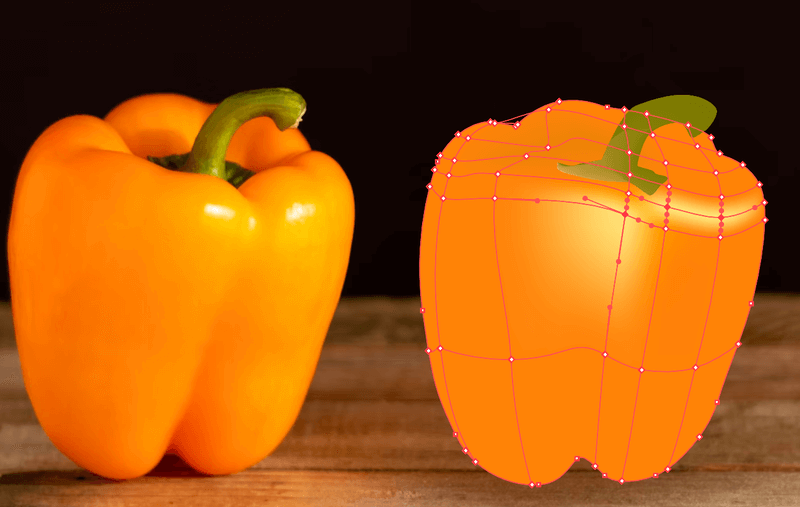
Step 3: Move both pen tool paths apart from the original image and use the Eyedropper Tool to sample colors from the original image. If you don’t want to use the same color as the original image, you can also fill it with other colors.

Step 4: Select the object and create the mesh. Now you have two options, you can use the Mesh Tool to create freehand mesh or create gradient mesh.
The gradient mesh is easier because it’s kinda preset. Just go to the overhead menu and choose Object > Create Gradient Mesh. You can adjust the rows, columns, gradient appearance, and highlight.
If you decide to use the Mesh Tool from the toolbar, you’ll need to click on the traced object to create a freehand mesh.
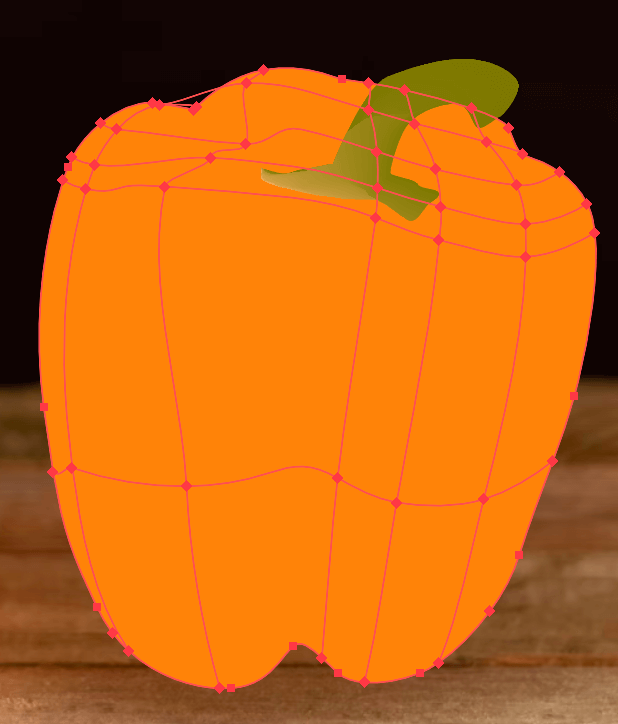
Made a mistake? You can delete a row or column by hitting the Delete key.
Step 5: Use the Direct Selection Tool to select the anchor points on the mesh where you want to highlight or add shadow. Hold the Shift key to select multiple anchor points and choose the color you want to fill color that specific area.
I used the eyedropper to sample colors directly from the original image.
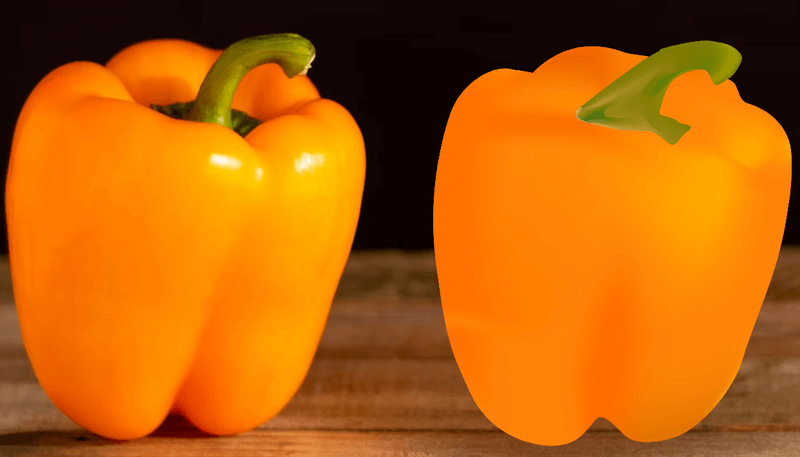
It requires some patience to edit the areas individually for getting your ideal result. Take your time.
FAQs
Creating a mesh does require some software skills because you’ll need to use other tools like pen tool, direct selection, and color tools. Here are some questions you might run into when using the Mesh Tool.
How do I trace an image in Illustrator?
There are different ways and meanings of tracing. The most common way to trace an image outline is using the pen tool. You can also use the brush tool to trace a hand-drawn style image if you’re using a graphic tablet.
Or the easiest way to trace an image is using the Image Trace tool.
How do you mesh text in Illustrator?
The Mesh Tool doesn’t work on live text, so you need to outline the text before meshing. Then you can use the same method in this tutorial to color it. If you want to distort the text, then go to Object > Envelope Distort > Make with Mesh and edit the anchor points.
How can I change my mesh color?
It’s the same method as Step 5 above. Select the anchor points on the mesh and choose a new fill color. You can use the eyedropper tool to sample colors or choose the color from Swatches.
Final Words
I would say the most complicated part when using the Mesh Tool is the coloring part. Sometimes it’s hard to get the exact perfect lighting or shadow of the object.
Creating a gradient mesh in Illustrator is somehow easier because it has a preset mesh and all you need to do is change the gradient appearance and color. You can also edit the anchor points with the Direct Selection Tool. So if you’re struggling with the Mesh Tool, try the gradient mesh first.
Paula
Thank you for explaining this so clearly!