Watercolor and vector? Sound like they are from two different worlds. Well, actually, watercolor is used more and more in digital design.
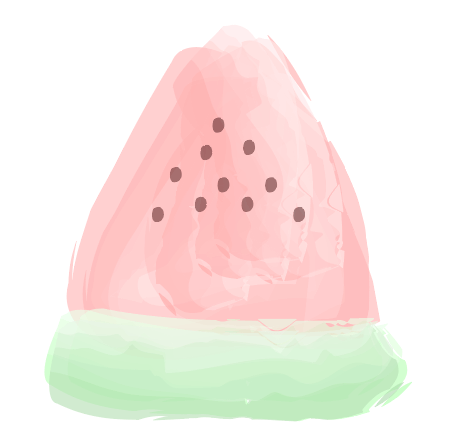
I’m a huge watercolor fan because it’s just so peaceful to look at and it can also be artistic when you just add a few strokes or a splash of watercolor to a design. I bet you’ve all seen something like this before.

In this tutorial, you’ll learn everything about watercolor in Adobe Illustrator, including how to make watercolor effects and create watercolor brushes.
Note: the screenshots from this tutorial are taken from Adobe Illustrator CC Mac version. Windows or other versions can look different.
How to Make Watercolor Effect in Adobe Illustrator
You can directly draw or trace an image to make it look like a watercolor painting. Either way, you’ll be using the paintbrush tool to make the watercolor effect.
Step 1: Open the brushes panel from the overhead menu Window > Brushes, and find the watercolor brushes.
Click Brush Libraries Menu > Artistic > Artistic_Watercolor.
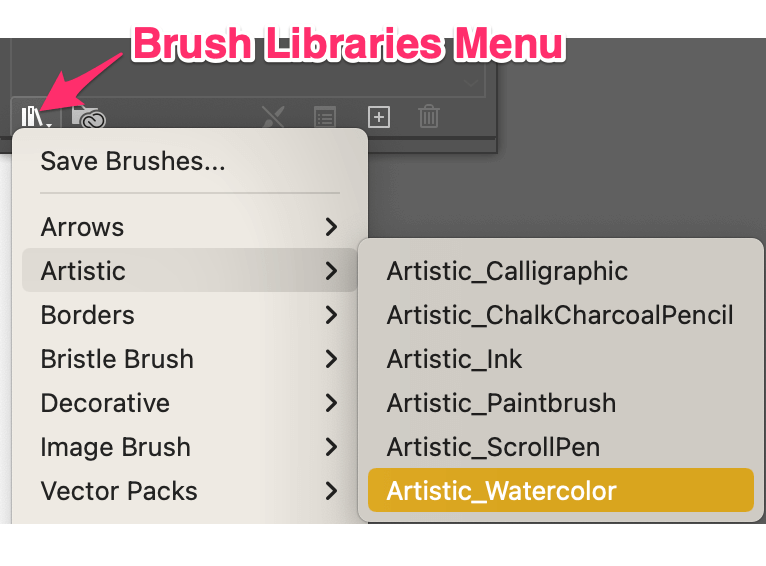
The watercolor brushes will pop up in a new panel window. These are Illustrator’s preset brushes, but you can change the color and size.
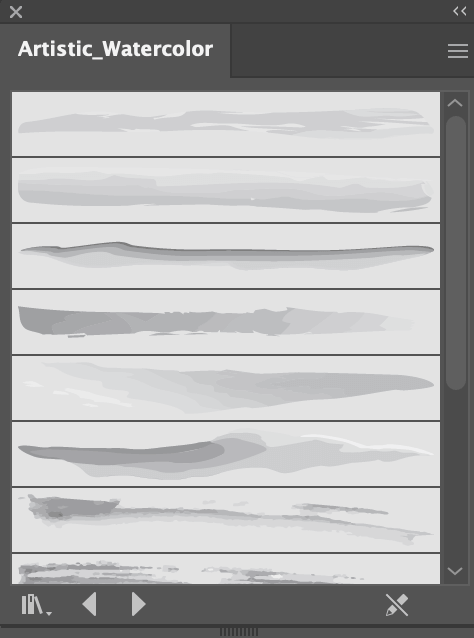
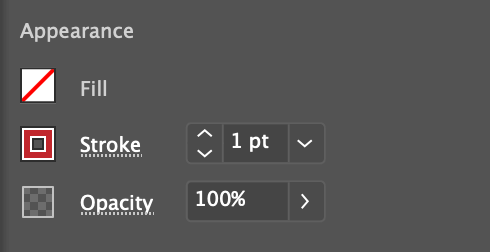
Step 2: Select a brush style, and choose a stroke color and weight. The quickest way to do all is from the Properties > Appearance panel.
Step 3: Choose the Paintbrush tool (keyboard shortcut B) from the toolbar and start drawing!
Keep in mind that drawing with a watercolor brush isn’t the same as using a regular brush because a watercolor brush usually has a “direction” and sometime it can’t draw a straight line as a regular brush would.
See what I’m talking about?

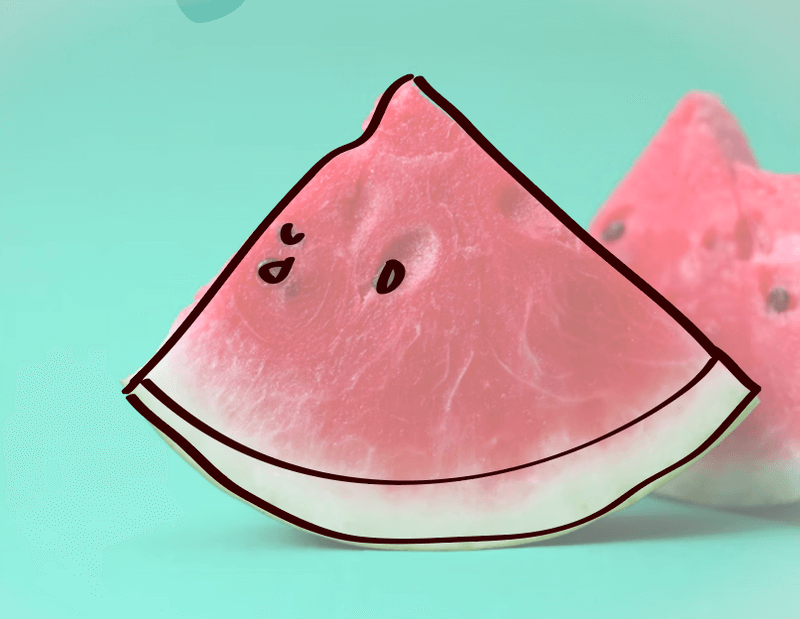
If you want to make an image look like a watercolor painting, you can use different brushes in different sizes to trace it. There’ll be an extra step before using the brushes, which is to embed the image that you want to make the watercolor effect in Adobe Illustrator.
I highly recommend lowering the opacity of the image because it’ll be easier to trace. I also suggest using a regular brush to trace the outline and then coloring it with watercolor brushes because it’s difficult to draw lines with watercolor brushes.
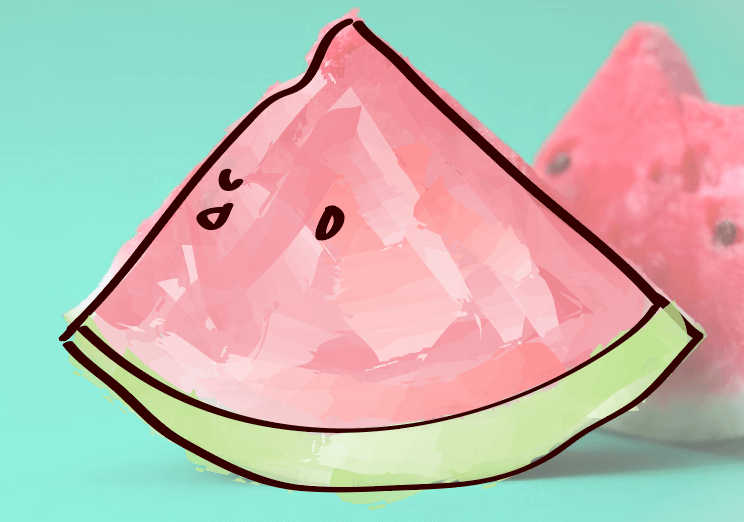
It’s easy to make the watercolor effect, however, it doesn’t always look realistic or natural.
If you can’t get the effect that you want using the preset watercolor brushes, you can also make your own.
How to Make Watercolor Brushes in Adobe Illustrator (2 Ways)
There are two ways to make watercolor brushes. You can either make a watercolor brush in Adobe Illustrator itself by creating a bristle brush or scan the real watercolor brush and vectorize it.
Method 1: Create a watercolor brush in Adobe Illustrator
You can create a bristle brush, duplicate it a few times, adjust the opacity, and make it a watercolor brush. See how this magic works by following the steps below.
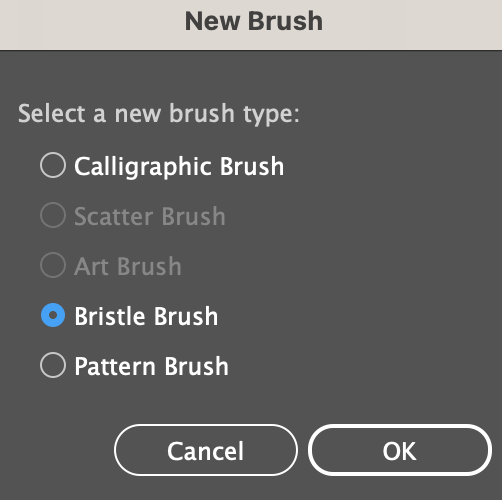
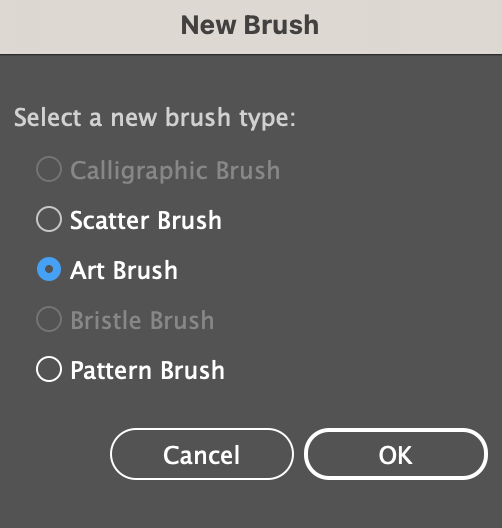
Step 1: Click on the menu in the top right corner of the brush panel and choose New Brush.
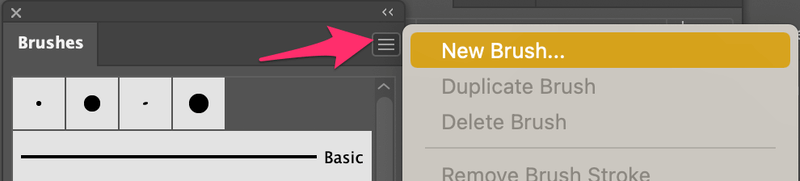
It’ll ask you to choose a brush type, select Bristle Brush and click OK.
Step 2: Adjust the settings of the bristle brush. You can choose the brush shape, size, etc.
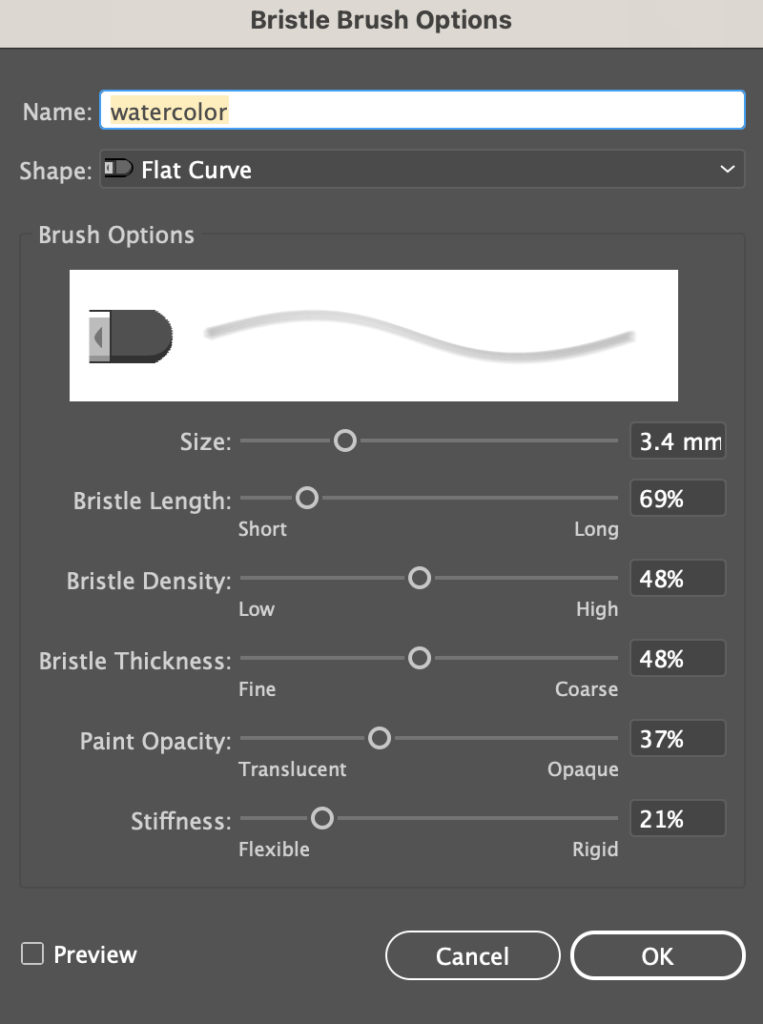
Once you’re happy with how it looks, click OK, and it’ll show on your brushes panel.
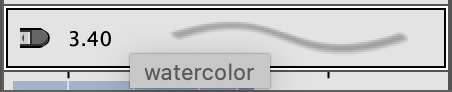
Choose the Paintbrush tool and try it out. If you want to adjust the settings anytime, simply double-click on the brush on the Brushes panel and make the changes.

Now, this isn’t really a watercolor brush, but it does somehow looks like it. If you’re happy with how it looks, you can stop right here. I do suggest you follow along to see what else you can do though.
Step 3: Use the paintbrush to draw a line and duplicate it a couple of times, depending on the thickness of the brush, if you want it to be thicker, duplicate it more times, and vice versa. For example, I’ve duplicated it three times, so I have four strokes in total.

Step 4: Move the strokes overlapping together until you find the perfect point that looks best to you.

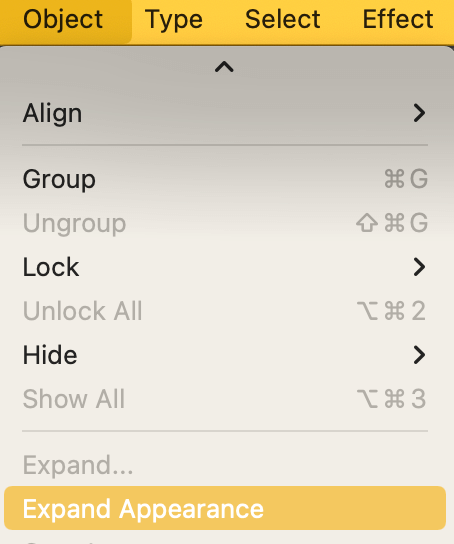
Step 5: Select all the strokes and go to the overhead menu Object > Expand Appearance to convert the strokes to objects.

Group the objects.
Step 6: Duplicate the object, choose one of them, and use the Pathfinder tool to unite the shape. For example, the united object is the bottom shape.


Step 7: Move the two objects together and adjust the opacity of both. There you go, now it looks much more like an actual watercolor brush, right?

Now all you have to do is group them and drag them to the Brushes panel.
It’ll ask you to choose a brush type, usually, I choose Art Brush.
Then you can name the brush, choose the brush direction, and the colorization option.
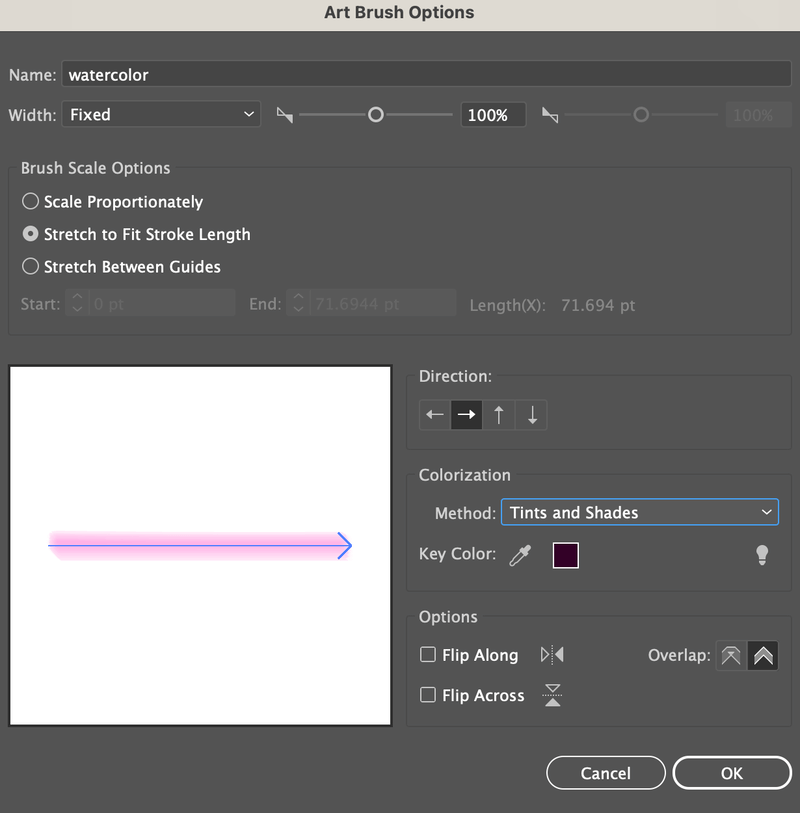
Now the watercolor brush should show up in your Brushes panel.
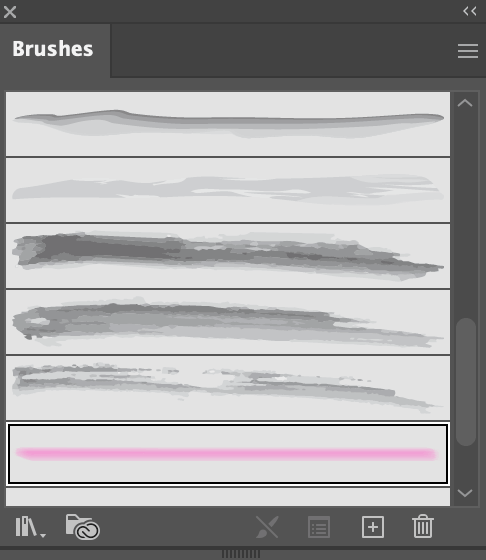
Ready for use!
Method 2: Vectorizing Hand-drawn watercolor brush
This method is basically brushing on paper and vectorizing the brushes in Illustrator. I like this method because I can have so much more control over the strokes drawing by hand.
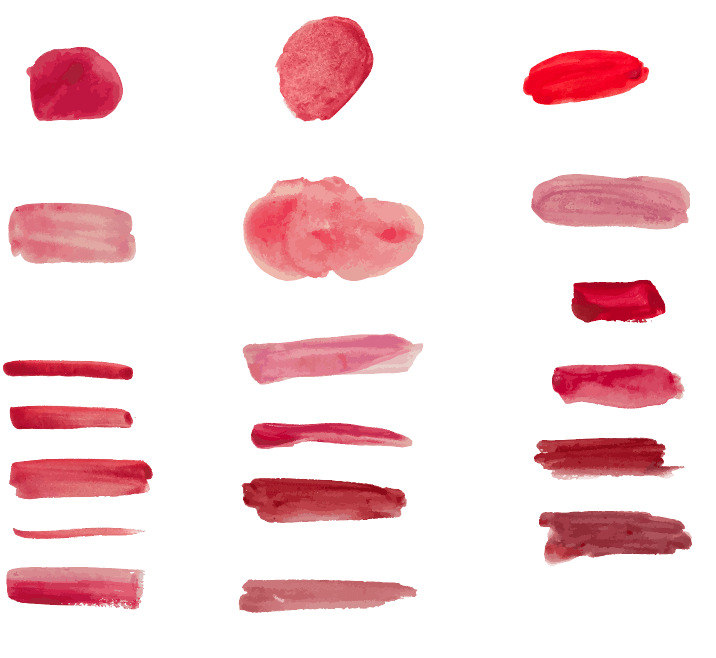
For example, these hand-drawn watercolor brushes look more realistic than the ones created in Illustrator.
Once you’ve scanned the images, you can use the image trace tool to vectorize the image. It would be a good idea to remove the image background first.
When the brush is vectorized, when you click on it, it should look like this.

Tips: If you use Photoshop, that’d be great, because removing the image background in Photoshop is much faster.
Select the watercolor-looking vector and drag it to the Brushes panel, following the same steps in Step 7 from Method 1.

You can always find free watercolor brushes for download if you don’t have time to make them by yourself.
FAQs
You should’ve learned how to make watercolor effects or brushes in Adobe Illustrator by now. Here are a few more questions that you might be wondering about.
How do you digitize a watercolor in Illustrator?
You can digitize a watercolor artwork by scanning it to the computer and working on it in Adobe Illustrator. If you don’t have a scanner, you can take a picture but make sure to take it under good lighting for better results, because Illustrator isn’t great for image manipulation.
Can you vectorize watercolor in Illustrator?
Yes, you can vectorize watercolor in Adobe Illustrator. The easiest way to do that would be using the Image Trace tool. However, the watercolor effect will not be the same as the hand-drawn version.
How to create a watercolor vector?
You can vectorize an existing watercolor vector, or use the watercolor brushes to draw, and then go to Object > Path > Outline Stroke to convert the strokes to objects.
Wrapping Up
Nothing too complicated about making watercolor effects in Adobe Illustrator, right? No matter what you do, drawing, coloring, or making brushes, you’ll need to use the Brushes panel. Make sure that you have the panel handy to use.
If you decide to make your own brushes, know the difference between Method 1 and 2 is that Method 1 creates a Bristle Brush and Method 2 creates an Art Brush. Both are vector brushes and they are editable.
jodi
I don’t believe that you made that Thank You graphic in Illustrator. I’m trying to decide if it’s worth it to learn how the make watercolor in vector format (for resolution reasons). If I can really get those results in Illustrator I’d love to know for sure. yes?
June Escalada
If you wonder how I made it – it’s a photo I took of my watercolor brush, and then I added the “thank you” letters digitally.