
The idea of highlighting text is to give a focus point, but it’s useful in other ways as well. For example, when you have a complex background, it’s hard to decide on a text color that matches and is readable, adding a highlight is a solution!
Highlighting text can also make the text look more stylish in many designs. Whenever I make a text-based poster, I always like to play with the text styles, add highlights, shadows, and distort the text, etc.
Unlike working on Word doc, there isn’t a highlight text color option in Adobe Illustrator. If you want to highlight text, you’d need to add the highlight manually and there are a few different ways to do it.
In this tutorial, I’ll show you three ways to highlight text in Adobe Illustrator. You can add a text background color by editing it on the Appearance panel, creating a highlight text effect using Offset Path, or simply adding a colored rectangle behind your text.
Let’s start with the easiest way.
Note: the screenshots from this tutorial are taken from Adobe Illustrator CC Mac version. Windows and other versions can look different.
Method 1: Highlight Text with a Rectangle
This is the quickest and easiest way to highlight text in Adobe Illustrator. All you need to do is to create a rectangle and arrange it behind the text.
For example, in this image, the text is hard to read on this background, so it would be a good idea to highlight the text to make it more readable.

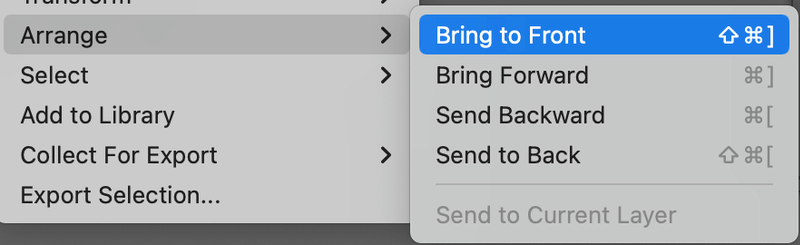
Step 1: Right-click on the text and select Arrange > Bring to Front.
Step 2: Choose the Rectangle Tool (keyboard shortcut M) from the toolbar and create a rectangle slightly larger than your text box.

Step 3: Choose a highlight color and fill the rectangle.

Tip: If you’re not sure about the match, take a look at the color guide 😉
If you want to change the highlight color, simply change the rectangle color.
A down point of this method is that the text and highlight are separated. I recommend you group the text and rectangle so that you can move and scale them together.
Method 2: Add a Text Color Background
Even though there isn’t a highlight text style, you can make it by editing its appearance.
Step 1: Open the Appearance panel from the overhead menu Window > Appearance.
Step 2: Select the text and click on the Add New Fill button.
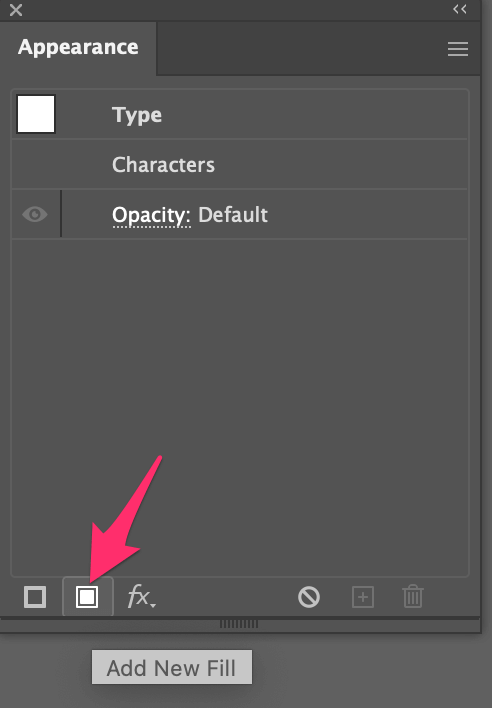
You’ll see a copy of your text and you can click on Fill to choose a color.
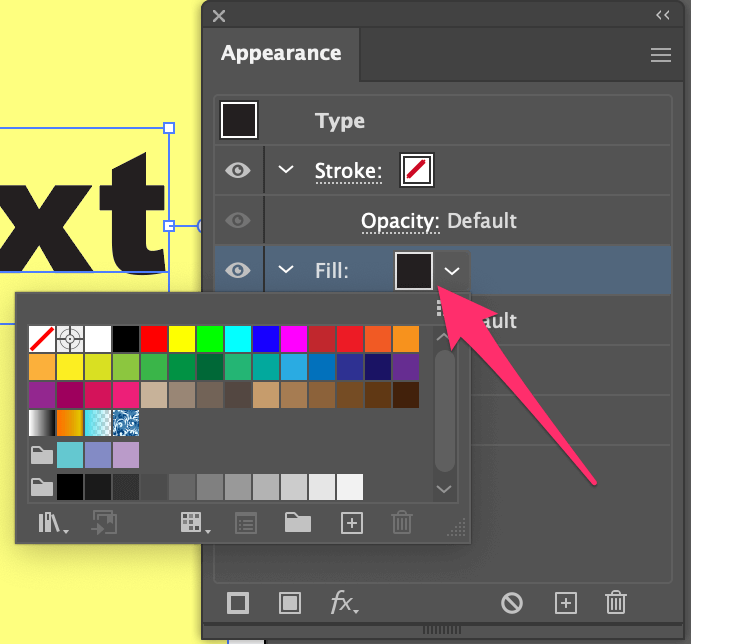
I changed the fill color to purple.

Step 3: Click on the Add New Effect (fx) button.
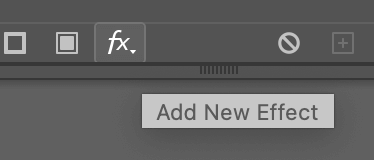
Choose Convert to Shape > Rectangle.

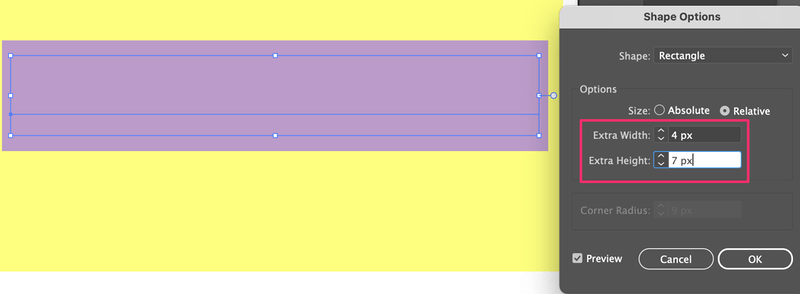
Step 4: Adjust the Extra Height and Extra Weight on the dialog box depending on the size of the highlight box you want and click OK. You can see the type bounding box as a reference.
Step 5: Go to the Appearance panel click on the Character with rectangle fill, and drag it under Type.
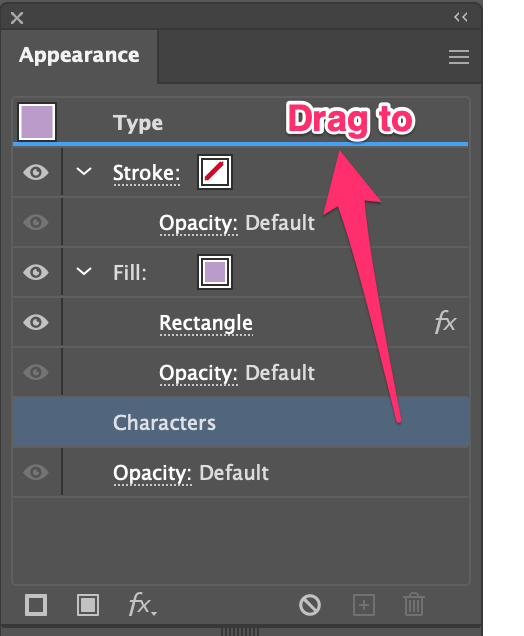
Now you should see the text highlighted in the new fill color you chose.

The highlight effect looks similar to the rectangle method, but the good point of this method is that you can move the text with its highlight together freely, because they are in one, instead of two separate objects.
Method 3: Create a Highlight Text effect
Let’s do something different for this method. How about we add highlights within the text instead of in the background? Sounds good? Follow the steps below.
Step 1: Outline the text, go to the overhead menu and select Object > Compound Path > Make or use the keyboard shortcut Command/Ctrl + 8.

Step 2: Choose a fill color.

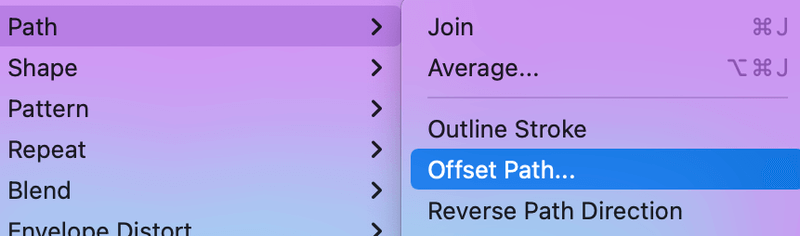
Step 3: Go to the overhead menu again and select Object > Path > Offset Path.
Input a negative Offset value so that the offset path will be created within the original text.
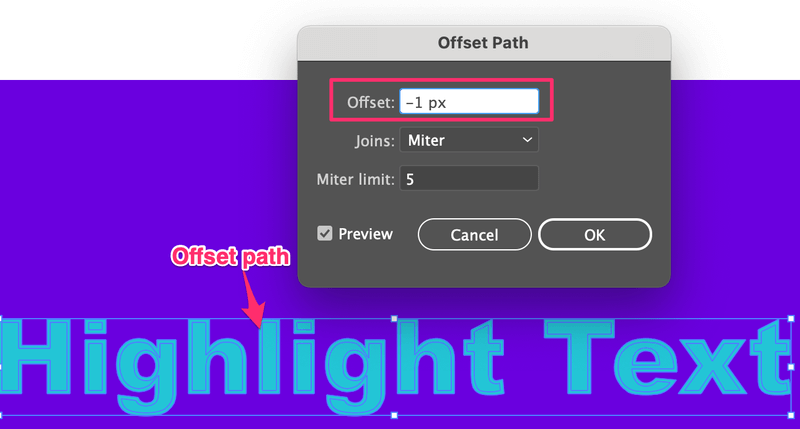
Step 4: Choose a color of the offset path and press Command/Ctrl + 8 to make it a compound path. Here I chose a lighter blue.

Step 5: Hold the Option/Alt key and drag to duplicate the new offset path and move it slightly away from the original path.
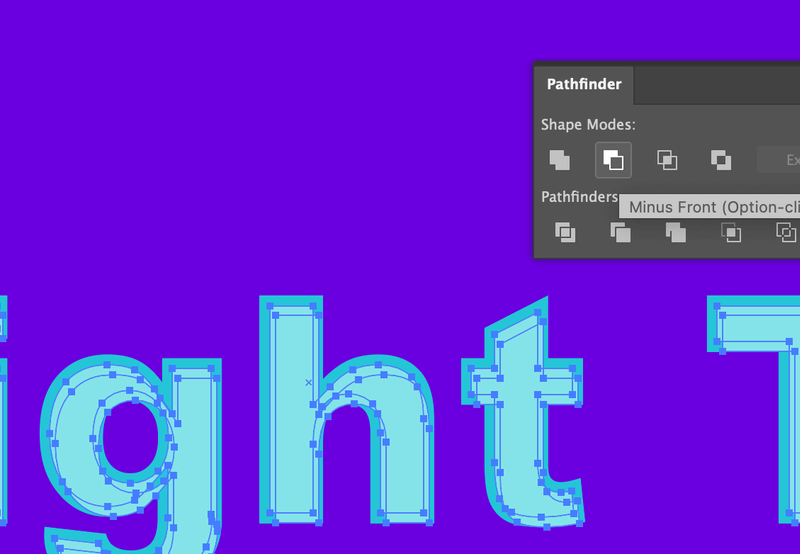
Select both and click Minus Front from the Pathfinder panel. You’ll see the lighter blue as the highlight within the text.

If you want to make a more dramatic highlight effect, when you duplicate the offset path, you can move it further from the original, and you can choose a lighter color for the offset path.

Final Words
Keep in mind that when you add a rectangle or offset path to highlight text, you need to group the objects in order to move the text and highlight the effect together. The only way you don’t have to group objects to highlight text is by adding a new fill from the Appearance panel.
noman
Not enough, There is no option to select and highlight any font from the written paragraph in adobe illustrator.
June Escalada
That’s right, from the paragraph panel, there isn’t this option.