
Want to draw a bike gear or create a cog shape inside a car wheel? There are different ways to create a gear/cog shape in Adobe Illustrator, and I’ll show you the two easiest ways to do it. You’ll be using the basic shape tools to create shapes and use the pathfinders to combine shapes.
Yeah, it does sound complicated with all the tools, but trust me, it’s much easier than using the pen tool to trace a gear image, which was what I did when I first started using Adobe Illustrator. The Pen tool seemed to be the solution to everything until I learned more about creating shapes in Adobe Illustrator.
Anyway, let’s jump right into the topic!
How to Draw a Gear/Cog Shape in Adobe Illustrator
There are two easy ways to draw the gear shape. You can either create a star or a few rectangles and then use the Pathfinder tools to make the gear/cog shape.
Before choosing a method, open the Pathfinder panel from the overhead menu Window > Pathfinder.
Method 1: Make a gear from a star
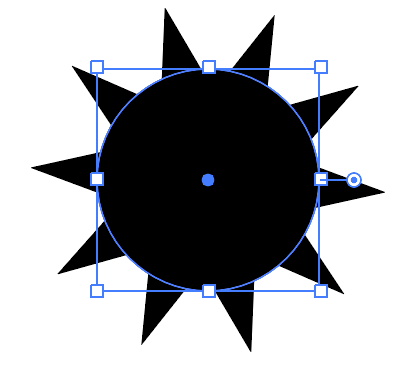
Step 1: Choose the Star Tool from the toolbar, click and drag on the artboard, and press the up arrow key multiple times (around 5 times should be good) to increase the number of points of the star.

Step 2: Use the Ellipse Tool (keyboard shortcut L) to make a perfect circle and move it to the center of the star. The two shapes should be overlapping.
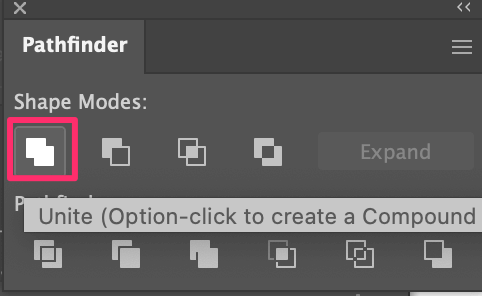
Step 3: Select both shapes, go to the Pathfinder panel, and click Unite.
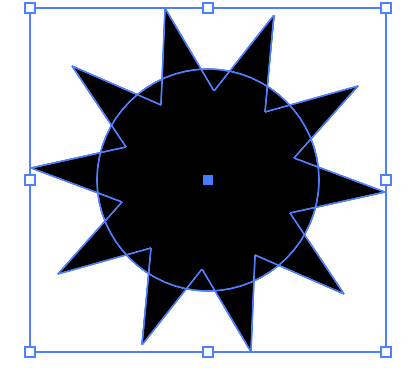
Step 4: Create another circle and place it on the new shape you just created. The new circle should be bigger than the first circle and smaller than the star shape.
Tip: You can select both shapes to see the overlapping area.
I guess you can already see the cog shape, so the next step is to remove the unwanted areas.
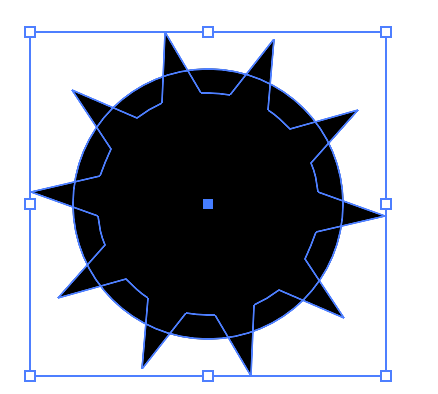
Step 5: Select the new circle and the shape you made earlier with the Unite tool, go to the Pathfinder panel again, and this time, click Intersect.
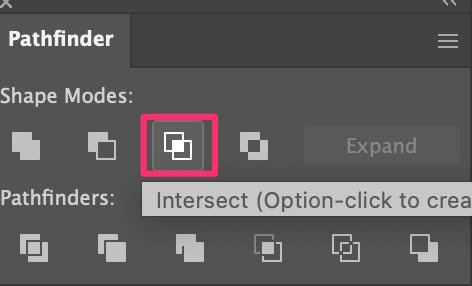
You’ll see a gear shape.

The next step is to add a hole in the center.
Step 6: Make a circle and move it to the center of the gear shape.

I’m using another color to better demonstrate the position.
Select both shapes and use the keyboard shortcut Command + 8 (or Ctrl + 8 for Windows users) to make a compound path.
And you’ve made a cog/gear shape!

If you want to have the cog outline, simply switch the fill and stroke color.

Method 2: Make a gear from rectangles
Step 1: Choose the Rectangle Tool (M) from the toolbar and create a rectangle. Duplicate the rectangle three times so that you have four rectangles in total.
Step 2: Rotate the second rectangle by 45 degrees, the third rectangle by 90 rectangles, the fourth rectangle by -45 degrees and center align the four rectangles.
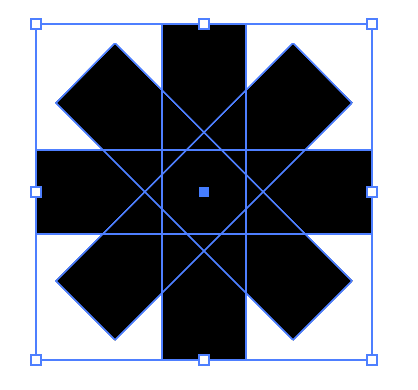
Step 3: Select all the rectangles and choose Unite from the Pathfinder panel to combine all rectangles into one shape.

Step 4: Select the united shape, and go to the overhead menu Effect > Stylize > Round Corners.
Set the round corner radius and check the Preview box to see how it looks.
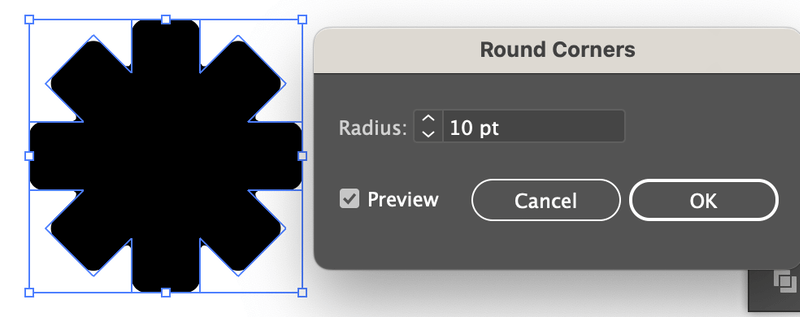
You can also use the Direct Selection Tool (A) to edit the corners.

Step 5: Add a circle in the center and make a compound path.

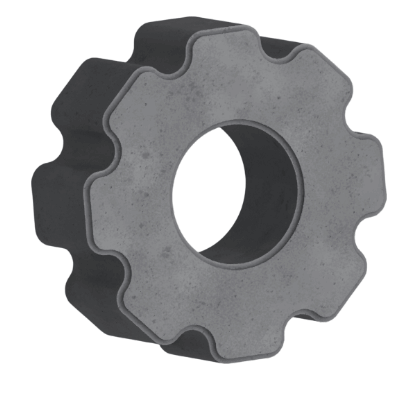
How to Make a 3D Gear in Adobe Illustrator
Want to make the gear a bit fancier? How about making a 3D gear? Since you’ve already made the shape above, it’ll only take you a couple of minutes to make a 3D gear.
Here are the two simple steps to apply 3D effects.
Step 1: Go to the overhead menu Window > 3D and Materials to open the 3D panel.
Step 2: Select the gear and click Exclude.
Note: you probably can’t see an obvious 3D effect if your object’s color is black. Change the color and you can see the effect.

That’s it. This is a very basic 3D effect. You can also add a bevel, or change its material and lighting. Feel free to explore the panel and get creative 🙂
Final Thoughts
Making a gear in Adobe Illustrator is just like making any other shape. Vector shapes all start from the most basic shapes and are created using other vector editing tools like Pathfinder, Shape Builder, Direct Selection Tool, etc.
So my final tip is – take some time to learn about these tools and you’d be surprised what you can create!