There are two ways to draw vector hair in Adobe Illustrator. You can either use brushes to draw from scratch or trace the hair from an image using the Pen Tool.
If you want to draw hair from scratch using brushes, it’s highly recommended you use a graphic tablet because it’s really challenging to draw with a mouse or trackpad.
In this tutorial, I’ll show you both ways to draw hair, plus how to make a hair brush in Adobe Illustrator.
Note: All screenshots from this tutorial are taken from Adobe Illustrator CC Mac version. Windows or other versions can look different.
Method 1: Drawing Hair Using Brushes
Technically, you can use any brush to draw hair in Adobe Illustrator, and depending on the style of your illustration, you can use different brushes. For example, if you’re creating cartoon hair or really simple line art, the existing brushes work.
If you want to create a more realistic hair brush, follow the steps below.
How to Create a Hair Brush in Adobe Illustrator
Step 1: Choose the Ellipse Tool (keyboard shortcut L) from the toolbar. Click and drag on the artboard to create a very thin ellipse shape like this.

Note: The thinner the elliptical shape is, the finer the line will be. If you want to draw thicker hair, feel free to make the elliptical shape a bit thicker.
Step 2: Get rid of the Stroke color and if your ellipse is not black, change the fill color to black.
The next step is to convert the shape to a brush.
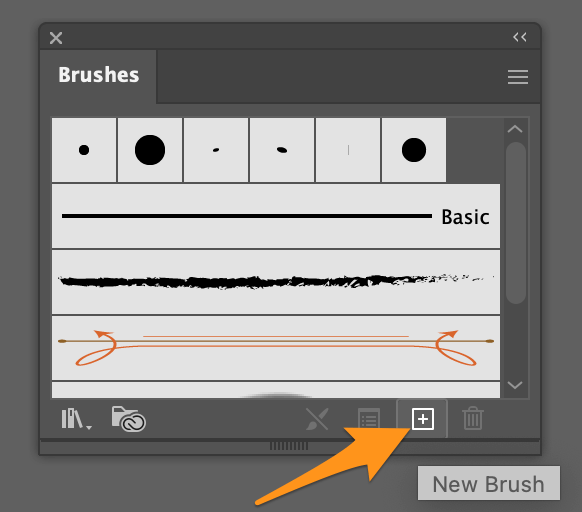
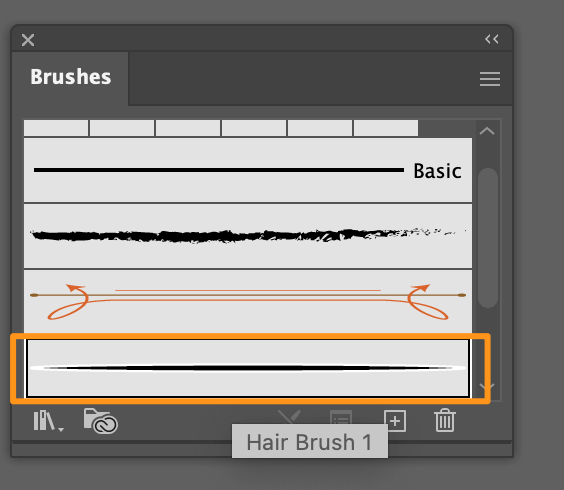
Step 3: Open the Brushes panel from the overhead menu Window > Brushes. Select the ellipse you just created, go to the Brushes panel, and click New Brush.
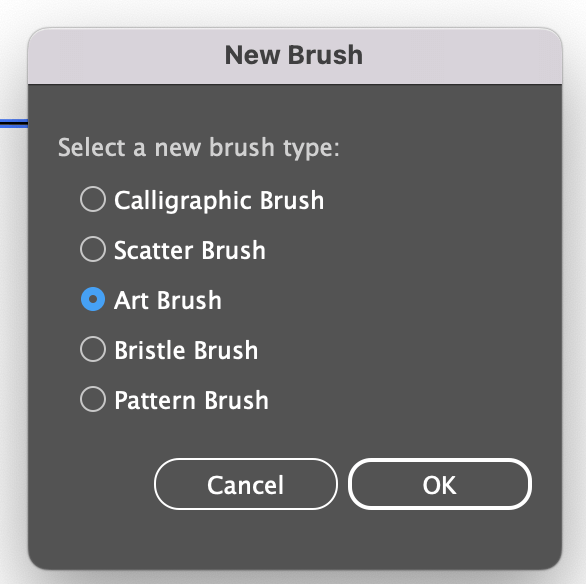
Select Art Brush and click OK.
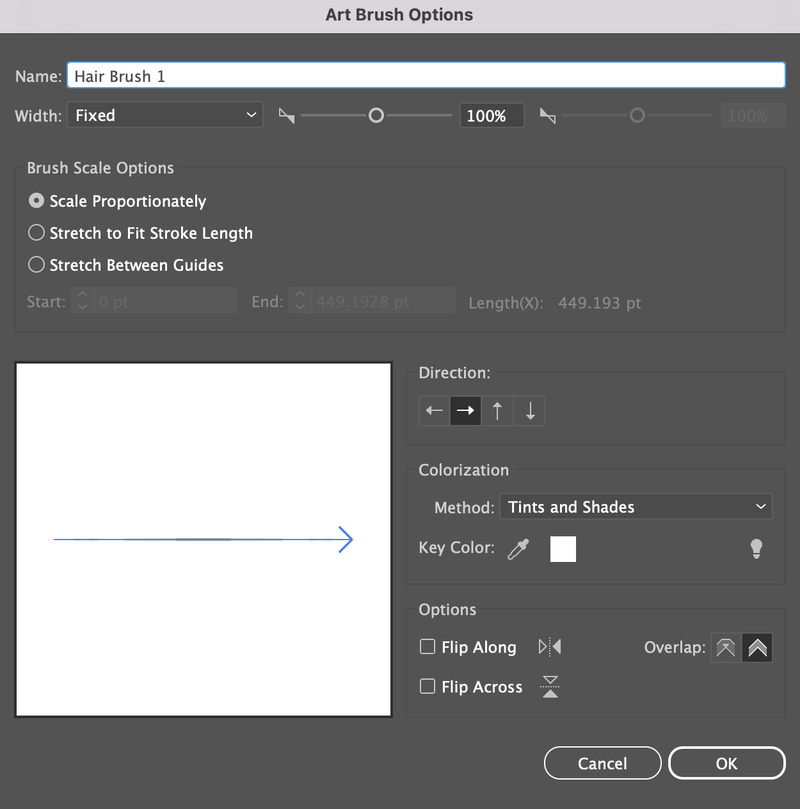
This will open a brush setting window, where you can change the direction, scale option, and colorization of the brush. You don’t have to change anything for now. Simply keep the default setting, and change the brush name so that you can find it easily. For example, I named mine: Hair Brush 1.
Once you have the settings done, click OK and you’ll see the brush on your Brushes panel.
Now you can use it to draw hair in Adobe Illustrator!
If you don’t want to make your own brush in Illustrator, you can also download hair brushes online. Most hair brushes are for Photoshop, so I figured it’s quicker to create my own hair brush than look for one.
Step 4: Select the Paintbrush tool on the toolbar or activate it using the keyboard shortcut B, choose the brush you just created, and start drawing hair!
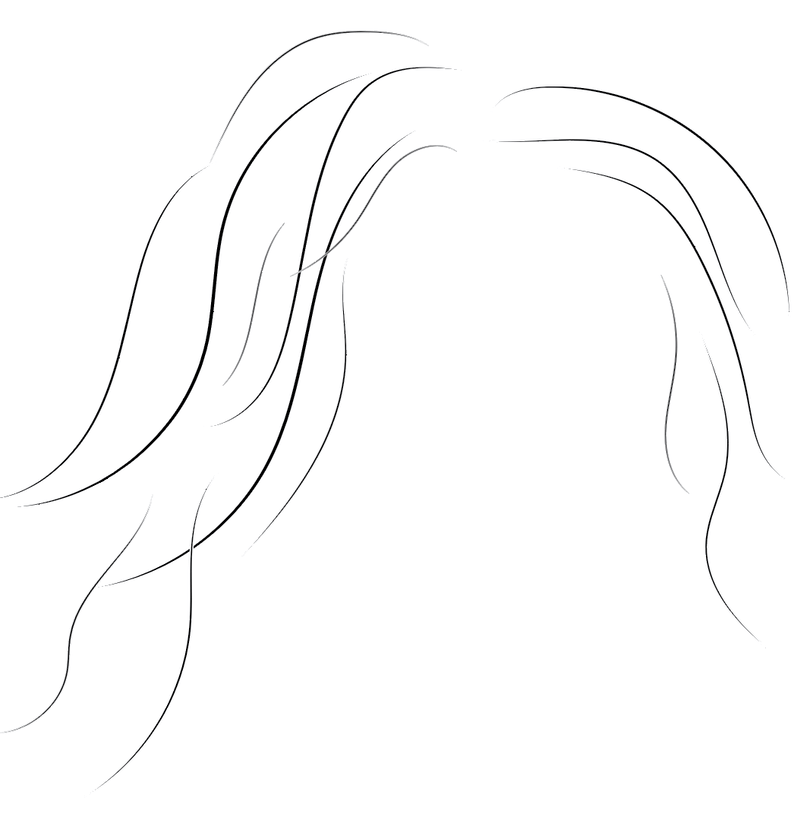
Depending on your illustration style, you can change the brush size accordingly to get the result you’re looking for.
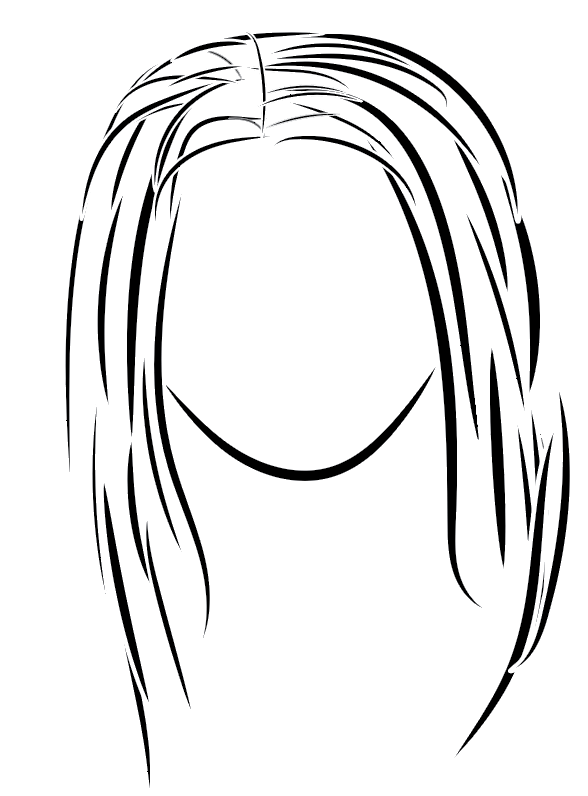
If you want to draw straight hair or curly/wavy hair for a line illustration, this is the go-to method. However, if you want to make a more cartoonish look, check out the method below.
Method 2: Drawing Hair Using the Pen Tool
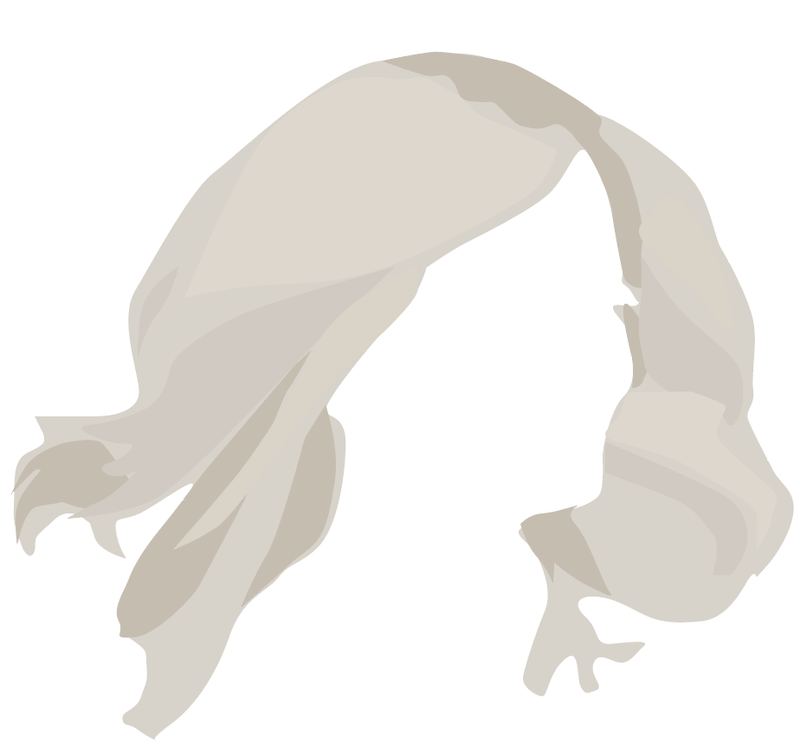
You could draw hair from scratch too but I do suggest finding an image as a reference to trace, at least the hair outline shape. Once you have an image, let’s jump into the steps below.
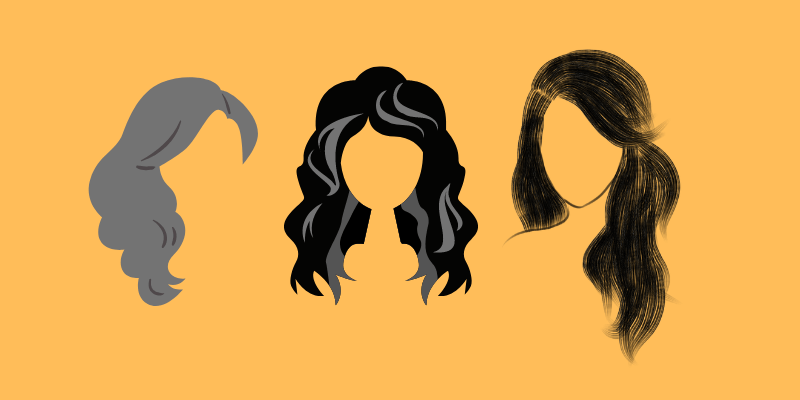
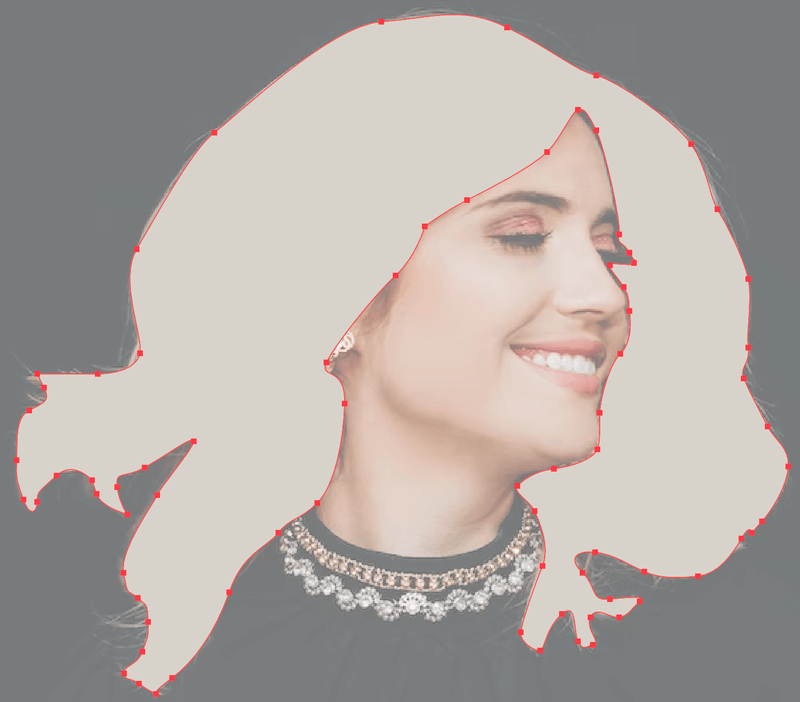
Step 1: Place the image in Adobe Illustrator, lower the opacity to the point while you can still clearly see the hair outline, and lock the image layer. For example, I’m going to use this image:

Step 2: Create a new layer for the hair outline. I do suggest drawing on new layers especially for the shadow and highlights of the hair so that you don’t modify something by accident.

Step 3: Click on the hair outline layer, choose the Pen tool (keyboard shortcut P) from the toolbar, choose a stroke color, get rid of the fill color, and trace the outline of the hair. Make sure you connect the first and last anchor points so that you can fill in the color easily.
If you’re not familiar with the Pen Tool, feel free to check out my Pen tool tutorial for a detailed guide on how to use the Pen tool in Adobe Illustrator.
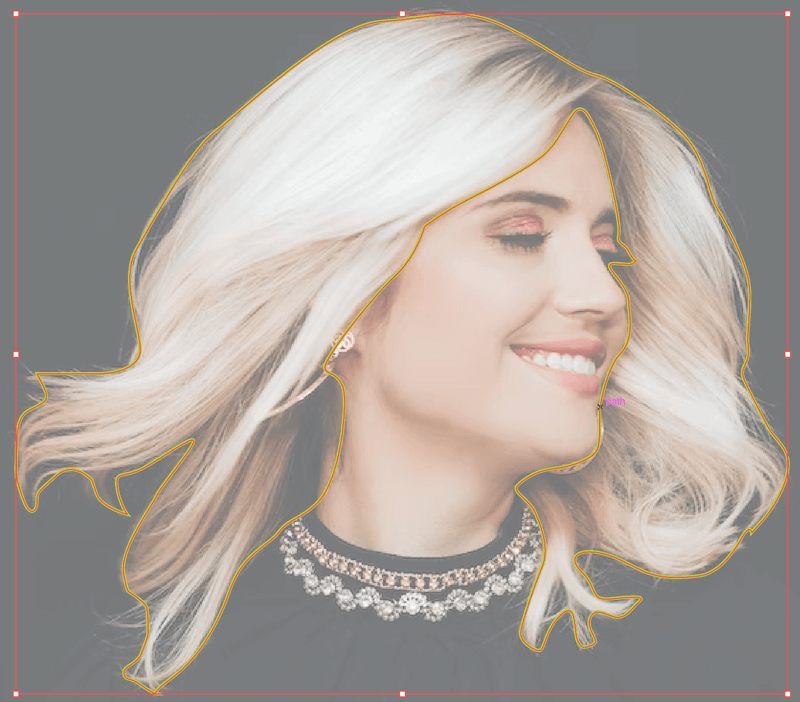
The outline doesn’t have to be exactly the same as the image and to be honest, it’s almost impossible to avoid some fuzzy hair.
Once you closed the Pen tool path, you can add a fill color to see how it looks, if you want to use similar colors as the original image, you can use the Eyedropper tool to sample color.
Step 4: Go to the Layers panel, select the hair outline layer, click on the eye icon to hide this layer, and then lock the layer by clicking on the lock icon.
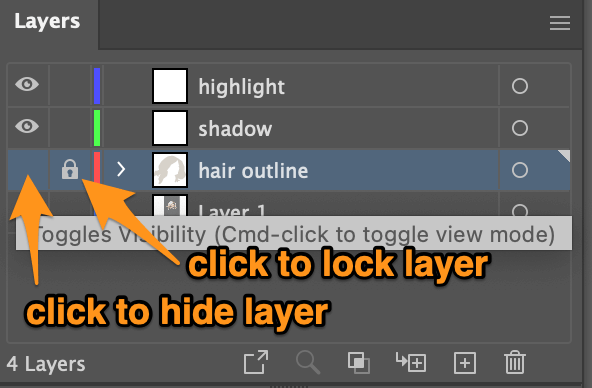
Step 5: Select the shadow layer, choose the Pen Tool, and draw the outline of the shadow (darker area) of the hair.

You can use the Eyedropper tool to sample the darker area of the hair from the image or choose a color on your own. The color should be the same or similar tone as the base hair color. If you show the hair outline layer, you can see the colors.
Follow Step 4 again to hide and lock this layer.
If the hair has different shadows, you can add another shadow layer, use the Pen tool to draw the shadow outline, and sample the color again.
Step 5: Select the highlight layer, and use the Pen tool to outline the highlighted area of the hair.
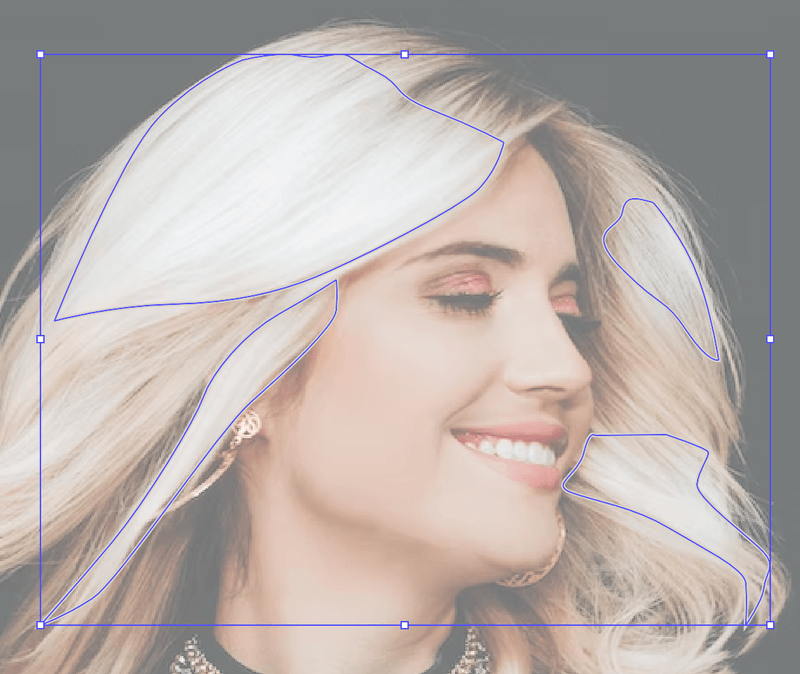
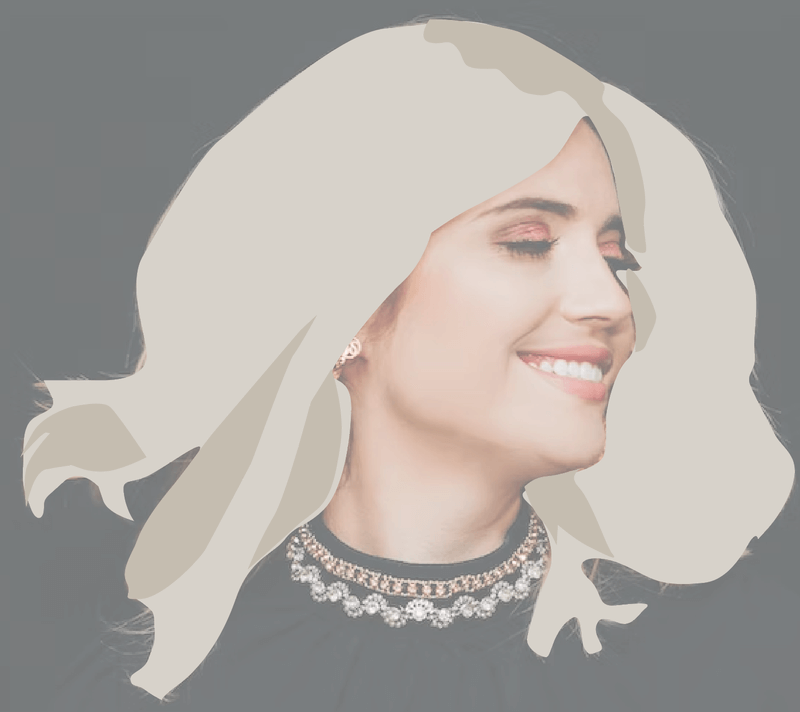
Follow the same step above to fill it with color. Once you’ve outlined all areas, you can show all layers to see the final result.
Feel free to use brushes to add more details to the hair.
Wrapping Up
Can’t say which method is better because I also use both together to create the look I want. For example, I often use the Pen Tool to trace the outline and create shadow areas because it’s faster to fill color. Then I’d use brushes to touch up the details.
I can say that if you want to create line illustrations, then the brushes work better, but if you want to fill the hair with color, using the Pen tool method would be much easier.