
Die-cut lines are essential for print materials. It’s the same idea when you add bleeds to your Illustrator document before you send your artwork to print. However, you can only add bleeds to the entire artboard but you can add die-cut lines to shapes or text using offset path or the Pen Tool.
For example, if you are designing stickers and want to print them out, adding a die-cut is a must to avoid cutting out the artwork.
In this tutorial, I’m going to show you two ways to add die-cut lines to turn an illustration/artwork into a die-cut sticker in Adobe Illustrator and get your sticker ready to print.
Note: All screenshots from this tutorial are taken from Adobe Illustrator CC Mac version. The Windows version can look different.
2 Ways to Make Sticker Cut Lines in Illustrator
Either method you choose, I highly recommend creating the cut lines on a new layer, and depending on the method, you might want to duplicate the object/shape that you’re adding a die line.
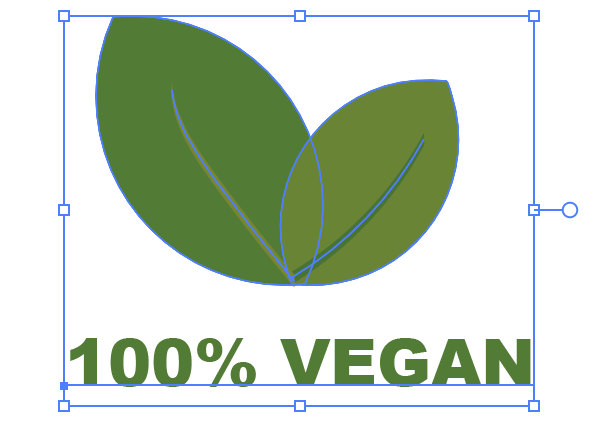
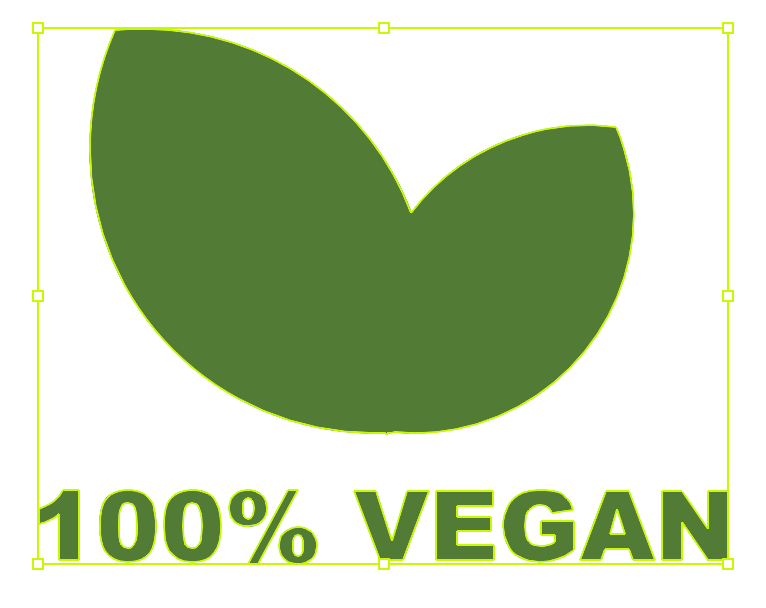
For example, I want to make and print this sticker I just made in Adobe Illustrator.
Note: if you have text on the artwork, make sure you outline the text first by selecting the text, right-clicking and choosing Create Outlines, or using the keyboard shortcut Shift + Command (Ctrl for Windows) + O to create a text outline.
Creating an outline will convert your text to an editable vector shape, so you should see the anchor points like this.

Now you can choose either method below to create cut lines around the shape/text. I would say that method 1 is easier if you want to make a text sticker because using the Pen Tool to trace text outlines can be a bit challenging if you’re not familiar with the Pen Tool.
I’ll go through the detailed steps of both methods below.
Method 1: Offset Path
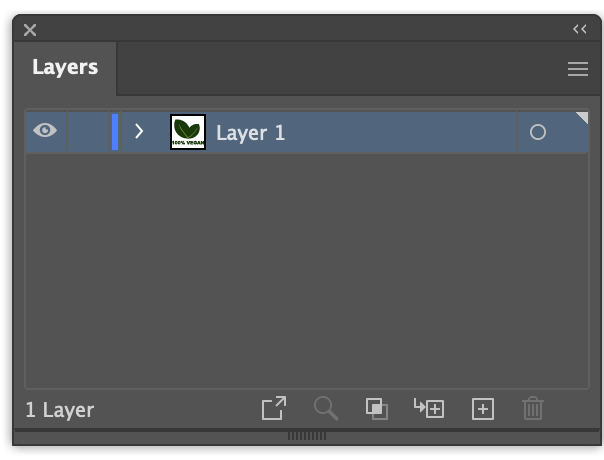
Step 1: Open the Layers panel from the overhead menu Window > Layers.
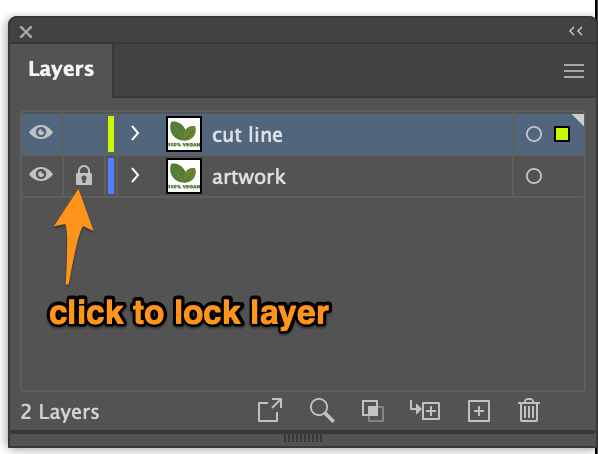
Step 2: Select the layer where you have your artwork, and drag it to the Create New Layer button. As you can see, it’ll duplicate the layer, if you haven’t changed the layer name, it should show as Layer 1 copy.

To avoid working on the wrong layer, it’s a good idea to name the layers. For example, you can name the artwork layer as “artwork”, and the duplicated layer as “cut line” as we’ll be creating the sticker die cut lines on the duplicated layer.
It’s also a good idea to lock the artwork layer in case you edit on the wrong layer. If you want to lock a layer in Illustrator, simply click on the box between the artwork thumbnail and the eye icon, and you should be able to see a lock icon.
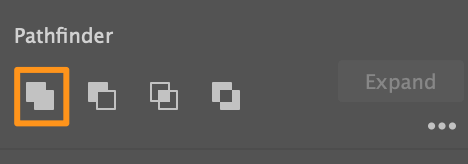
Step 3: Select the objects on the cut line layer, go to the Properties > Pathfinder panel, and click Unite.
If you are not familiar with the Pathfinder options, check out my tutorial on How to Use the Pathfinder in Illustrator.
Then it should show the shape of your artwork and the details should be gone because the selected shapes are united.
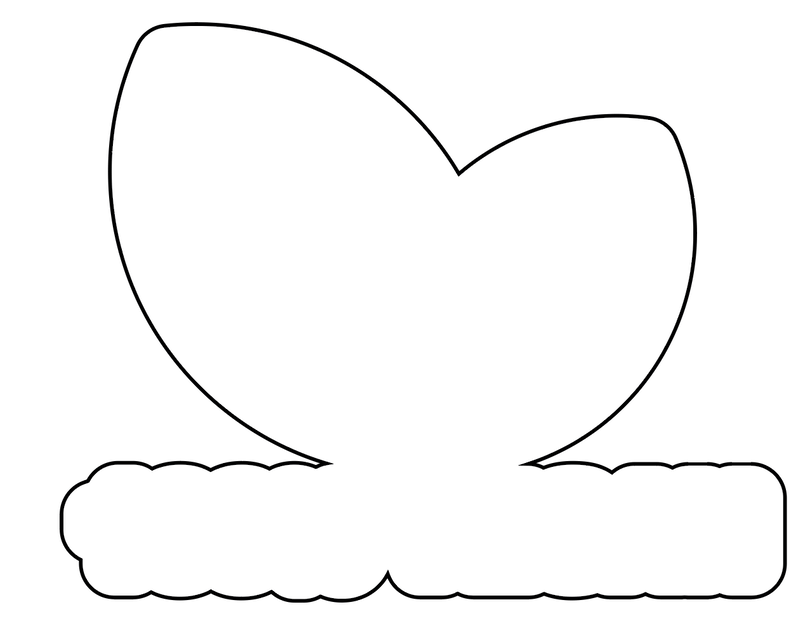
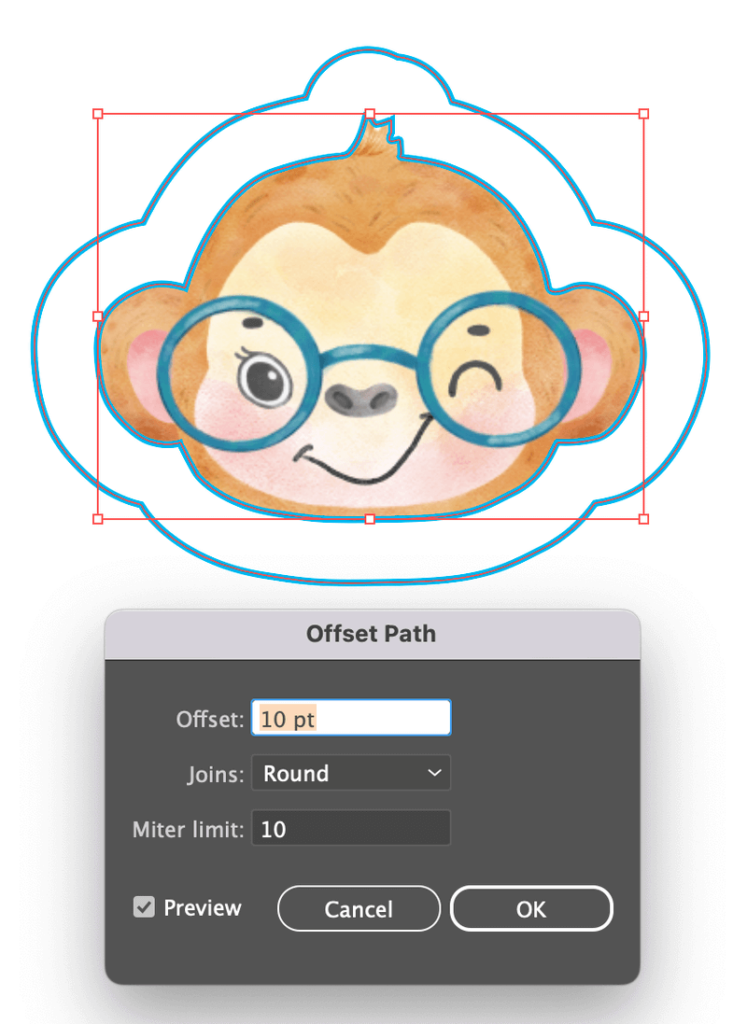
Step 4: With the object/shape selected, go to the overhead menu Object > Path > Offset Path.
The Offset Path setting window will pop and you can change the settings.
The Offset value determines the space between the cut line and your artwork, so you can change it accordingly. Normally, for making stickers, the Joins setting is Round, but you can change it too. Miter Limit controls how far the points extend from the original path.
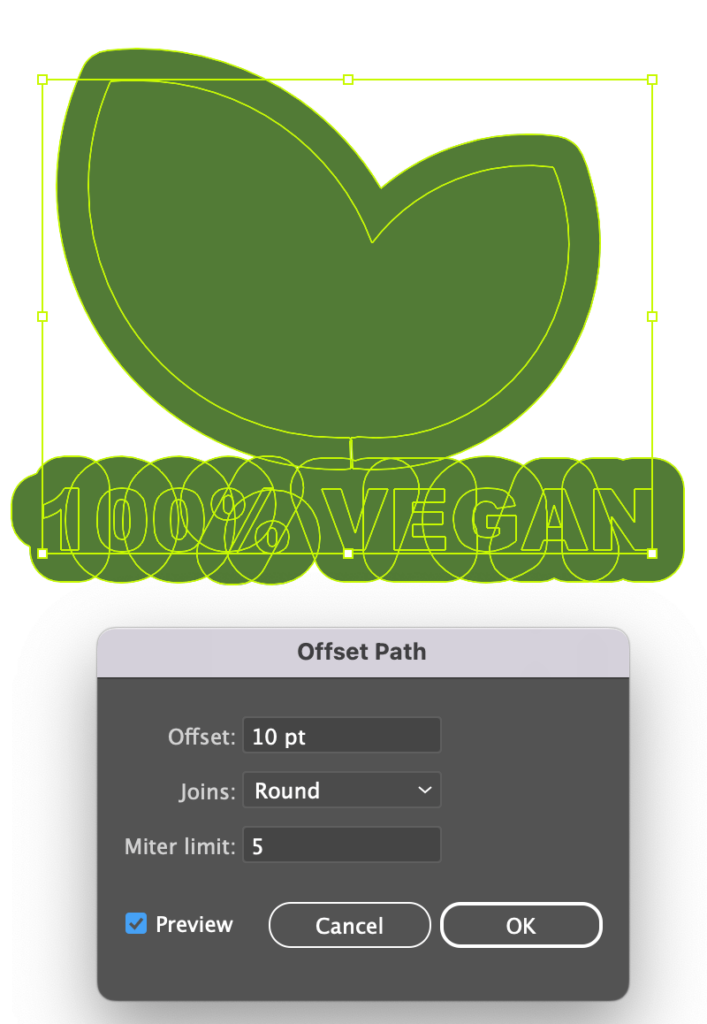
You can check the Preview box as you adjust the settings for the best result. Once you’re happy with the cut line area (shape), click OK.
Step 5: Select the offset path you just created, and click Unite again on the Pathfinder panel. This step should get rid of the text outlines and combine the shape.

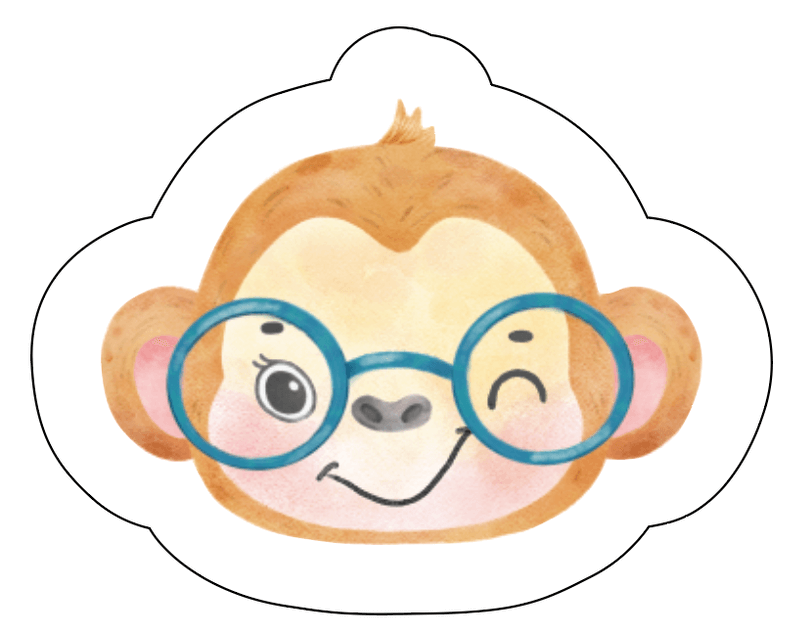
Step 6: Change the color to white, or any color you want to use as the sticker base color and add a stroke color as the sticker cut line.
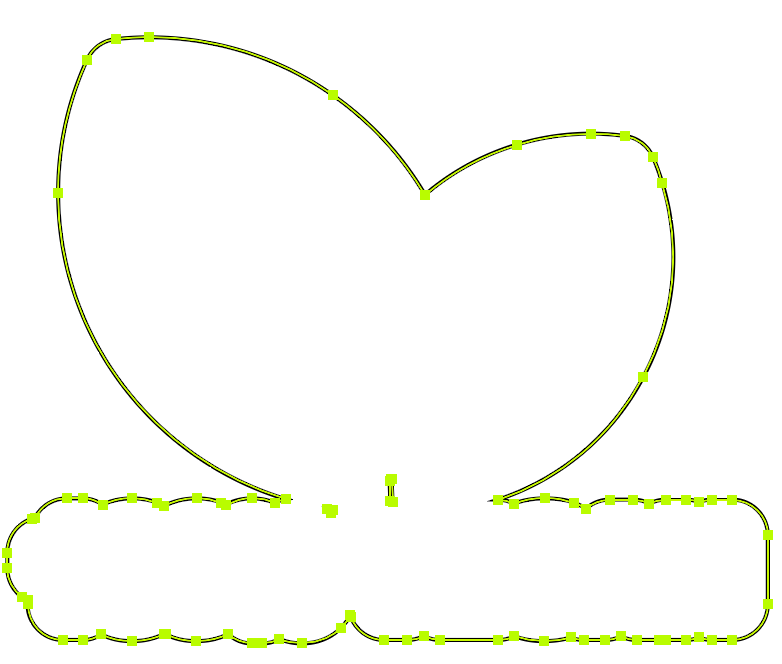
As you can see, there are some small holes within the shape. You can keep or remove them based on your preference. If you want to remove them, simply choose the Direct Selection Tool, click on the unwanted path (hole), and hit the Delete key twice to remove them.
Of course, you can also use the Direct selection tool to adjust the cut line by editing the anchor points.
Step 7: Go to the Layers panel, select the cut line layer, and move it under the artwork layer. Now your sticker die cut line is created.

Method 2: Pen Tool
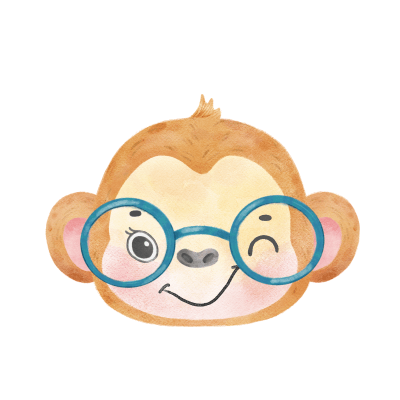
You can use the Pen Tool to create die-cut lines from raster images. If you want to make a sticker die cut from a raster image, you’ll need to vectorize the image or use the clipping mask to cut out the part of the image you want to make the sticker. For example, I’ll show you how to create a sticker cut line from this raster image.
Step 1: Add the image to Illustrator.
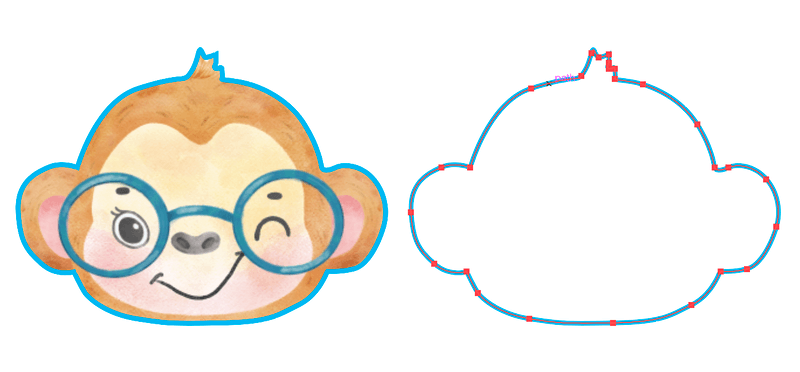
Step 2: Choose the Pen Tool from the toolbar and trace the outline of the image, in this case, I’ll trace the outline of the monkey.

Step 3: Create a new layer, copy the pen tool path, and paste it into the new layer. It doesn’t matter the pen tool path position right now since we can align it with the image later.
Step 4: Select the raster image and the pen tool path from the original layer, right click and choose Make Clipping Mask.
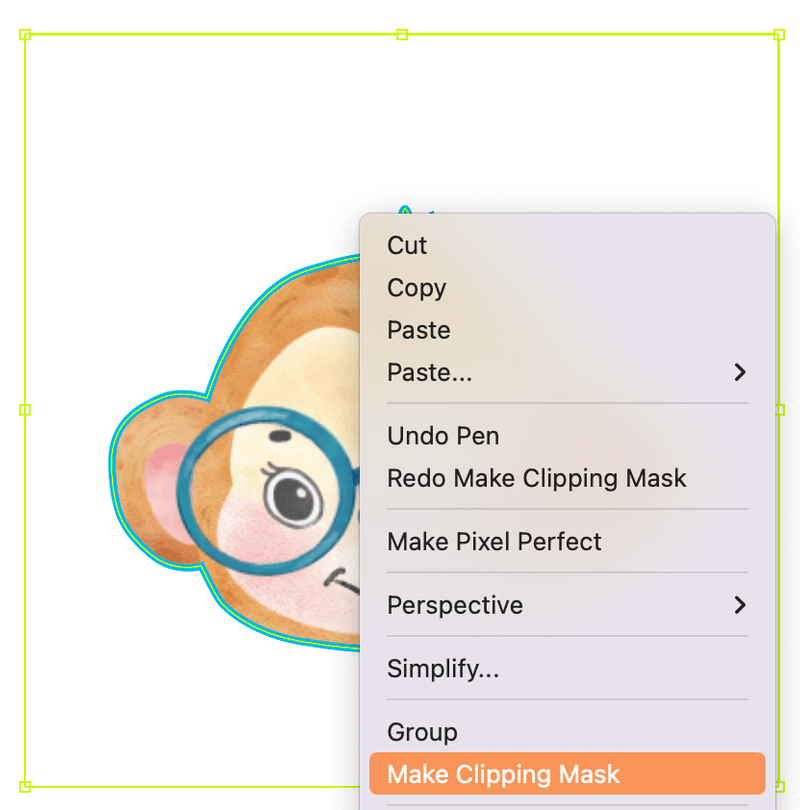
Now the image background should be gone, only leaving the cut-out image within the pen tool path. Since the background color is white in this image, you won’t notice the difference.
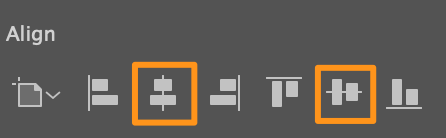
Step 5: Select the cutout image and the duplicated pen tool path (from the new layer), go to the Algin panel under Properties, and choose Horizontal Align Center and Vertical Align Center.
Step 6: Select the pen tool path, and go to the overhead menu Object > Path > Offset Path to create the die cut line exactly the same as Method 1.
You can adjust the sticker die-cut line stroke accordingly.
Tip: If your raster image has simple lines, you can also use the Image Trace feature to vectorize the image.
Now your sticker is ready for print.
Final Thoughts
The easiest and quickest way to make cut lines is using by adding an offset path to your vector graphic, but if you want to create a die-cut line for a raster image, you need to use the Pen Tool to trace the image and vectorize it.