
When a design is heavily text-based, It’s so important to style the text to differentiate it from a Word document. You know what I mean? You can’t just type out the text content and call it a design.
I’ve been working as a graphic designer for over ten years, and in the past five years, I worked with event companies that required a lot of print materials like brochures, magazines, and heavy informative design materials.
As easy as it may seem, honestly, sometimes a text-based design gives you more headaches than a vector graphic. When text is the leading element of a design, you’ll need to make a lot of effort to make it look nice.
Whether you are playing with the font to make your poster look nicer or creating a font for a logo, it all starts with Myriad Pro Regular, Adobe Illustrator’s default character style.
In this tutorial, you will learn how to change character styles, apply text effects, and a quick guide on how to create your own font (re-shape text) in Adobe Illustrator.
Without further ado, let’s get started.
3 Ways to Edit Text in Adobe Illustrator
Note: Screenshots are taken from the Illustrator CC Mac version. Windows or other versions might look slightly different.
Editing text is not just about changing fonts and colors. See what else you can do to text and make your design stand out.
Method 1: Change Character Styles
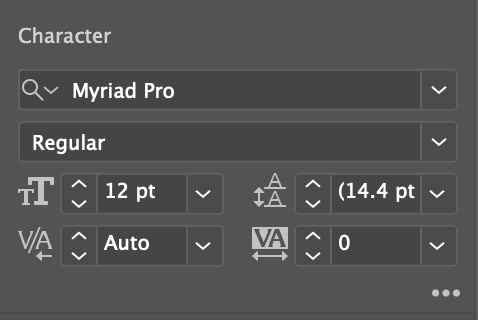
The basics! You can change text colors, fonts, add spacing, etc in the Properties > Character panel. When you select the text, the Character panel shows up automatically.
Step 1: Select the text using the Selection Tool (keyboard shortcut V) if you need to edit all text in one style. Starting from scratch? select the Type Tool (keyboard shortcut T) to add text.

Another way is to select the Type Tool or double-click on the text, it’ll automatically switch to the Type Tool, so you can select the text area you want to edit.
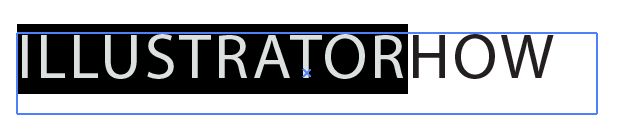
For example, you can apply different colors and fonts to the text.

Step 2: Change the font, style, or spacing in the Character panel.
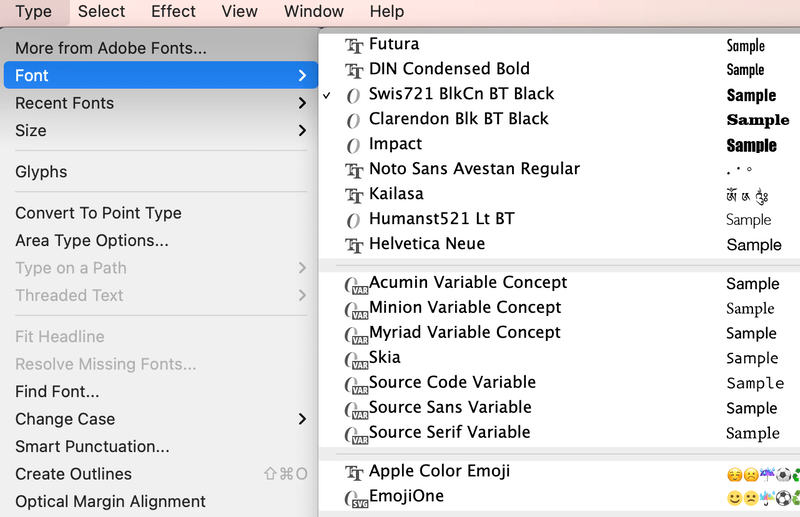
If you only need to change the font, you can also do it from the overhead menu Type > Font, and select a different font.
If you need to add or change colors, follow me to the next step.
Step 3: Select a color from the Swatches panel, or double-click on the Fill Tool and use the color picker to select a color.
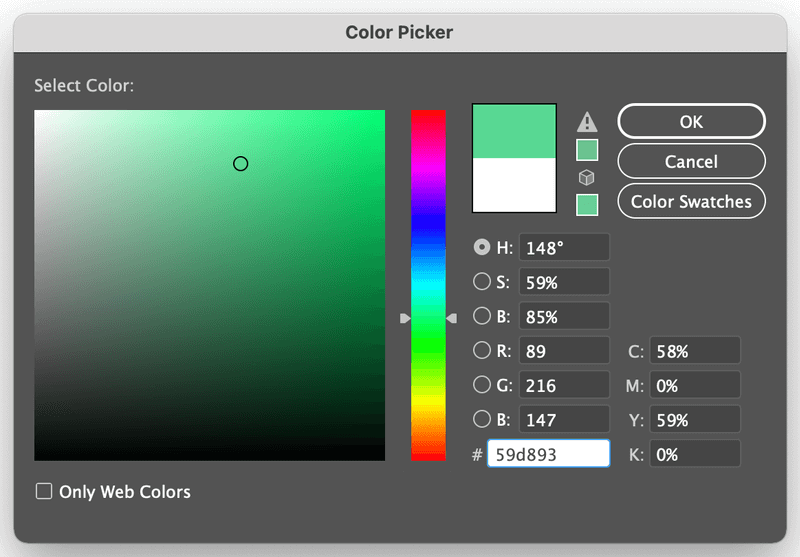
The Eyedropper Tool (keyboard shortcut I) is an option as well if you already have a sample color image.

Not fancy enough? How about bold text or some text effects? Let’s see what else you can do. Keep reading.
Method 2: Apply Text Effects
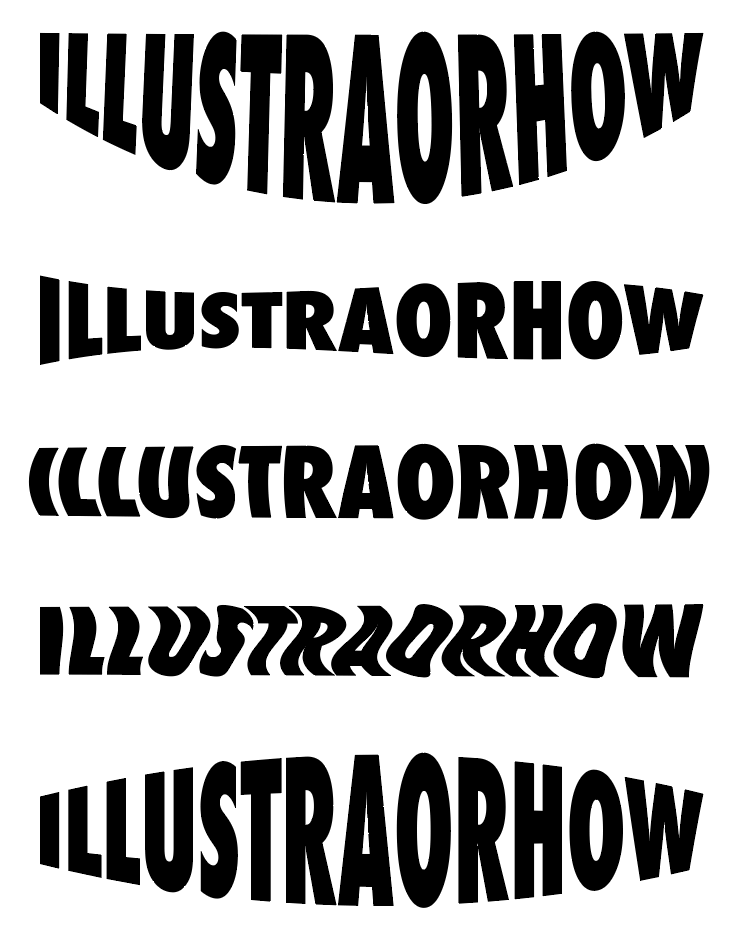
There’s so much you can do with text. For example, you can curve text, or add other effects to make your design fun and sophisticated.
Step 1: Select the text you want to edit.
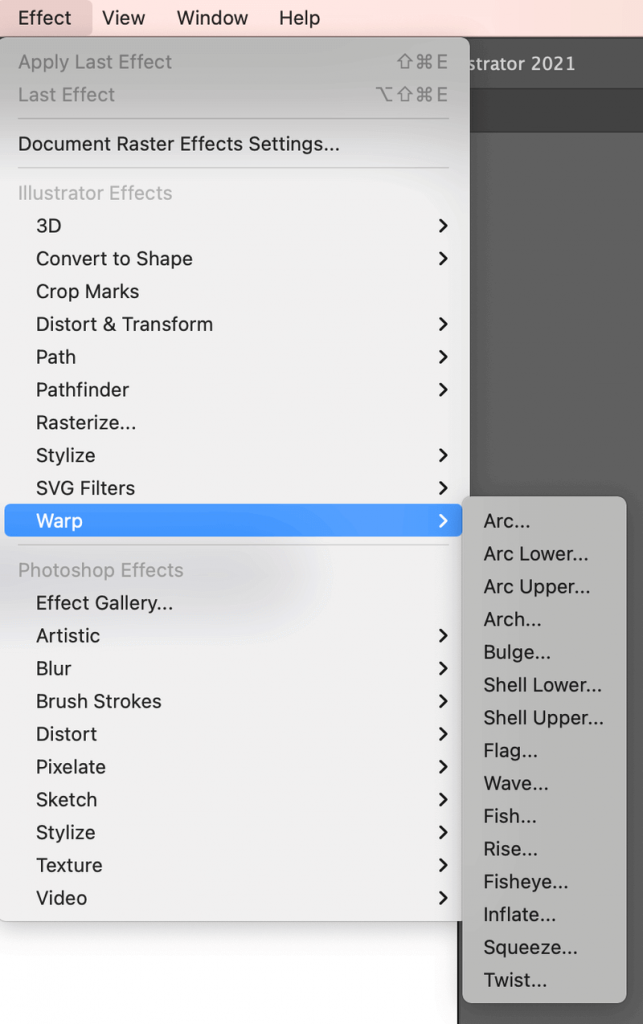
Step 2: Go to the overhead menu Effect > Warp and choose an effect.
There are 15 different effects you can apply to text from the Warp options.
You can also use the Type on a Path, Distort & Transform, or Envelope Distort tools to make special text effects.
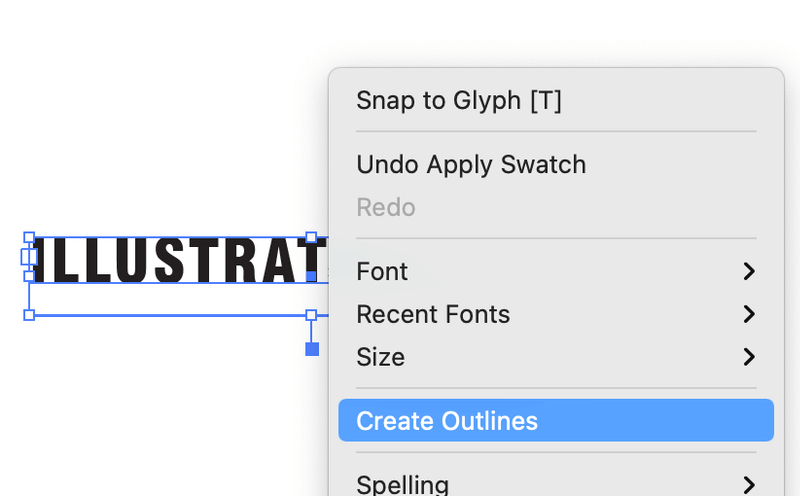
Method 3: Re-Shape Text
This method is useful when you design a logo or a new font.
When you design a logo, you don’t want to just use any font because it looks plain, and you might run into copyright issues if you don’t buy the font license for commercial use. Plus, it’s always cool to design your own font.
Step 1: Outline the text. Select the text, right-click and select Create Outlines or use the keyboard shortcut Shift + Command + O.
Step 2: Ungroup the text. Right-click on the text and select Ungroup.
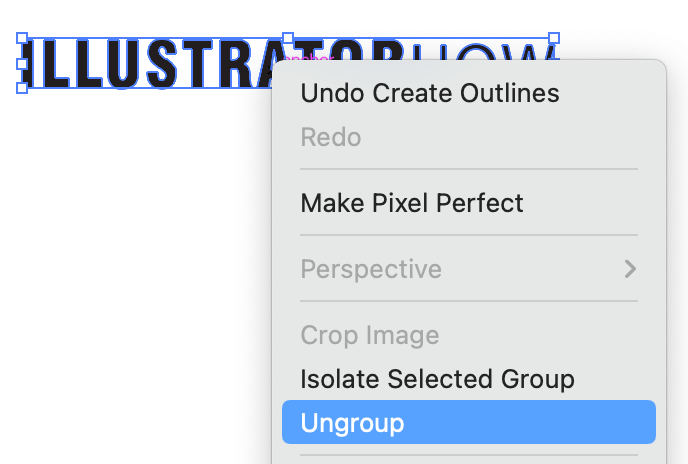
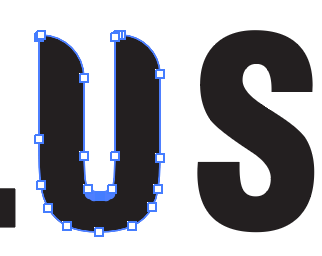
Step 3: Select the individual letter you want to re-shape and select the Direct Selection Tool (keyboard shortcut A). You’ll see many anchor points in the text.
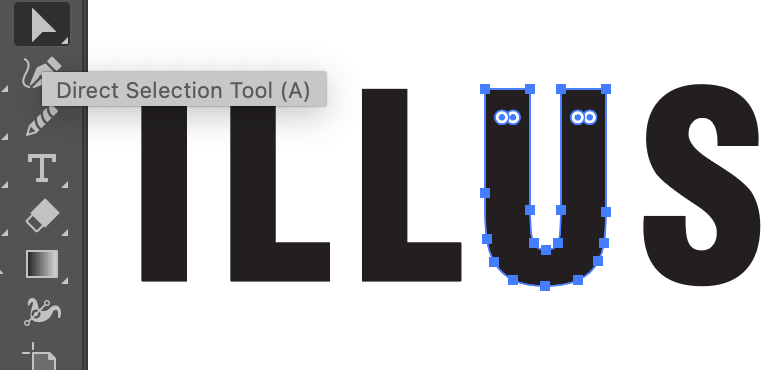
Step 4: Click and drag any anchor points to edit and re-shape.
What Else?
You might also be interested to know the answers to the following questions related to editing fonts.
Can you edit text in a PNG or JPEG file in Illustrator?
You can trace the image and edit the text from a PNG or JPEG image in Illustrator, but it’s limited to only changing the text shape. Because the text becomes a vector when you trace the image, and you can use the Direct Selection Tool to reshape the vector text.
Unfortunately, you cannot change the character style.
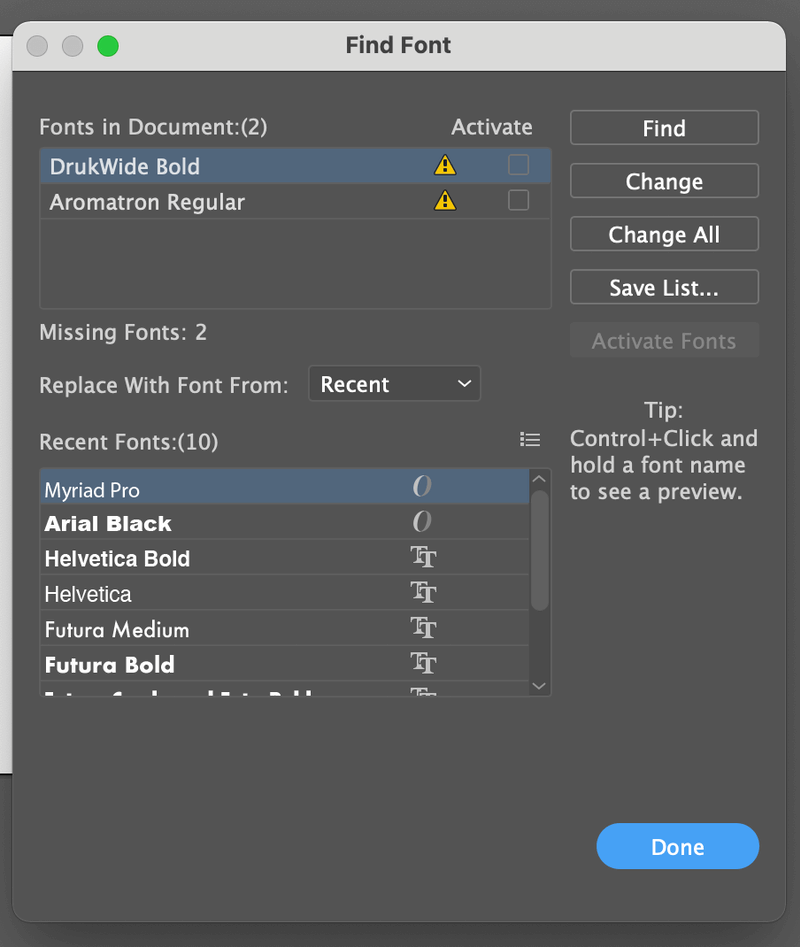
How to replace text in Illustrator?
When you open the ai file, the missing font area will be highlighted in pink. And you will see a popup box showing you which fonts are missing.
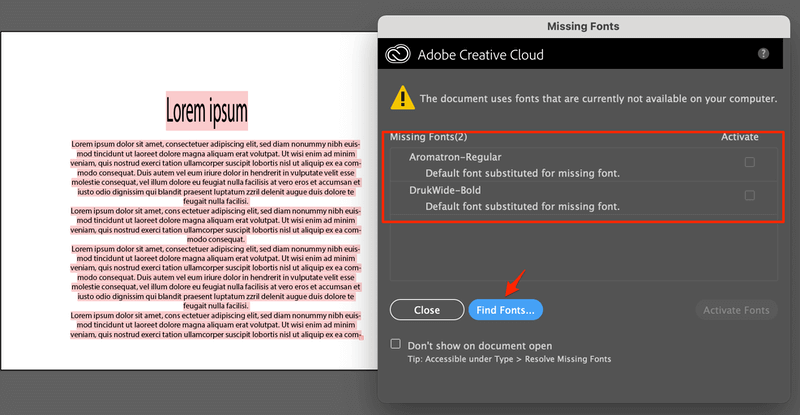
Click Find Fonts. You can either replace the missing fonts with existing fonts on your computer or download the missing fonts. Choose the font you want to substitute, and click Change > Done.
Why is my type/text box not showing?
You might’ve accidentally hidden the type (bounding) box. When it’s hidden, you cannot scale your text or text area by clicking and dragging the text box.
Go to the overhead menu View > Show Bounding Box. You should be able to scale text or text area again.
That’s All for Today
Text is an important part of graphic design and there’s so much you can do with it, from simple character style to font design. Already shared my tricks and secret for editing text, hope you make good use of them and create something cool.
PERIS NGARI
Thankyou!! I’ve bumped into this article and you have really saved my life!!
I’m a beginner in graphics & design and hoping to gain such experience as you and become an expert!
Once again,thankyou! This was so helpful!
June Escalada
Hi Peris,
You’re very welcome! Glad it helped!
Razaul Millat
Very helpful to get an overall knowledge of Adobe Illustrator. Thanks for the patience and labor time you offered to make every chapter easier for everybody new to old.
June Escalada
You’re welcome Razaul!
Rani
This was very helpful. Thank you so much for breaking it down in an easy to follow format
June Escalada
You’re welcome Rani!