
No, we are not talking about Image Trace.
Turning a photo into a digital illustration or drawing is slightly different from vectorizing an image. We’re not going to use Image Trace here, instead, I’ll show you how to create a digital drawing from scratch in Adobe Illustrator.
There are different styles of digital illustration, but 90% of them start with lines. So I’ll show you how to turn a photo into a line drawing first, and we will add elements to the line drawing to create a vector version of the image.
Note: All screenshots from this tutorial are taken from Adobe Illustrator CC Mac version. Windows or other versions can look different.
How to Turn a Picture into Line Drawing in Adobe Illustrator
A graphic tablet is highly recommended for creating digital illustrations. It makes line drawing and color filling easier. Technically, you can use a mouse as well, but when you do freehand drawing, the result isn’t ideal.
After outlining the picture, you can also add colors or shapes to the line drawing and create a digital graphic illustration.
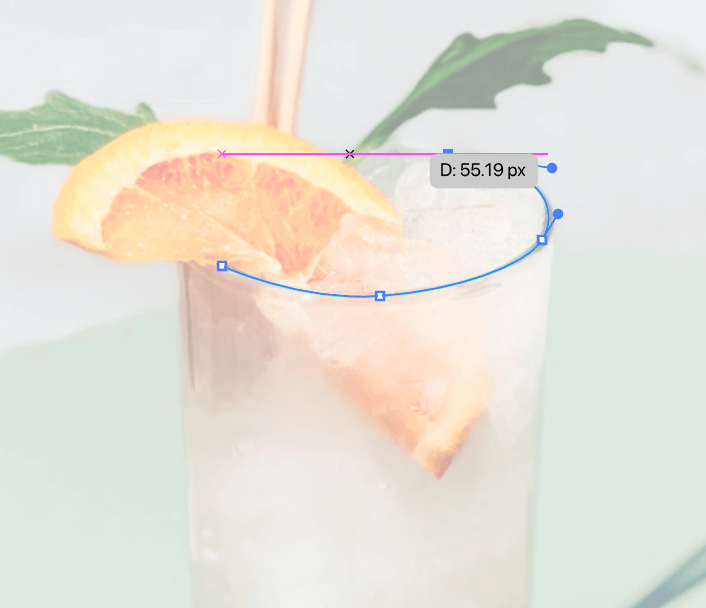
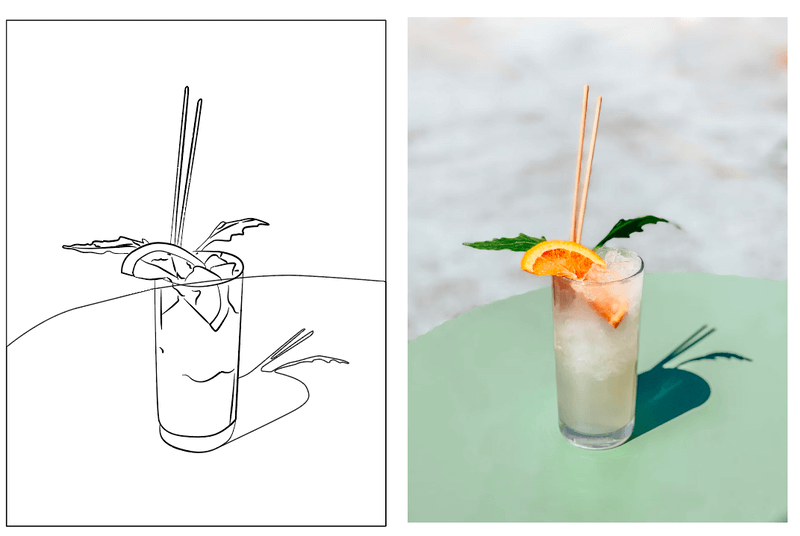
Step 1: Place the picture that you want to turn into a line drawing/illustration in Adobe Illustrator. For example, I’m going to create a line drawing based on this cocktail image.

Step 2: Lower the opacity and use the keyboard shortcut Command + 2 or (Ctrl + 2 for Windows users) to lock the image.
It’s a good idea to lower the opacity because you’ll be tracing the image with drawing tools and the line you draw will show better. Locking the image prevents moving it by accident and messing up the artwork.
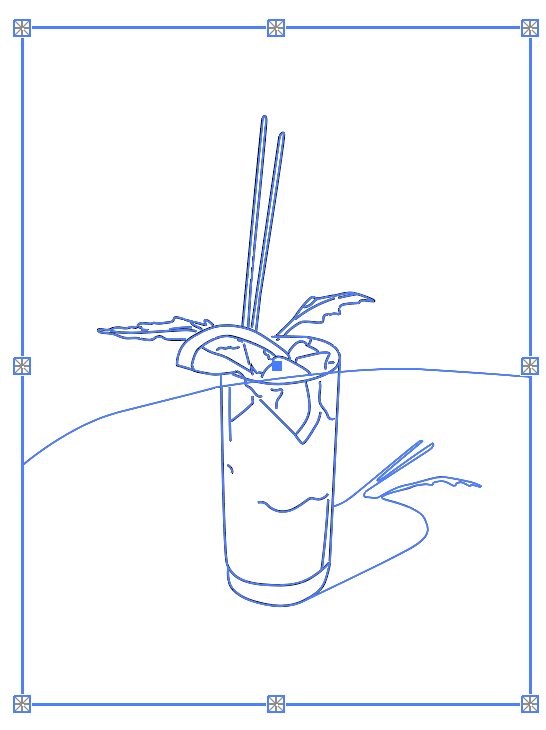
Step 3: Choose a drawing tool and start tracing the lines of the image. You can start from any part of the image. Just zoom in and trace.
For example, I’m using the Pen tool to trace the outline of the glass first.
Depending on the style of line drawing you want to create, you can choose Pen tool, Pencil, or Paintbrush to draw in Adobe Illustrator. Pen tool creates more precise lines, Pencil creates freehand paths, and brushes are better for drawing freehand lines.
I usually use the Pen tool to trace the outline, and then use brushes to add details.
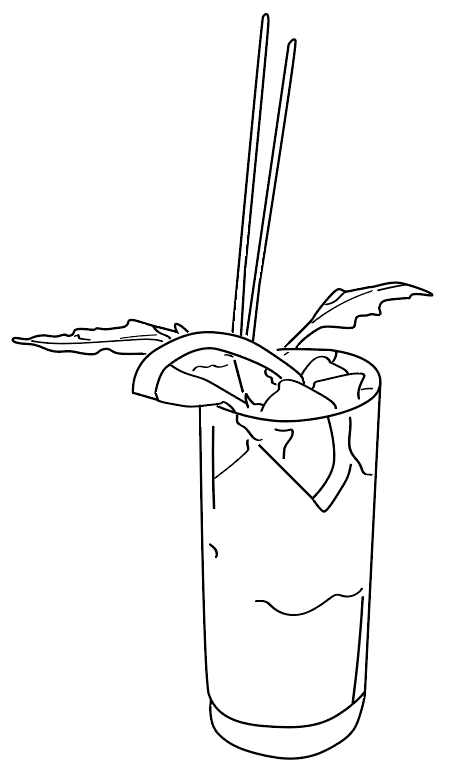
For example, here I’ve already traced the outline so you can see the line drawing style the pen tool creates.

Now I’m going to use the brushes to add details. When you use the paintbrush tool to draw, open up the Brushes panel so that you can choose and switch between different brushes easily.
And this is what I got.

Now you can unlock the original image and delete it to see how the line drawing looks.
You can change the stroke style and weight, or have different stroke weights for different lines. It’s all up to you.
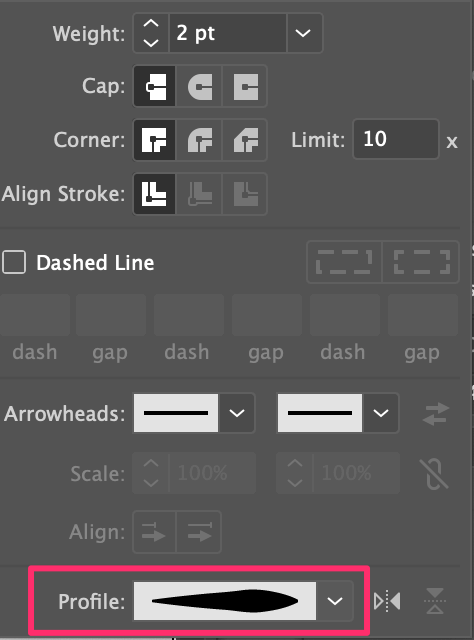
For example, I always like to change the stroke width profile to make the drawing look less stiff.

Alternatively, you can add a brush stroke style instead of changing the stroke width profile.
So this is how you turn a photo into a line drawing in Adobe Illustrator.
How to Make a Digital Illustration in Adobe Illustrator
After tracing out the lines, you can add color and shapes to the image. If you want to make a digital illustration version of a picture, follow the steps below.
Let’s use the same image from above.
Step 1: Trace the outline of the photo using the method I introduced above of creating a line drawing.

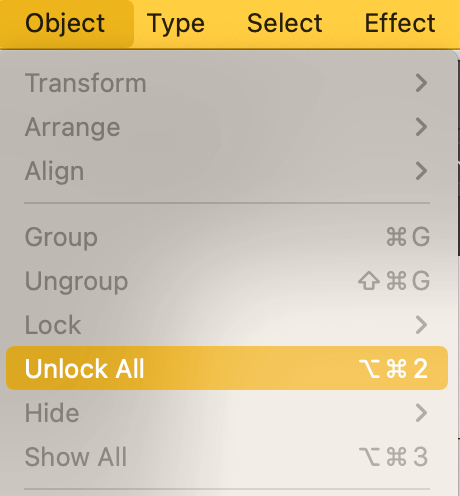
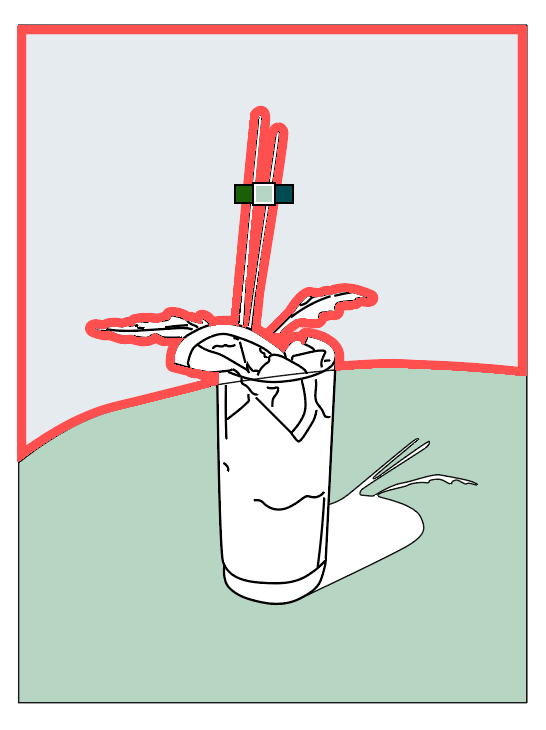
Step 2: Go to the overhead menu Object > Unlock All so that you can move the image you locked earlier for drawing the lines.
Step 3: Move the image next to the lines you drew, and bring the opacity back to 100%. This step is to get the image ready for sampling colors.
Step 4: Use the Eyedropper tool (keyboard shortcut I) to sample colors from the original image and make a color palette.

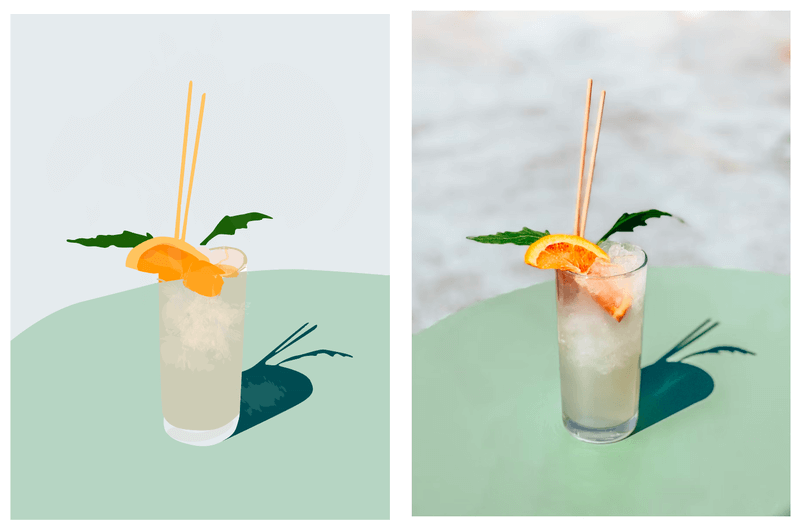
Step 5: Color the drawing. There are different ways to fill color in Adobe Illustrator, depending on the effects you want to create.
For example, if you want to make a watercolor style illustration, use watercolor brushes. Otherwise, using the Live Paint Bucket is the quickest way. Another option is simply to select the objects and choose colors, but this method works better for closed paths.
If you decide to use the Live Paint Bucket, go to the overhead menu Object > Live Paint > Make to create a live paint group. You’ll see all the strokes and paths are grouped together.
Choose the Live Paint Bucket tool and start coloring! You can remove or keep the stroke color.
You might not get all the areas colored because the areas of the open path are hard to control.

But you can always use brushes to add details and finalize the artwork.
Here’s what I got. Pretty similar, right?
Final Thoughts
Turning a photo into a digital illustration or line drawing takes some effort, but if you choose the right tools and follow the right steps, the process can be simplified.
And all details matter. For example, locking the image prevents you from moving or deleting it by accident, lowering the opacity helps trace the outline, etc.
Tushar
Thanks..very great nicely explained..i have been following your illustration and others blogs too ..it gives me so much help…👍⭐👏
June Escalada
Hi Tushar,
Happy to hear you find my articles helpful!