There are many ways to turn your portrait into a cartoon in Adobe Illustrator. The easiest way would be directly using Image Trace, which you can make in a couple of clicks, but the result isn’t always ideal.
If you want a more realistic version of your cartoon portrait, the best way to cartoonize yourself that really looks like you is to use the Pen tool to trace the outline of your image, change the strokes, and then color the vector. Or you can directly use the Paintbrush tool to draw and add colors.
Honestly, my favorite way to turn a photo into a cartoon is to use a combination of tools. For example, For accurate and detailed lines, I like to use the Pen tool, and for casual lines, I find that the brushes work much better.
In this article, I’ll show you how to use the Pen tool and Paintbrush tool to create a cartoon character of yourself in Adobe Illustrator.
5 Steps to Convert Your Image to Cartoon in Adobe Illustrator
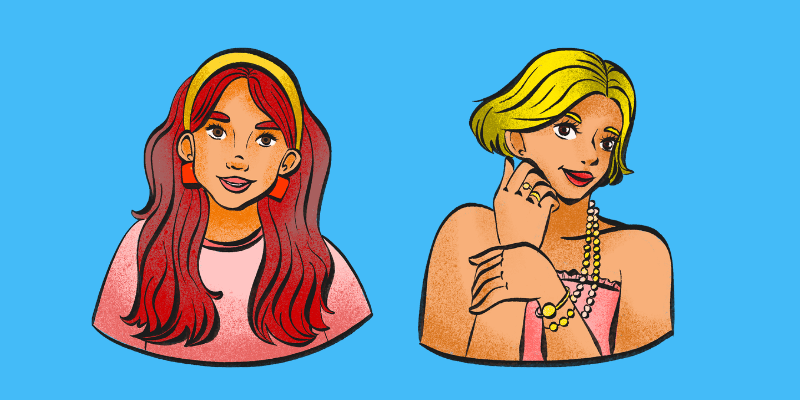
Turning an image into a cartoon in Adobe Illustrator is basically vectorizing an image. The idea is to use a photo of yourself as a reference, trace the outline of your portrait, and then fill the shapes (closed path) with colors.
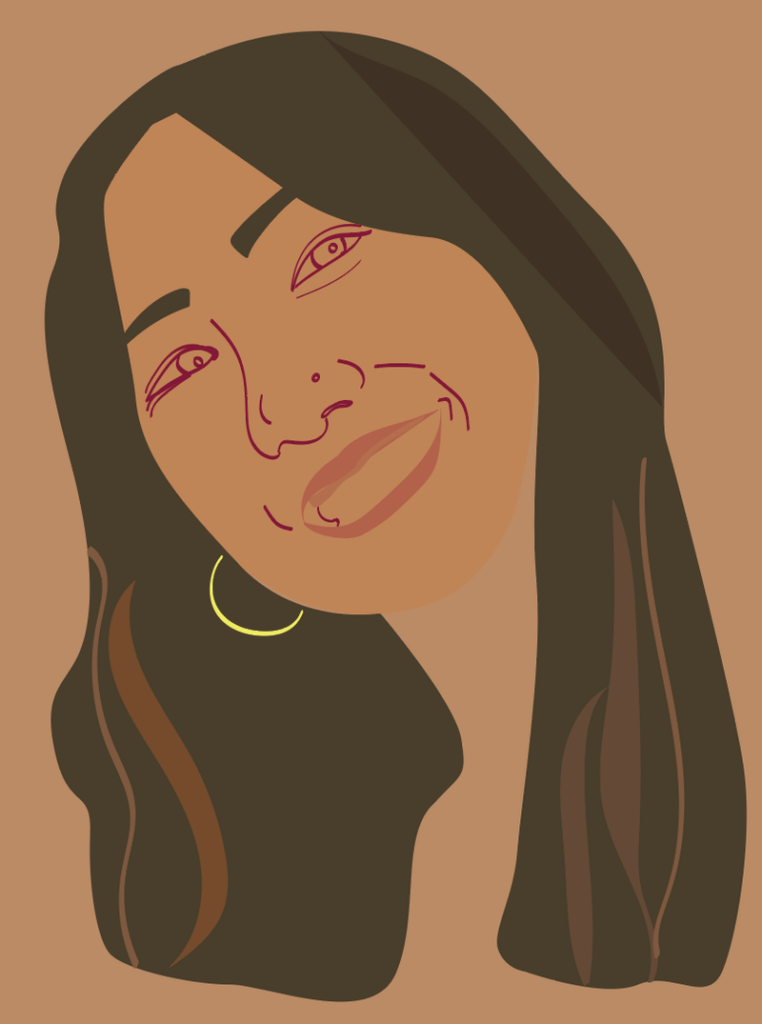
For example, I’ll convert this image of myself into a cartoon.

Note: All screenshots from this tutorial are taken from Adobe Illustrator CC Mac version, Windows or other versions can look different.
Step 1: Choose a reference image
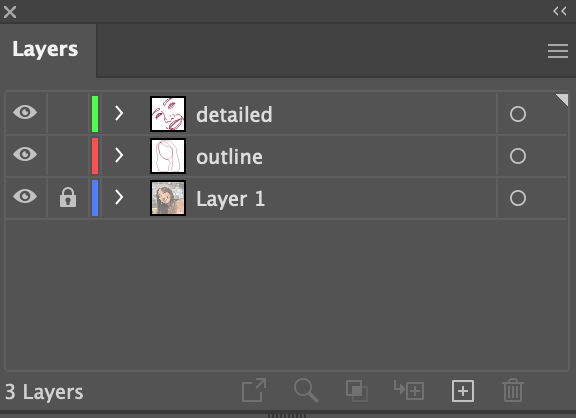
Place a photo of yourself in Adobe Illustrator and lower the opacity of the image. Lock the image or lock the layer if you decide to work on different layers.
I do recommend working on different layers so that you won’t modify your artwork by accident. For example, I will create layers for the facial outline and details.
Step 2: Create a new brush
Open the Brushes panel from the overhead menu Window > Brushes. The calligraphy brushes work pretty well, but you can make a custom brush for better tracing results.
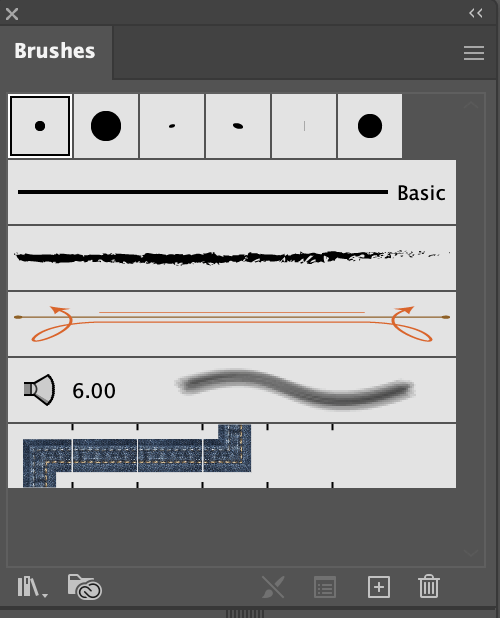
Simply double-click on a standard brush to open the brush settings. Change the roundness and angle. I would suggest making the size a bit smaller too.
If you’re using a drawing tablet, which is highly recommended because drawing with a mouse can be challenging, you can change the brush settings to pressure-sensitive.

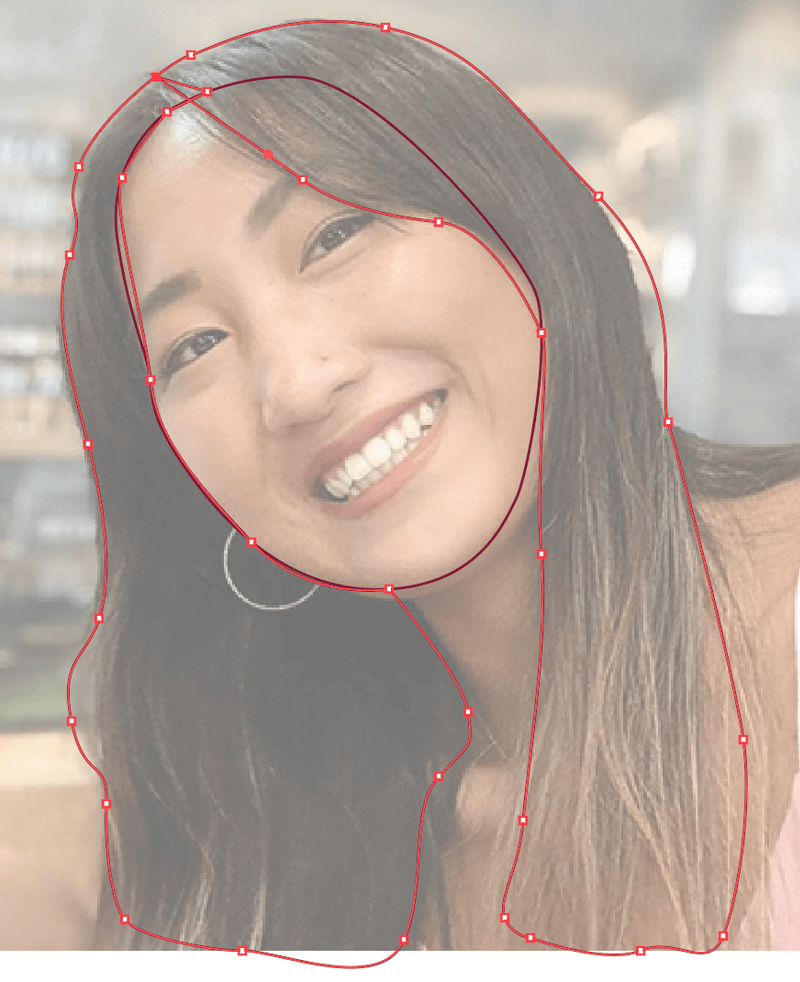
Step 3: Trace the image outline
Click on the outline layer. Choose the Pen tool or Paintbrush tool, and start working on the outline.
Tip: I would start with bigger shapes like face and hair outline, and then work on the details like facial features and hair layers.
For example, I’m using the Pen tool to draw the hair and face outline because it’s faster than using a brush and it’ll be easier to add color later as closed paths.
Go to a new layer and start drawing the details of the face and if you want, you can add details to the hair as well.
Tip: Change the brush size accordingly as you draw, it will make a difference!

Step 4: Combine shapes/merge objects
This step is to get your cartoon ready to add color. You can use the Pathfinder tools, Shape Builder Tool, or use the join path command to combine shapes or merge objects.
The Pathfinder tool works best for overlapping shapes, and the Shape Builder Tool works for both overlapping shapes or shapes that have intersection points.
For brush strokes, I find it easier to join the paths by selecting the lines I want to join and using the keyboard shortcut Command/Ctrl + J to join the lines.
Step 5: Add colors
There are different ways to add or change colors in Adobe Illustrator. You can directly select the shape/object, and choose a color from the Swatches panel or color picker.
The easiest way to color the cartoon is to sample colors from the original image using the Eyedropper tool.
Simply select the shape you want to color, choose the Eyedropper Tool from the toolbar, or activate using the keyboard shortcut I, and click on the color on the original image that you want to sample the color.
Keep adding colors until you are satisfied with the result and that’s pretty much it!
Final Thoughts
The steps to make a cartoon character drawing in Adobe Illustrator are not difficult, but if this is your first time doing this, you might struggle a bit with combining open paths for coloring.
Don’t give up! All you need is practice and you can create something really cool. Hope this tutorial helps and let me know if you have any questions 🙂
Julie
Love it!
Payton F
Hello June! I think this tutorial was pretty good but I feel like for some it might be better to do a video on it. I feel like myself and some others might be able to understand it better if you did a video on it. I am not trying to judge your article at all, I hope you don’t take it that way! (Sorry I’m not the best at explaining things so if this is a little bit confusing to read I apologize.)
June Escalada
Hey Payton,
Thanks for your feedback. I’d be doing some videos soon actually. Will keep you updated.